
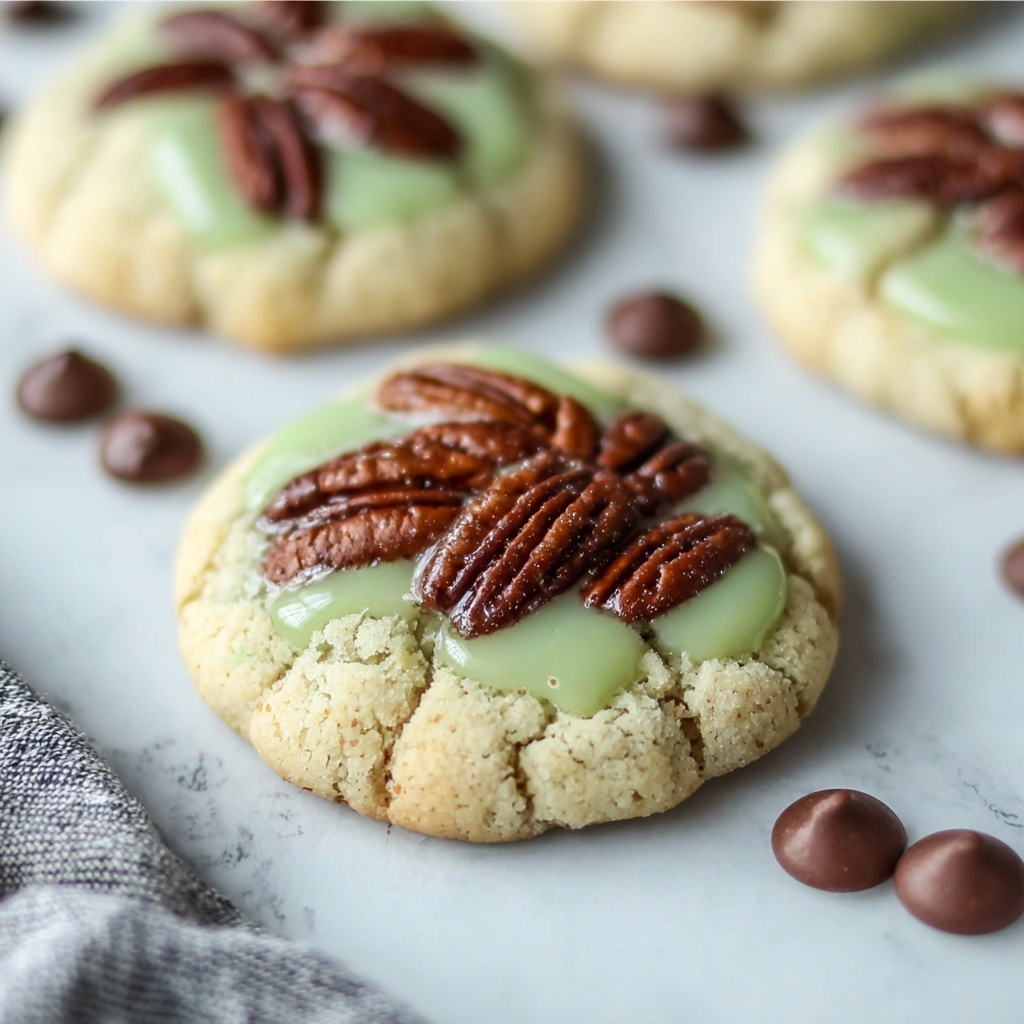
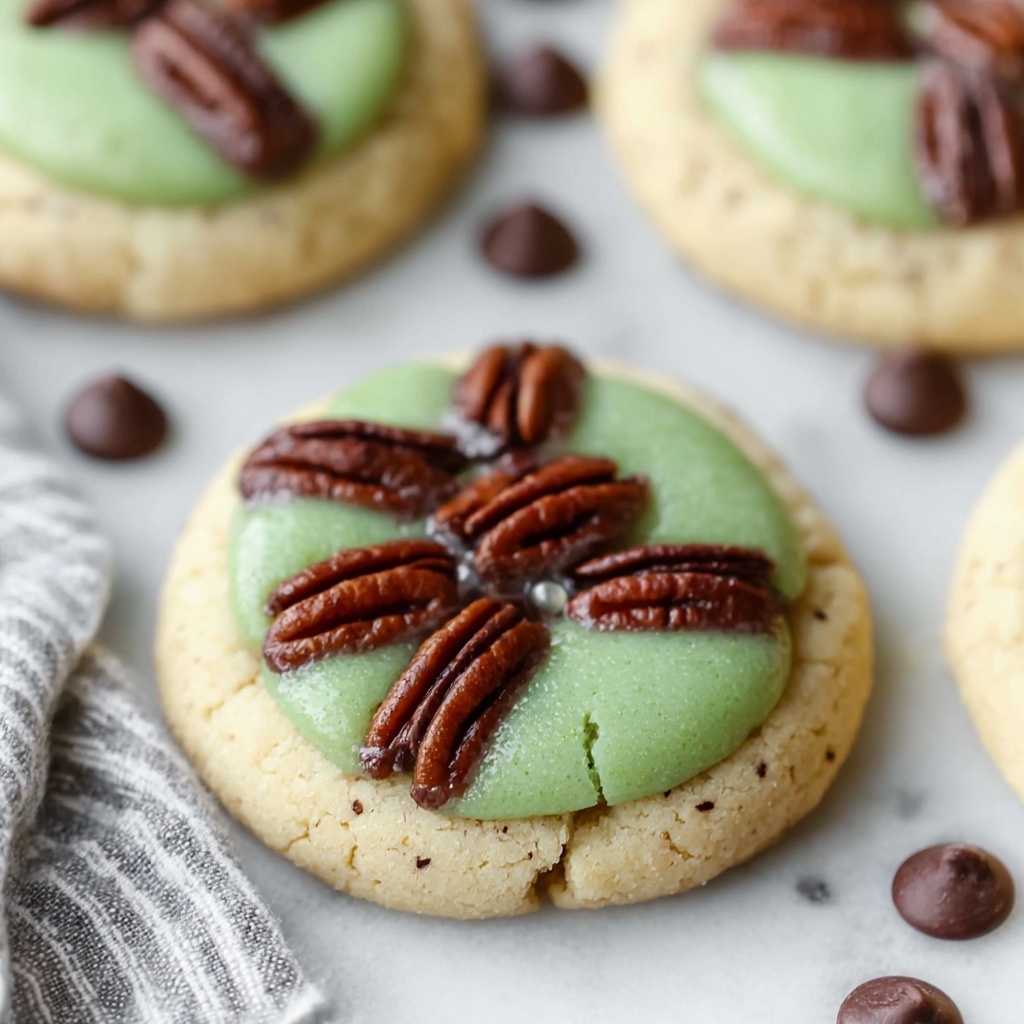
If you are on the lookout for a fun, festive treat that’s as delightful to make as it is to eat, this Turtle Sugar Cookies Recipe is your new best friend in the kitchen. These charming green turtle-shaped cookies bring a playful twist to classic sugar cookies, combining a simple dough with whimsical detailing that’s perfect for parties, holidays, or just brightening up an ordinary day. With the perfect balance of sweetness, buttery richness, and a pop of color, these cookies will surely become a favorite that everyone asks for again and again.
Ingredients You’ll Need
Getting started on this Turtle Sugar Cookies Recipe is a breeze because it uses simple, everyday ingredients that come together to create that perfect cookie texture and flavor. Each component has its own crucial role—from giving sweetness and softness to adding that signature bounce and the vibrant green color that makes these turtles come to life.
- ⅔ cups sugar: Sweetens the dough and helps create a tender crumb.
- ½ cup butter, softened: Adds richness and moisture, ensuring each bite melts in your mouth.
- 1 tsp vanilla: Enhances flavor with a warm, aromatic note.
- 1 egg: Binds ingredients together and contributes to the cookie’s structure.
- 1 ¾ cup flour: The base that provides structure and chewiness.
- ½ tsp baking powder: Gently leavens the dough for a light texture.
- ½ tsp baking soda: Works with the acid in the dough to help rise.
- ½ tsp salt: Balances sweetness and rounds out flavors.
- Green gel food coloring: Brings the turtles’ shells to life with a vivid, playful hue.
How to Make Turtle Sugar Cookies Recipe
Step 1: Preheat and Prepare
Begin by preheating your oven to 400ºF, setting the stage for perfectly baked cookies. This high heat will help your turtles develop just the right golden bottoms while keeping them soft in the center.
Step 2: Cream Butter and Sugar
In a large mixing bowl, beat together the sugar, softened butter, and vanilla extract until the mixture is creamy and smooth. This step is essential because it traps air, which helps create a lighter cookie texture.
Step 3: Add the Egg
Mix in the egg thoroughly to bind the ingredients. The egg adds richness and helps the dough come together for easy shaping.
Step 4: Combine Dry Ingredients
Gradually add the flour, baking powder, baking soda, and salt to the wet mixture, stirring until the dough becomes soft and smooth. This step ensures your cookies will hold their distinctive shape when baked.
Step 5: Add Green Gel Food Coloring
Add green gel food coloring bit by bit to the dough, beating it well after each addition until the color is evenly distributed. The shade depends on your preference and the strength of your coloring, but aim for a vibrant green that will make your turtles unmistakable.
Step 6: Form the Turtle Bodies
Using a 1-tablespoon cookie scoop, scoop out dough portions and roll them into round balls to form the turtle bodies. Place these on a greased cookie sheet, leaving enough room for shaping the turtles’ heads and feet.
Step 7: Create the Shell Pattern
Press down each dough ball gently with a fork, first in one direction and then the other, to imprint a crisscross shell pattern. Aim for about ½-inch thickness, which is perfect for baking tender yet sturdy turtles.
Step 8: Shape Heads and Feet
Roll small pieces of dough into a head and four tiny feet for each turtle. Carefully attach these to the main body, pressing gently so they stay put during baking but retain their distinct shapes.
Step 9: Bake the Cookies
Bake your turtles for 5 to 7 minutes, just until the bottoms start to brown slightly. Keep a close eye here—these cookies bake quickly, and you want them soft inside with a delicate crisp edge.
Step 10: Cool on a Rack
Once baked, transfer the cookies to a cooling rack. Cooling is key because it lets the cookies firm up just enough while you prepare the finishing touches.
Step 11: Add the Eyes
After the cookies have fully cooled, use an edible marker to draw cute turtle eyes. This final detail really brings the turtles’ personalities out and adds an adorable finishing touch.
How to Serve Turtle Sugar Cookies Recipe
Garnishes
Consider sprinkling a touch of colored sanding sugar or edible glitter on the turtle shells before baking for a fun sparkle effect. Alternatively, a light drizzle of white or dark chocolate after baking adds sweetness and visual contrast.
Side Dishes
These cookies pair wonderfully with a glass of cold milk or a cup of hot tea. For a party, serve alongside fresh fruit or a bowl of mixed nuts to balance the sweetness and provide variety.
Creative Ways to Present
Arrange the turtle cookies on a platter with small leaves made from mint or basil for a nature-inspired display. Wrapping them in clear cellophane tied with a green ribbon makes lovely gifts that will delight friends and family.
Make Ahead and Storage
Storing Leftovers
Store your turtle sugar cookies in an airtight container at room temperature for up to a week. This keeps them fresh and preserves their soft texture, so they’re just as delicious days later.
Freezing
If you want to make these cookies ahead of time, freeze the unbaked dough balls or the fully baked cookies in a sealed freezer bag for up to three months. Thaw at room temperature before serving or decorating.
Reheating
Warm cookies briefly in a toaster oven or microwave for 10-15 seconds to revive their soft, freshly baked feel. Just be careful not to overheat, or they might dry out.
FAQs
Can I use regular food coloring instead of gel?
While regular liquid food coloring works, gel food coloring is preferred because it provides a more vibrant color without altering the dough’s consistency.
Is it okay to use salted butter?
You can use salted butter, but reduce or omit the additional salt in the recipe to avoid over-seasoning the cookies.
How do I prevent the turtle heads and feet from detaching?
Press them gently but firmly into the cookie body before baking, and bake at the recommended temperature so the dough holds together without spreading excessively.
Can I add flavor variations to the dough?
Absolutely! Adding a bit of cinnamon or almond extract can give your Turtle Sugar Cookies Recipe a unique twist that’s just as delightful.
What if I don’t have an edible marker for the eyes?
You can use small drops of melted chocolate or tiny pieces of chocolate chips to create the eyes instead.
Final Thoughts
This Turtle Sugar Cookies Recipe is a heartwarming way to have fun in the kitchen while making delightful treats that bring smiles all around. Whether you are baking with kids or simply want a cookie that’s as charming to look at as it is to eat, these turtles are a fantastic choice. Don’t hesitate to try this recipe soon—your taste buds and your loved ones will thank you.
Print
Turtle Sugar Cookies Recipe
- Prep Time: 10 minutes
- Cook Time: 7 minutes
- Total Time: 17 minutes
- Yield: 24 cookies
- Category: Dessert
- Method: Baking
- Cuisine: American
Description
Delight in these charming Turtle Sugar Cookies, featuring a soft, buttery dough tinted with green gel food coloring to resemble adorable turtle shapes. Perfect for parties or festive occasions, these cookies come to life with creative details like a shell pattern pressed with a fork and edible marker eyes, baked quickly to a perfect golden bottom.
Ingredients
Cookie Dough
- 2/3 cup sugar
- 1/2 cup butter, softened
- 1 tsp vanilla extract
- 1 large egg
- 1 3/4 cups all-purpose flour
- 1/2 tsp baking powder
- 1/2 tsp baking soda
- 1/2 tsp salt
- Green gel food coloring, amount as needed
Instructions
- Preheat Oven: Preheat your oven to 400ºF (204ºC) to prepare for baking the cookies.
- Cream Butter and Sugar: In a large mixing bowl, beat together the sugar, softened butter, and vanilla extract until the mixture becomes creamy and smooth.
- Add Egg: Incorporate the egg into the creamed mixture and beat again until fully combined.
- Mix Dry Ingredients: Gradually add the flour, baking powder, baking soda, and salt to the wet ingredients, mixing until the dough is smooth and uniform.
- Add Color: Blend in green gel food coloring a little at a time until the dough achieves an even, vibrant green color.
- Form Dough Balls: Using a 1-tablespoon cookie scoop, portion out dough and roll each scoop into a round ball to represent the turtle’s body. Place the dough balls onto a greased cookie sheet, spacing them appropriately.
- Create Shell Pattern: Press each dough ball down to about 1/2 inch thickness using a fork. Press in two different directions to create a crisscross shell design.
- Shape Turtle Features: Roll additional small pieces of dough to form each turtle’s head and four feet, then gently attach these to the body balls to complete the turtle shape.
- Bake Cookies: Bake the cookies in the preheated oven for 5 to 7 minutes, or until the bottoms start to turn golden brown.
- Cool: Transfer the baked cookies onto a cooling rack and allow them to cool completely.
- Add Eyes: Once the cookies are cooled, use an edible marker to carefully draw eyes on each turtle for a fun, finishing touch.
Notes
- Be careful not to overbake; the cookies cook quickly and should only be baked until the bottoms are just beginning to brown.
- Adjust the amount of green gel food coloring based on the brand and desired color intensity.
- Make sure butter is softened but not melted for optimal texture.
- Use an edible marker safe for food decorating to add the turtle eyes after cooling.
- Cookies should be about 1/2 inch thick after pressing down to achieve the correct baking texture.
