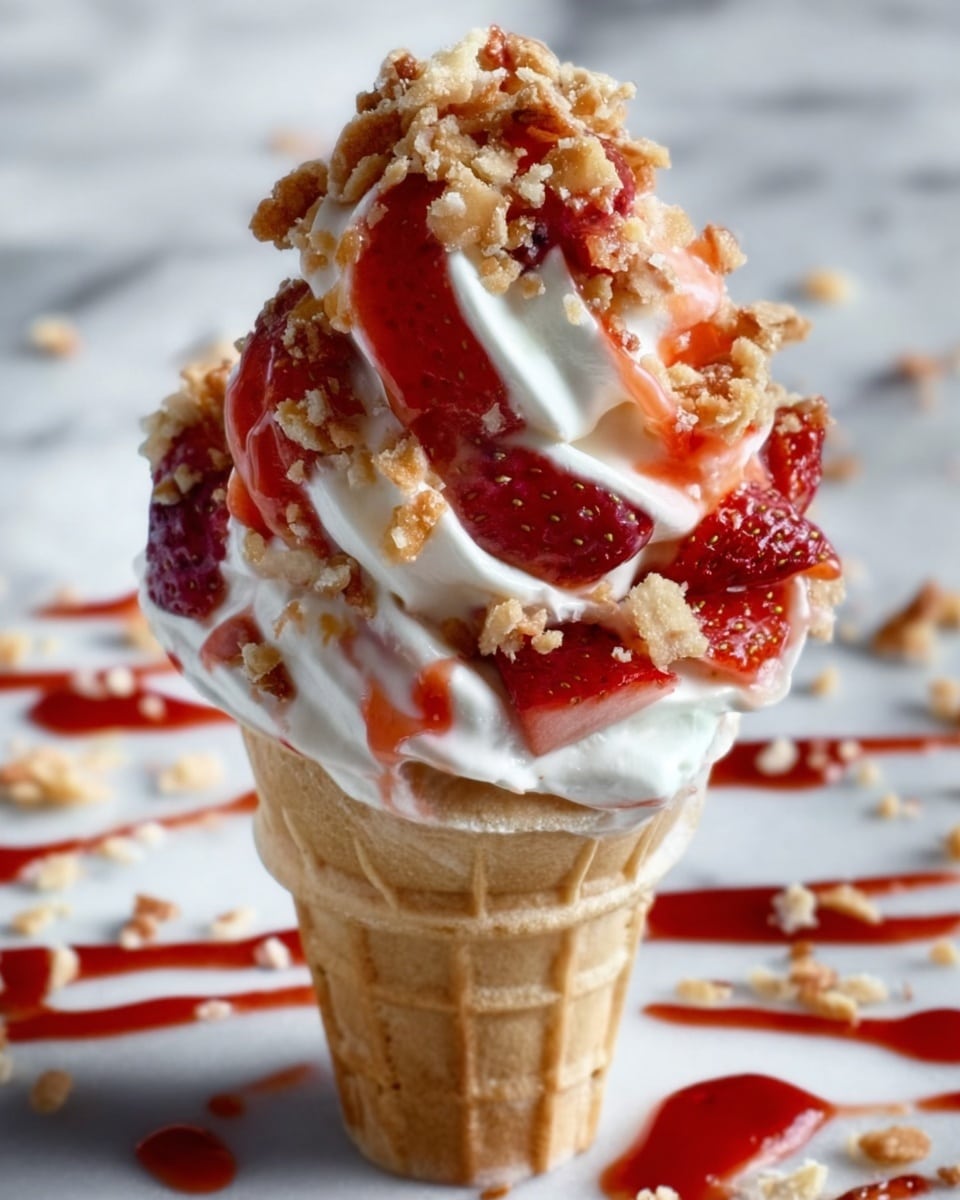
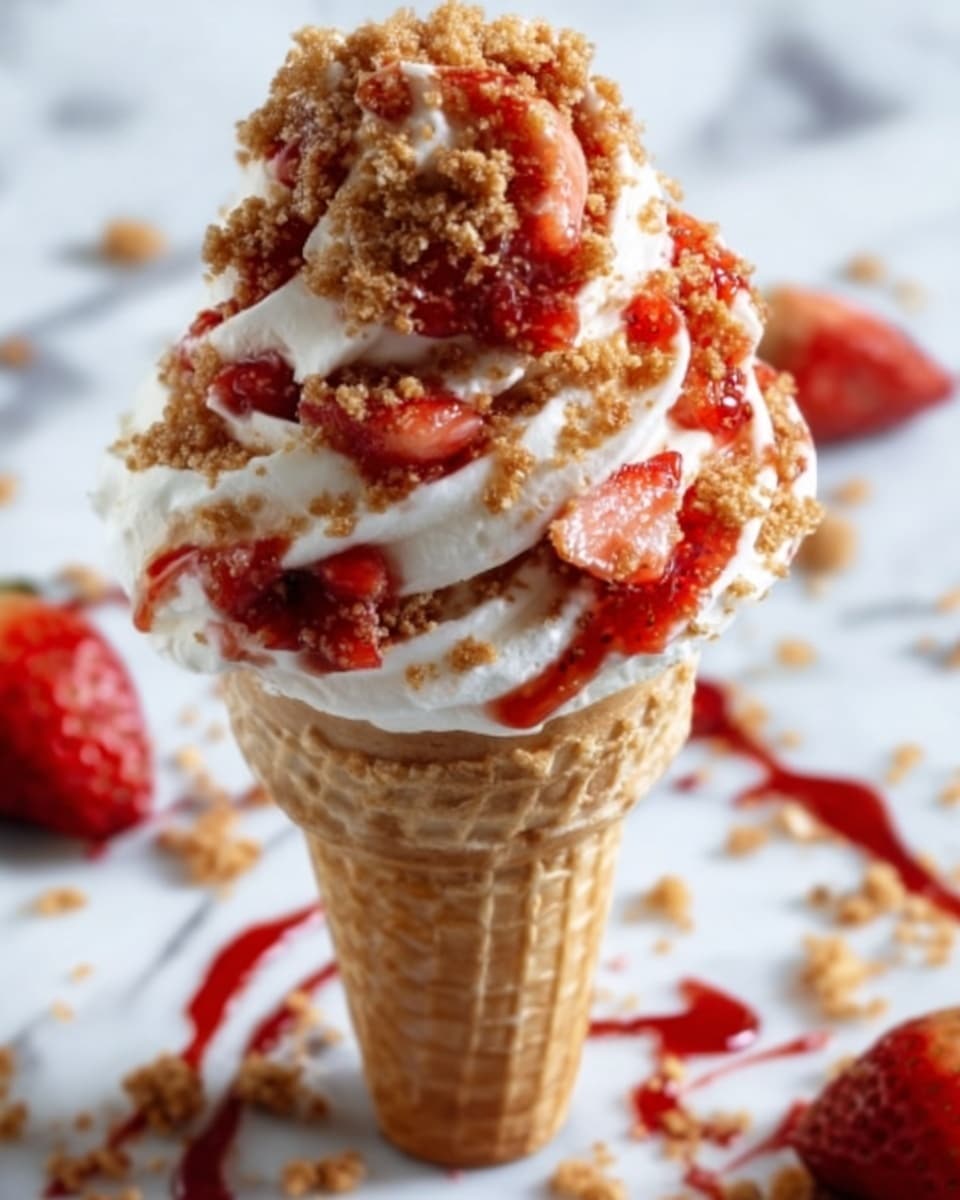
If you’re a fan of sweet, creamy desserts with a delightful crunch and a burst of fresh fruit flavor, then you are going to absolutely adore this Strawberry Crunch Cheesecake Cones Recipe. These charming handheld treats combine the smooth richness of no-bake cheesecake filling, the crispy sweetness of white chocolate-coated cones, and the irresistible fruity zest of strawberry crunch topping and fresh berries all in one delicious bite. Perfect for summer parties, family gatherings, or simply when you want to indulge in something extraordinary without any fuss, this recipe brings all your favorite dessert elements together in the most fun and visually stunning way.
Ingredients You’ll Need
Here’s a selection of simple yet essential ingredients that work beautifully together to create this dessert’s creamy texture, vibrant color, and satisfying crunch. Each item plays a crucial role in building layers of flavor and texture!
- 6 Waffle or Sugar Cones: The sturdy yet sweet base that holds all the deliciousness together.
- 5 oz White Chocolate, melted: Adds a luscious creamy coating and helps the strawberry crunch topping stick perfectly.
- 1 cup Strawberry Crunch Topping: Brings a crispy, fruity element that adds texture and color contrast.
- 24 oz No Bake Cheesecake Filling: The smooth, dreamy filling that’s rich without baking fuss—store-bought or homemade works great!
- 6-8 Strawberries, diced: Adds freshness, natural sweetness, and a beautiful pop of red throughout the cones.
- Strawberry Glaze or Sauce: Provides extra tang and sweetness to elevate each bite.
How to Make Strawberry Crunch Cheesecake Cones Recipe
Step 1: Melt the White Chocolate
Start by melting your white chocolate carefully according to the package instructions until it becomes smooth and pourable. This step is key for getting that perfect glossy coat on your cones and helps the strawberry crunch topping stick beautifully.
Step 2: Coat the Cones
Next, take your waffle or sugar cones and dip the tops into the melted white chocolate, making sure you coat a nice portion but tap off any excess chocolate to avoid drips. This coating not only tastes heavenly but also acts as an adhesive for the crunchy layer!
Step 3: Add Strawberry Crunch
Immediately after coating, roll the dipped cones in the strawberry crunch topping. The timing here is essential because the chocolate must still be soft and sticky to hold the crunch securely. This adds that delightful texture you’ll love.
Step 4: Let the Cones Set
Place the coated cones upright on a parchment-lined baking sheet. Let them sit for 5 to 10 minutes so the chocolate hardens completely. This sets the stage for a crunchy exterior shell that will make every bite satisfying.
Step 5: Prepare the Filling Bag
Fill a piping bag or a resealable plastic bag with no-bake cheesecake filling, and snip off a corner for easy filling. This makes it simple to create those gorgeous layers inside your cones without any mess.
Step 6: Pipe Half the Filling and Add Strawberries
Pipe the cheesecake filling halfway into each cone, then drop a spoonful of strawberry glaze and scatter a few pieces of fresh diced strawberry on top. These little bursts of fruit flavor complement the creamy filling perfectly.
Step 7: Fill to the Top and Add Final Touches
Continue piping the remaining cheesecake filling to fill the cones completely. Then, drizzle more strawberry glaze, scatter extra diced strawberries, and finish by sprinkling additional strawberry crunch topping. For extra flair, drizzle with more melted white chocolate and dust with crunch topping again!
Step 8: Chill and Serve
Finally, pop your strawberry crunch cheesecake cones into the fridge for 10 to 20 minutes to chill. This step helps everything set beautifully so that the flavors meld and the texture is just right for serving.
How to Serve Strawberry Crunch Cheesecake Cones Recipe
Garnishes
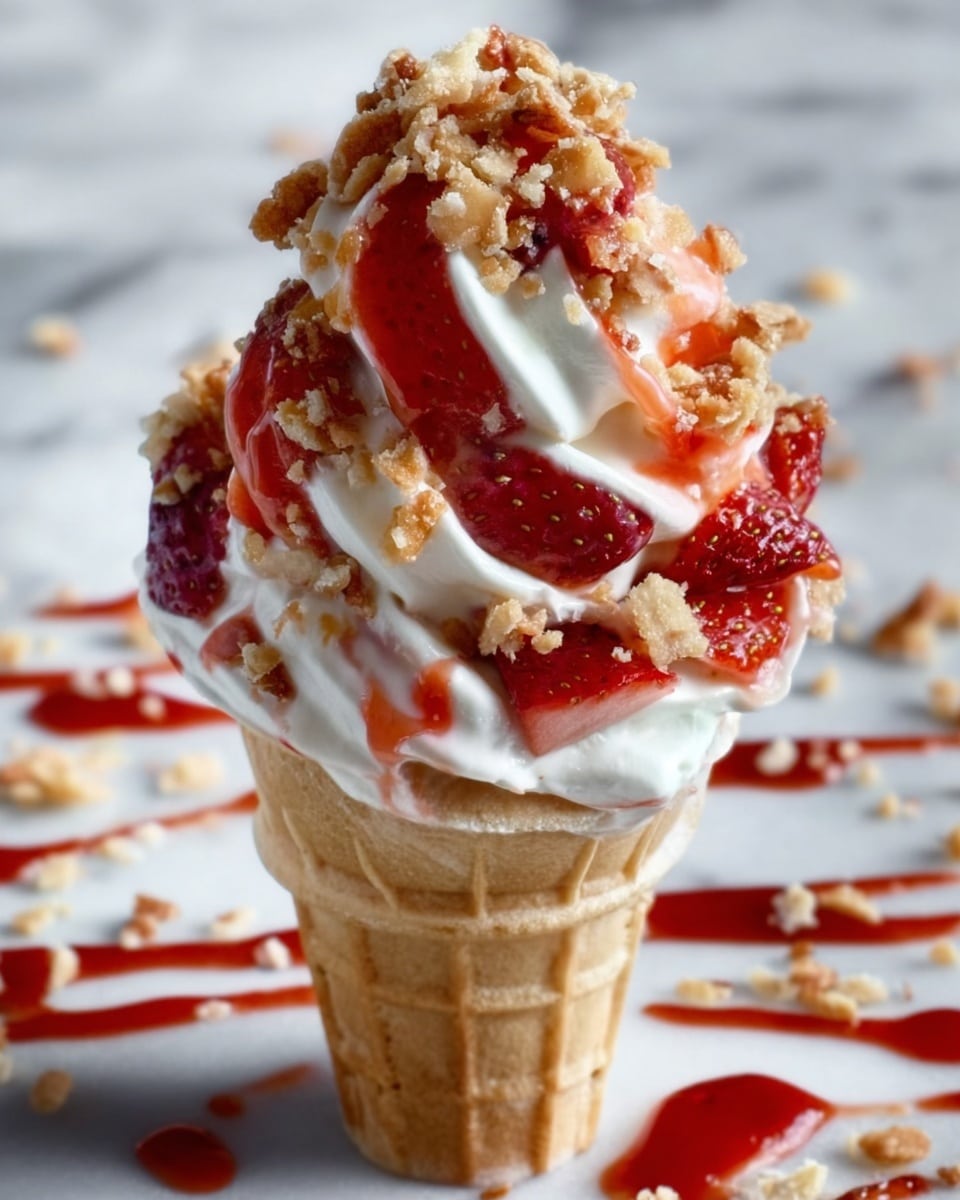
For garnishing your strawberry crunch cheesecake cones, think fresh and vibrant. A few extra diced strawberries on top, a drizzle of strawberry glaze, or a fresh mint leaf can elevate the look and flavor dramatically. These little touches invite people to dig in and enjoy the experience fully.
Side Dishes
This dessert cones recipe works wonderfully on its own as a standout sweet treat, but if you want to round out a summer meal, serve them alongside a light fruit salad, chilled lemonade, or even a scoop of vanilla bean ice cream. The creamy, crunchy cones provide such a contrast that simple sides complement rather than compete.
Creative Ways to Present
Presentation is everything! Serve the cones standing upright in a pretty vase or a custom holder lined with fresh strawberry leaves or edible flowers. You could even create a cone bouquet by arranging them in a decorative container for a wow-worthy party centerpiece that guests will admire before enjoying their first delicious bite.
Make Ahead and Storage
Storing Leftovers
If you have any leftover strawberry crunch cheesecake cones, place them in an airtight container in the refrigerator. They should stay fresh and tasty for up to 2 days, though they are best eaten as soon as possible to maintain crunchiness and freshness of the strawberries.
Freezing
Freezing these cones is possible but not ideal since the fresh strawberries and crunchy topping might lose their texture upon thawing. If you choose to freeze them, wrap each cone individually in plastic wrap and place in a freezer-safe container. Thaw in the fridge for several hours before serving.
Reheating
Because this is a chilled no-bake cheesecake dessert, reheating is not recommended. Serve cold or at room temperature for the best flavor and texture experience with the Strawberry Crunch Cheesecake Cones Recipe.
FAQs
Can I use regular cheesecake filling instead of no-bake?
Regular baked cheesecake filling tends to be firmer and less easy to pipe, so no-bake filling is recommended for ease and the creamy texture that complements the cones wonderfully.
What if I can’t find strawberry crunch topping?
You can create your own by mixing crushed freeze-dried strawberries with crushed graham cracker crumbs or cereal flakes for a similar sweet, fruity crunch.
Can these be made vegan or dairy-free?
Yes! Use dairy-free white chocolate, a vegan no-bake cheesecake filling alternative, and make sure the cones don’t contain any animal products for a delicious vegan-friendly treat.
How long do the cones stay crunchy?
When coated with white chocolate and chilled properly, the cones should stay crunchy for at least a day, but if filled too far in advance, the cheesecake moisture may soften them over time.
Can I prepare these cones for a party ahead of time?
Yes, you can prep them a few hours in advance and keep them in the fridge covered loosely with plastic wrap, but for best texture, add fresh strawberry pieces just before serving.
Final Thoughts
You really cannot go wrong with the Strawberry Crunch Cheesecake Cones Recipe when you want a dessert that’s both fun and downright irresistible. From the creamy cheesecake filling to the crisp cone and that punch of fresh strawberry and crunchy texture, every bite is a celebration. Don’t hesitate to whip these up for your next gathering—your friends and family will thank you for introducing them to such a joyful treat!
Print
Strawberry Crunch Cheesecake Cones Recipe
- Total Time: 20 minutes
- Yield: 6 servings 1x
- Diet: Vegetarian
Description
These Strawberry Crunch Cheesecake Cones combine creamy no-bake cheesecake filling with a delightful crunch and fresh strawberries, all served in a crispy waffle cone coated with melted white chocolate and strawberry crunch topping. An easy, no-bake dessert perfect for summer parties or a fun treat any time.
Ingredients
Cones & Coating
- 6 Waffle or Sugar Cones
- 5 oz White Chocolate, melted
- 1 cup Strawberry Crunch Topping
Cheesecake Filling & Toppings
- 24 oz No Bake Cheesecake Filling (premade or homemade)
- 6–8 Strawberries, diced
- Strawberry Glaze or Sauce, as needed
Instructions
- Melt the White Chocolate: Melt the white chocolate according to the package directions until smooth and pourable, ensuring it is free of lumps.
- Coat the Cones: Dip the top part of each waffle or sugar cone into the melted white chocolate, tapping off excess chocolate to avoid drips.
- Add Strawberry Crunch: Immediately roll the white chocolate coated section of each cone in the strawberry crunch topping so it sticks well and creates a crunchy layer.
- Set the Cones: Place the coated cones on a parchment-lined baking sheet and allow them to harden for 5-10 minutes so the white chocolate sets firmly.
- Prepare the Filling Bag: Transfer the no-bake cheesecake filling into a piping bag or a Ziploc bag with one corner snipped off for precise filling.
- Initial Filling: Pipe cheesecake filling into each cone halfway. Then add a small spoonful of strawberry glaze and a few pieces of diced fresh strawberries on top to infuse fresh flavor.
- Final Filling: Continue piping the cheesecake filling to fill the cones to the top. Add more strawberry glaze and diced strawberries to the surface for an appealing finish.
- Finish & Decorate: Sprinkle extra strawberry crunch topping over the filled cones and drizzle additional melted white chocolate if desired. Add a final dusting of crunch topping for texture and visual appeal.
- Chill & Serve: Refrigerate the assembled cones for 10-20 minutes before serving to allow the cheesecake filling to firm up and flavors to meld.
Notes
- Use freshly diced strawberries for the best taste and texture in the filling.
- Ensure the white chocolate is not too hot before dipping cones to avoid melting them.
- If you don’t have premade no-bake cheesecake filling, you can prepare a homemade version using cream cheese, sugar, and whipped cream or condensed milk.
- Chill the cones thoroughly before serving to maintain their structure and enhance flavor.
- You can substitute strawberry glaze with jam or preserves if preferred.
- Prep Time: 10 minutes
- Cook Time: 0 minutes
- Category: Dessert
- Method: No-Cook
- Cuisine: American
