
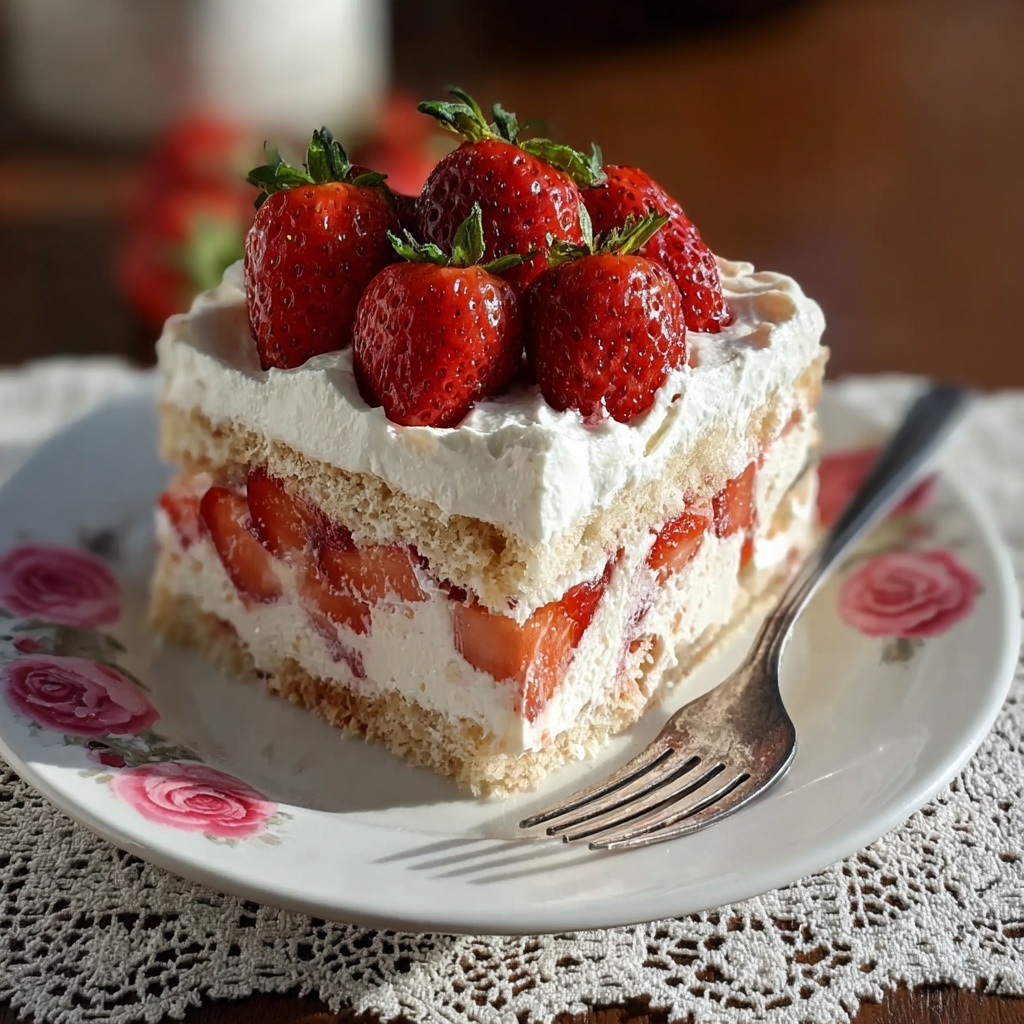
If you’ve ever longed for a dessert that’s both delightfully creamy and refreshingly fruity without the fuss of baking, then you’re going to adore this Strawberry Cream Cheese Icebox Cake Recipe. It’s a charmingly simple layered treat where the softness of cream cheese whipped perfectly with heavy cream pairs beautifully with juicy strawberries and crunchy graham crackers. Every bite feels like a sweet, dreamy slice of summer, but the best part is how effortlessly it comes together, making it the perfect show-stopper for casual get-togethers or a special family dessert.
Ingredients You’ll Need
Gathering just a handful of essential ingredients is all it takes to create this luscious dessert. Each element’s role is simple but priceless: fresh strawberries bring vibrant color and natural sweetness, cream cheese adds luscious tanginess, and graham crackers lend a buttery crunch that softens into melt-in-your-mouth magic.
- Fresh strawberries (1 pound): Choose ripe but firm berries for the best juicy flavor and pretty slices.
- Cream cheese (8 ounces, softened): This provides the rich, tangy backbone that makes the filling luxuriously creamy.
- Powdered sugar (1/2 cup): Adds just the right amount of sweetness to balance the cream cheese.
- Vanilla extract (1 teaspoon): A splash of vanilla elevates the flavor, bringing warmth and depth.
- Heavy cream (1 1/2 cups): Whipped to stiff peaks, this lightens the filling and gives it a cloud-like texture.
- Graham cracker sheets (24): They act as the crisp layers that soak up moisture to create the cake’s signature soft yet textured layers.
How to Make Strawberry Cream Cheese Icebox Cake Recipe
Step 1: Prepare the Strawberries
Start by washing your fresh strawberries under cold water and gently patting them dry. Remove the stems and slice them into thin, even pieces. These slices layer beautifully and offer little bursts of fresh flavor throughout the cake.
Step 2: Prepare the Cream Cheese Filling
In a mixing bowl, beat the softened cream cheese until it’s smooth and creamy—no lumps here! Then, add the powdered sugar and vanilla extract, continuing to beat until everything is blended into a velvety, sweet mixture bursting with flavor.
Step 3: Whip the Heavy Cream
In a separate bowl, whip the heavy cream until stiff peaks form. This step is crucial because the whipped cream adds lightness and volume, transforming the filling into an airy delight that balances the cream cheese’s richness.
Step 4: Fold in the Whipped Cream
Gently fold the whipped cream into the cream cheese mixture. Take your time here to preserve the fluffiness—this careful folding ensures the texture stays light and creamy, not dense or flat.
Step 5: Assemble the Icebox Cake
Line the base of an 8×8 inch square baking dish with a layer of graham cracker sheets, breaking them to fit cozily if needed. Spread an even layer of the cream cheese mixture on top, then scatter sliced strawberries over it. Repeat these layers—graham crackers, cream cheese filling, strawberries—until your ingredients run out, finishing with a creamy top layer for a polished look.
Step 6: Chill the Cake
Cover your assembled masterpiece with plastic wrap and pop it into the fridge for at least 4 hours, though overnight chilling works even better. This resting time allows the graham crackers to soften just right and the flavors to blend into a harmonious dessert experience.
Step 7: Serve and Enjoy
Before serving, garnish with extra strawberry slices if you like a little flair. Cut into squares with a sharp knife and enjoy this chilled beauty—each slice is pure joy, combining creaminess, sweetness, and freshness effortlessly.
How to Serve Strawberry Cream Cheese Icebox Cake Recipe

Garnishes
Fresh strawberry slices, a light dusting of powdered sugar, or even a few mint leaves can perfectly complement the vibrant colors and flavors of the cake. These garnishes add a touch of elegance and freshness without overpowering the dessert.
Side Dishes
Pairing this icebox cake with a simple cup of freshly brewed coffee or a light, floral tea works beautifully to balance the richness of the cream cheese filling. For something extra special, a scoop of vanilla ice cream on the side elevates each bite.
Creative Ways to Present
Try layering the components in clear glass jars or individual dessert cups for a charming single-serve presentation. This not only looks stunning but also makes serving at parties or gatherings incredibly easy and mess-free.
Make Ahead and Storage
Storing Leftovers
Keep any leftovers covered tightly in the refrigerator. The icebox cake stays fresh and delicious for up to 3 days, making it a fantastic make-ahead treat you can enjoy over time without losing its integrity.
Freezing
While it’s best enjoyed fresh or within a few days, you can freeze the assembled cake for up to a month. Wrap it securely in plastic wrap and aluminum foil to protect it from freezer burn. Thaw in the fridge overnight before serving to restore that perfect creamy texture.
Reheating
Since this is a chilled dessert, reheating is not recommended. The unique texture of the whipped cream and softened graham crackers is best enjoyed cold. Just take it out of the fridge a few minutes before serving for the ideal softness.
FAQs
Can I use frozen strawberries in the Strawberry Cream Cheese Icebox Cake Recipe?
Frozen strawberries can work in a pinch but tend to release a lot of liquid, which might make the cake soggy. Fresh strawberries are definitely the best choice for that perfect balance of texture and flavor.
Is there a substitute for cream cheese in this recipe?
While cream cheese is key for the signature tangy richness, you can try mascarpone for a milder flavor or ricotta to lighten it up, but the texture will vary slightly.
How long should the icebox cake chill before serving?
At least 4 hours is ideal to let the graham crackers soften and flavors meld, but overnight chilling yields the best results for a truly cohesive dessert.
Can this recipe be made gluten-free?
Absolutely! Just swap the graham crackers for gluten-free versions, which are widely available, and keep the rest of the recipe the same.
Can I add other fruits to the Strawberry Cream Cheese Icebox Cake Recipe?
Definitely! Blueberries, raspberries, or even thinly sliced peaches can be layered alongside or instead of strawberries for a delightful twist.
Final Thoughts
This Strawberry Cream Cheese Icebox Cake Recipe is truly one of those magical desserts that tastes like it belongs at fancy celebrations yet comes together so effortlessly you can whip it up on a whim. Its creamy layers and fresh fruit make it irresistibly charming and perfect for sharing with loved ones. I hope you find as much joy making and eating this dessert as I do every single time!
Print
Strawberry Cream Cheese Icebox Cake Recipe
- Prep Time: 20 minutes
- Cook Time: 0 minutes
- Total Time: 4 hours 20 minutes
- Yield: 9 servings
- Category: Dessert
- Method: No-Cook
- Cuisine: American
- Diet: Vegetarian
Description
A delightful no-bake Strawberry Cream Cheese Icebox Cake that layers fresh strawberries, creamy whipped cream and cream cheese filling, and crunchy graham crackers for a simple yet elegant dessert. Perfect for warm days, this chilled cake melds flavors beautifully after a few hours in the fridge.
Ingredients
Strawberries
- 1 pound fresh strawberries (washed, hulled, and sliced)
Cream Cheese Filling
- 8 ounces cream cheese (softened)
- 1/2 cup powdered sugar
- 1 teaspoon vanilla extract
Whipped Cream
- 1 1/2 cups heavy cream
Base
- 24 graham cracker sheets
Instructions
- Prepare the Strawberries: Wash the strawberries thoroughly under cold water, remove the stems, and slice them thinly. Set them aside to use in the layers.
- Prepare the Cream Cheese Filling: In a mixing bowl, beat the softened cream cheese until smooth and creamy. Add the powdered sugar and vanilla extract, then beat again until fully combined and silky smooth.
- Whip the Heavy Cream: In a separate mixing bowl, whip the heavy cream using a mixer until stiff peaks form, which means the cream holds its shape firmly.
- Fold in the Whipped Cream: Gently fold the whipped cream into the cream cheese mixture. Use a spatula to carefully incorporate the whipped cream without deflating it, ensuring a light and airy filling.
- Assemble the Icebox Cake: Line the bottom of an 8×8 inch square baking dish with a layer of graham crackers, breaking them as needed to fit snugly. Spread an even layer of the cream cheese mixture on top of the crackers. Arrange a layer of sliced strawberries over the cream cheese. Repeat the layering process—graham crackers, cream cheese mixture, and strawberries—until all ingredients are used, finishing with a top layer of cream cheese mixture.
- Chill the Cake: Cover the dish tightly with plastic wrap and refrigerate for at least 4 hours, preferably overnight. This allows the graham crackers to soften from the moisture and the flavors to meld perfectly.
- Serve: Before serving, optionally garnish with additional strawberry slices for a fresh look. Cut into squares and serve chilled for a refreshing dessert.
Notes
- The cake must be chilled for at least 4 hours to soften the graham crackers properly.
- Using fresh, ripe strawberries enhances the flavor and texture.
- You can substitute the heavy cream with whipping cream of similar fat content if desired.
- For a variation, try adding a drizzle of chocolate or a sprinkle of toasted nuts between layers.
- The cream cheese should be softened to room temperature for easy mixing and a smooth filling.
- Store leftovers covered in the refrigerator for up to 3 days.


