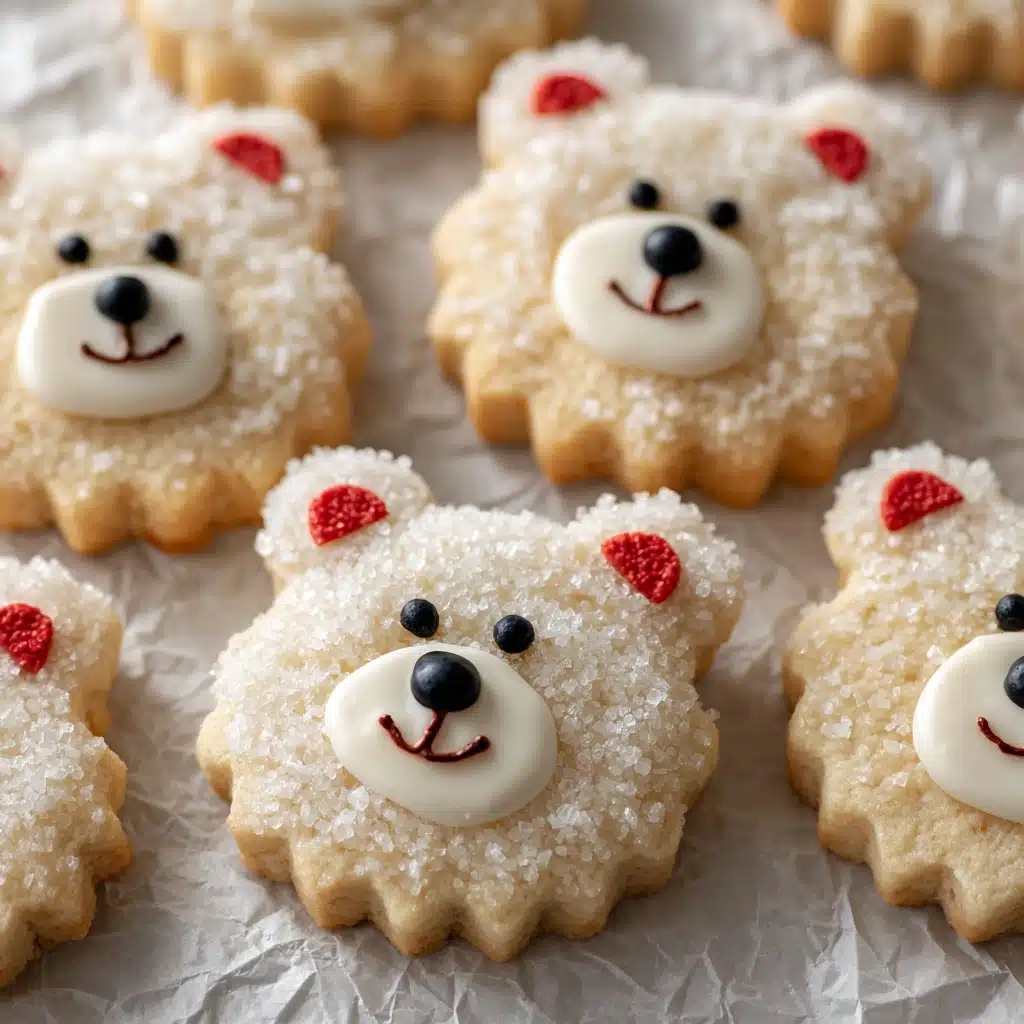
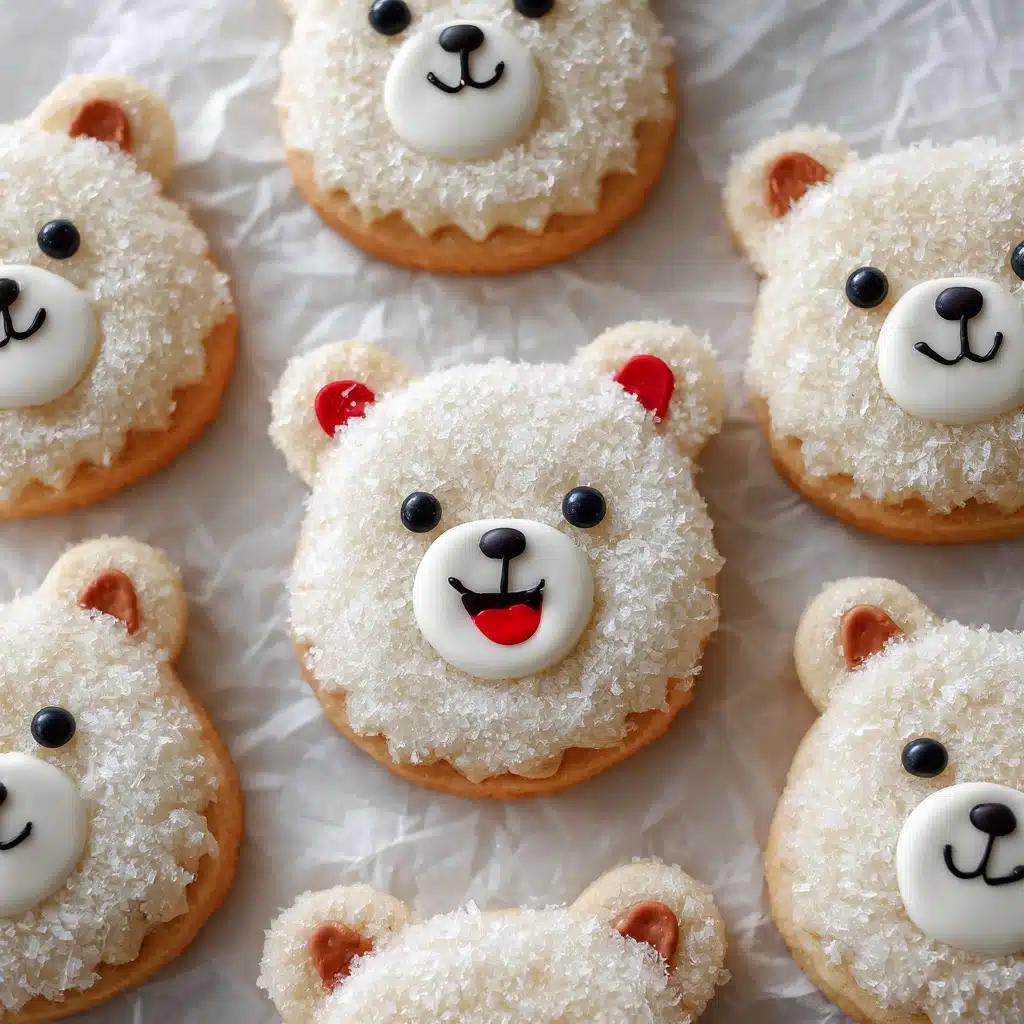
Polar Bear Cookies are the kind of winter treat that instantly lights up a cookie platter and brings out smiles, no matter your age. Imagine a no-bake, creamy white chocolate coating, crisp vanilla wafer center, and adorable edible faces complete with marshmallow “ears” and chocolate chip details. These cookies win hearts with both their melt-in-your-mouth texture and their playful, polar bear look—perfect for holiday parties, kids’ gatherings, or any snowy-day celebration. Trust me, if you’re seeking a festive project that’s as fun to make as it is to eat, this Polar Bear Cookies recipe is the answer.
Ingredients You’ll Need
-
Ingredients:
- 1 (11 oz) bag white chocolate chips or white candy melts
- 24 vanilla wafer cookies
- 24 mini marshmallows (halved)
- 48 mini chocolate chips
- 24 regular chocolate chips
- 1/2 cup shredded coconut (optional, for fur effect)
How to Make Polar Bear Cookies
Step 1: Set Up Your Cookie Assembly Station
Start by lining a baking sheet with parchment paper. This keeps the Polar Bear Cookies from sticking and makes cleanup a breeze later on. Place all your decorations—cut mini marshmallows, mini and regular chocolate chips—into small bowls so that everything is within easy reach. Trust me, this will make the decorating process smooth, mess-free, and way more fun.
Step 2: Melt the White Chocolate
Pour the white chocolate chips or candy melts into a microwave-safe bowl. Heat them in 30-second bursts, stirring after each interval, until the chocolate is completely smooth and silky. Be patient and keep the heat low; slow melting prevents scorching and delivers that beautiful glossy finish you want for your Polar Bear Cookies.
Step 3: Dip the Cookies
Drop one vanilla wafer cookie at a time into the melted chocolate. Use a fork to turn the cookie gently until it’s totally covered, then lift it out, letting any extra chocolate drip off. A gentle tap on the bowl’s edge helps remove excess coating, ensuring your cookies look neat and set evenly once dry.
Step 4: Add Ears, Eyes, and Nose
While the coating is still soft, immediately press two halved mini marshmallows onto the top edge of each cookie for the bear’s ears. Add two mini chocolate chips slightly below for the eyes, and finish with a regular chocolate chip for the nose in the center. Decorating while the chocolate is wet ensures everything sticks beautifully—and it’s genuinely fun to see each cookie come to life!
Step 5: (Optional) Give Your Bears a Little Fur
If you love a bit of whimsy, sprinkle shredded coconut around the outer edge of each cookie before the chocolate sets. This adds a “fluffy” look, transforming your Polar Bear Cookies into extra-cuddly treats and adding a subtle, nutty-sweet flavor.
Step 6: Let the Cookies Set
Allow your finished cookies to rest at room temperature or, if you’re eager, pop them in the fridge for 10 to 15 minutes. Once the chocolate is firm and the faces are secure, your Polar Bear Cookies are ready to share, gift, or simply admire before devouring.
How to Serve Polar Bear Cookies

Garnishes
Give your Polar Bear Cookies a shimmering, “freshly snowed” look by dusting them lightly with powdered sugar or edible glitter—both add a magical frosty touch that kids love. If using coconut, try mixing in a hint of sparkling sanding sugar for extra twinkle, making your cookie tray shine at any winter gathering.
Side Dishes
Pair these cookies with mugs of hot cocoa or spiced winter tea—something cozy to sip while nibbling on these sweet, crunchy bears. For a party dessert board, surround them with peppermint bark, chocolate-dipped pretzels, or dried fruit for just the right mix of flavors and textures.
Creative Ways to Present
Stack Polar Bear Cookies in a “winter wonderland” cookie tin lined with blue tissue, or arrange them on a platter with white chocolate-dipped pretzel “icebergs” for an adorable, themed display. They also look fantastic wrapped individually in cellophane bags with a silver ribbon, perfect for edible gifts or favors at a polar-themed party.
Make Ahead and Storage
Storing Leftovers
Once set, store your Polar Bear Cookies in an airtight container at room temperature for up to 5 days. Keep them out of humid spots to maintain their crunch, and consider placing parchment between layers to prevent any decorations from sticking together—especially if you’re stacking them for a crowd.
Freezing
You can absolutely freeze Polar Bear Cookies! Arrange them in a single layer on a baking sheet to freeze solid, then transfer to a freezer-safe bag or container separated by parchment. Thaw at room temperature for about 15 minutes before serving, and they’ll taste as delightful as the day you made them.
Reheating
These cookies are at their best served at room temperature, straight from the container. Avoid microwaving or oven warming, as it can cause the chocolate to melt or the decorations to slide off. If you’ve frozen them, just let them sit out and naturally come to temperature before enjoying.
FAQs
Can I use regular chocolate instead of white chocolate for dipping?
Absolutely! While the white coating gives Polar Bear Cookies their signature wintry look, you can use milk or dark chocolate for a fun twist, though they’ll lose that classic polar bear color. Play around with “panda” or “brown bear” versions by switching up your chocolate base.
Do I need to use both mini and regular chocolate chips?
Using both creates the most adorable and expressive faces, but you can improvise! Try small candies or colored sprinkles for features, or even pipe a bit of melted chocolate to make custom eyes and noses if you’re feeling creative.
Are there gluten-free options for the vanilla wafers?
Many stores carry gluten-free vanilla wafers or round cookies—simply swap them in and proceed as usual. Just be sure to check that your chocolate chips and candy melts are also gluten free if serving to guests with sensitivities.
Can kids help make Polar Bear Cookies?
Yes, and they’ll love it! This recipe is practically made for little hands—let kids dip, decorate, and invent their own bear faces. Just supervise any melting and reheating steps, and prepare for a little bit of (very fun) mess.
How far in advance can I make these?
Polar Bear Cookies are a fantastic make-ahead treat. Prepare them up to 2-3 days before your event and store in an airtight container. The decorations stay put, and the flavors only improve as the chocolate and cookie meld together over time.
Final Thoughts
These Polar Bear Cookies are my go-to for adding a bit of frosty fun to any dessert table. They’re quick, playful, and just the right amount of indulgent—plus, everyone from toddlers to grandparents can’t resist that friendly bear face. Give this recipe a try and watch your kitchen become the coziest polar bear habitat around!
Print
Polar Bear Cookies Recipe
- Total Time: 20 minutes
- Yield: 24 cookies 1x
- Diet: Vegetarian
Description
Learn how to make adorable Polar Bear Cookies that are perfect for winter parties or holiday gatherings. These no-bake treats feature vanilla wafer cookies coated in white chocolate, decorated to look like cute polar bears with marshmallows and chocolate chips.
Ingredients
Ingredients:
- 1 (11 oz) bag white chocolate chips or white candy melts
- 24 vanilla wafer cookies
- 24 mini marshmallows (halved)
- 48 mini chocolate chips
- 24 regular chocolate chips
- 1/2 cup shredded coconut (optional, for fur effect)
Instructions
- Prepare the Cookies: Line a baking sheet with parchment paper. Melt the white chocolate chips or candy melts in a microwave-safe bowl. Dip each vanilla wafer cookie into the melted chocolate, then place on the prepared sheet.
- Decorate: While the chocolate is still wet, add mini marshmallows for ears, mini chocolate chips for eyes, and a regular chocolate chip for the nose. Sprinkle shredded coconut for a furry effect.
- Set: Let the cookies cool at room temperature or chill in the fridge until the chocolate sets.
Notes
- Prep decorations before dipping for easier assembly.
- Store cookies in an airtight container for up to 5 days.
- Prep Time: 20 minutes
- Cook Time: 0 minutes
- Category: Dessert
- Method: No-Bake
- Cuisine: American
Nutrition
- Serving Size: 1 cookie
- Calories: 140
- Sugar: 12g
- Sodium: 55mg
- Fat: 7g
- Saturated Fat: 5g
- Unsaturated Fat: 2g
- Trans Fat: 0g
- Carbohydrates: 18g
- Fiber: 0g
- Protein: 1g
- Cholesterol: 2mg

