
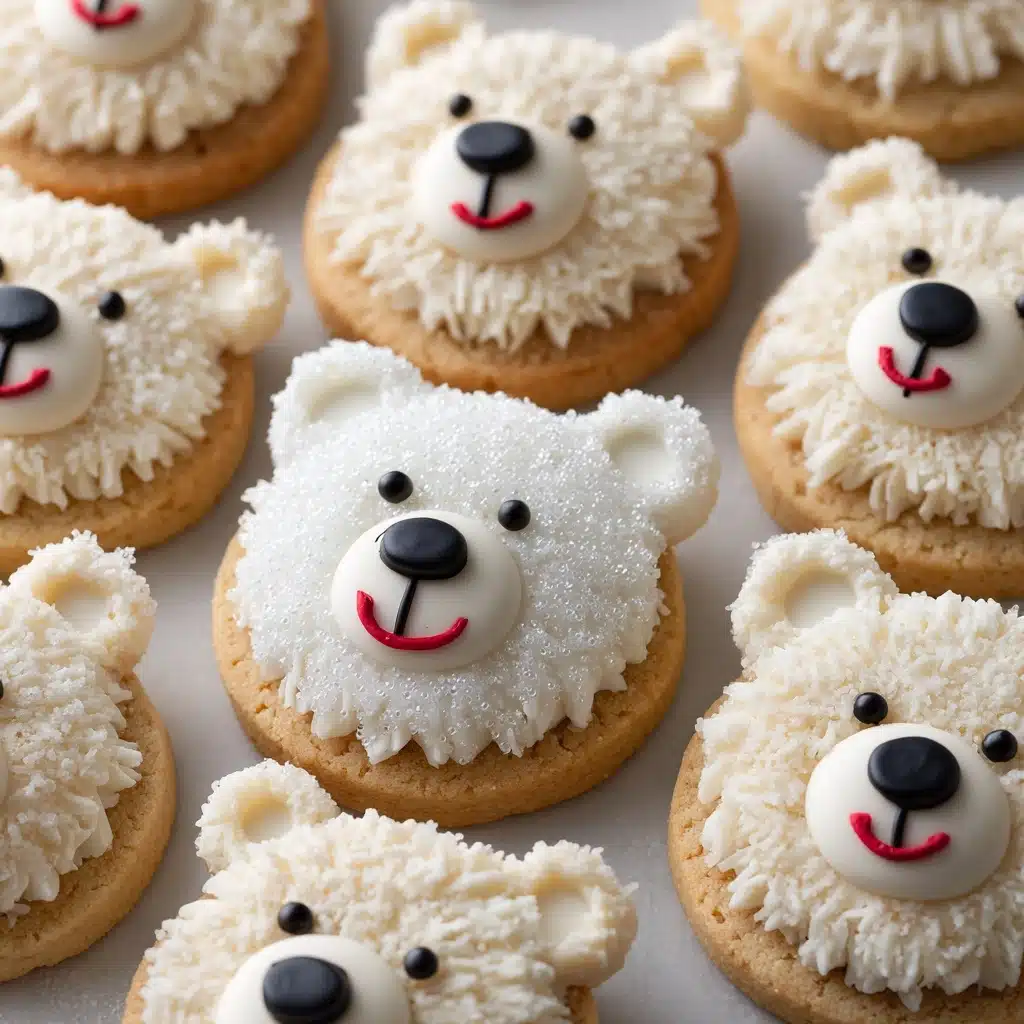
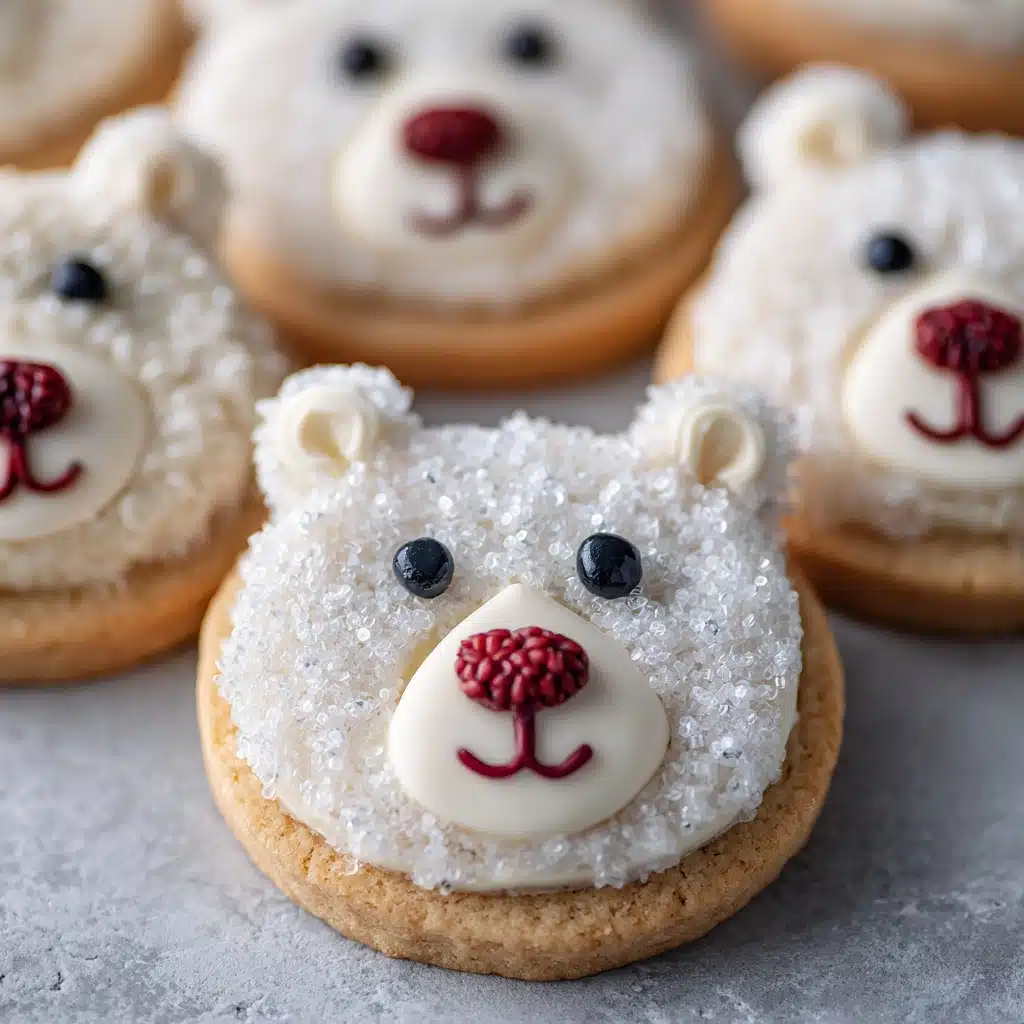
There’s nothing quite as magical as a tray of Polar Bear Cookies lighting up your kitchen counter. This crowd-pleasing, no-bake treat transforms classic chocolate sandwich cookies into the cutest winter animals with a generous coat of white chocolate, candy melt faces, and delightful artisan details. From the plush “ears” to the sweet pink cheeks that can be added for fun, every bite delivers a crunchy, creamy mouthful that will have kids and adults alike reaching for seconds. Whether you’re looking for a holiday project to share with little hands or just want to wow your friends at your next gathering, these Polar Bear Cookies are pure, frosty joy in a cookie suit!
Ingredients You’ll Need
-
Ingredients:
- 1 package (14.3 ounces) chocolate sandwich cookies
- 12 ounces white chocolate or vanilla candy coating
- 1 cup mini white chocolate chips
- 1 cup large white chocolate melts or candy wafers
- black decorating gel or melted dark chocolate for facial details
- pink decorating gel or pink candy melts for cheeks (optional)
How to Make Polar Bear Cookies
Step 1: Prep Your Workspace
Begin by lining a baking sheet with parchment paper. This simple trick makes cleanup a breeze and prevents your Polar Bear Cookies from sticking. Have all your decorations (ears, snouts, gels) ready — assembling these cookies moves quickly once you start dipping!
Step 2: Melt the Coating
Melt your white chocolate or vanilla candy coating in a microwave-safe bowl or over a double boiler, following package instructions. Stir gently until it’s smooth and glossy — perfect for a “fur” effect. Be patient, as overheating can cause the chocolate to seize, so keep it low and slow!
Step 3: Dip and Shape
Working one at a time, dip a chocolate sandwich cookie into the melted white coating, making sure to cover it completely. Use a fork to lift it out, tapping off excess. Quickly transfer it to your prepared baking sheet. While still wet, press a large white candy melt onto the lower third (for the snout) and two mini white chips at the top for ears. Repeat with all the cookies.
Step 4: Add Faces
Give your polar bears their adorable faces! Let the white chocolate set for about 5–10 minutes. Then, using black decorating gel or a thin piping of melted dark chocolate, draw two little eyes and a nose on each snout. For a playful touch, dab on pink gel or a dot of melted pink candy melts for sweet cheeks.
Step 5: Let Set and Serve
Allow your decorated Polar Bear Cookies to set completely at room temperature. Once the coating is firm to the touch, gently peel each cookie off the parchment and transfer to a serving platter. They’re now ready to charm at any party or cookie swap!
How to Serve Polar Bear Cookies
Garnishes
Just before serving, you can dust your Polar Bear Cookies with a light shower of powdered sugar or, for a snow-flurry effect, sprinkle a bit of shredded coconut over the top before the coating sets. These tiny tweaks add both texture and whimsy!
Side Dishes
If you’re making a winter dessert table, Polar Bear Cookies pair perfectly with mugs of hot cocoa or a big pitcher of vanilla milk. For something a bit more refined, offer with a light peppermint mousse or raspberry compote—the subtle tartness balances the sweetness nicely.
Creative Ways to Present
Arrange your Polar Bear Cookies in a circle on a frosty-white platter with mini marshmallows scattered around for “snowballs.” Or, tuck them into clear cellophane bags tied with blue ribbon for sweet little holiday favors. For a truly magical moment, nestle them on a cake stand amid toy polar bears for an edible arctic scene!
Make Ahead and Storage
Storing Leftovers
Store your Polar Bear Cookies in an airtight container at room temperature for up to 5 days. To prevent smudging the faces, place parchment between layers. Their texture and creamy coat stay deliciously intact if you keep them dry and out of direct sunlight.
Freezing
These cookies freeze surprisingly well! Arrange in a single layer on a tray until firm, then stack with parchment between in a freezer-safe container. They’ll keep their charm and taste for up to two months—just bring to room temperature before serving.
Reheating
No actual reheating required, since Polar Bear Cookies are a no-bake treat! If you’ve stored them in the fridge or freezer, let them thaw for 30 minutes at room temperature, so the flavors and textures are at their best.
FAQs
Can I use dark or milk chocolate instead of white?
For Polar Bear Cookies, white chocolate is essential for the “polar bear” color, but you could certainly try using dark or milk chocolate for a different animal-inspired twist—maybe “brown bear” or “panda” cookies!
How do I keep the chocolate coating smooth?
Make sure to melt your chocolate slowly and stir constantly. If the coating starts to thicken while dipping, gently reheat it. Also, letting excess chocolate drip off before transferring the cookies prevents pooling.
Can I make these with gluten-free cookies?
Absolutely! Swap in your favorite gluten-free sandwich cookies. Just double-check that any candy melts or chips you use are gluten-free as well so everyone can enjoy them.
How can kids help with this recipe?
Little ones will love dipping cookies and pressing on the candy “ears” and “snouts.” Older kids can practice piping on faces—just provide extra cookies for snacking in case of happy accidents!
Do Polar Bear Cookies work for other occasions besides winter?
You bet! They’re adorable for animal-themed parties, baby showers, or any celebration that calls for cuteness. You can even tint the cheeks different colors to match the occasion.
Final Thoughts
If you’re searching for a treat that brings instant smiles and silly joy, you truly can’t go wrong with a batch of Polar Bear Cookies. There’s nothing like seeing those adorable faces lined up, ready to be devoured. Give them a try—you’ll have fun making memories, and even more fun enjoying every bite!
Print
Polar Bear Cookies Recipe
- Total Time: 25 minutes
- Yield: 24 cookies 1x
- Diet: Vegetarian
Description
Learn how to make adorable Polar Bear Cookies perfect for any winter occasion. These delightful treats are made with chocolate sandwich cookies and white chocolate, creating a cute and tasty dessert that will impress everyone.
Ingredients
Ingredients:
- 1 package (14.3 ounces) chocolate sandwich cookies
- 12 ounces white chocolate or vanilla candy coating
- 1 cup mini white chocolate chips
- 1 cup large white chocolate melts or candy wafers
- black decorating gel or melted dark chocolate for facial details
- pink decorating gel or pink candy melts for cheeks (optional)
Instructions
- Prepare the Cookies: Line a baking sheet with parchment paper.
- Dip and Decorate: Melt the white chocolate or candy coating and dip each sandwich cookie, adding white candy melts for the snout and chocolate chips for ears.
- Add Details: Use black gel or dark chocolate for eyes and nose, and pink gel or candy melts for cheeks if desired.
- Allow to Set: Let the cookies set completely before serving.
Notes
- For extra texture, sprinkle shredded coconut over the coating for a snowy effect.
- Store cookies in an airtight container at room temperature for up to 5 days.
- Prep Time: 25 minutes
- Cook Time: 0 minutes
- Category: Dessert
- Method: No-Bake
- Cuisine: American
Nutrition
- Serving Size: 1 cookie
- Calories: 160
- Sugar: 14 g
- Sodium: 85 mg
- Fat: 8 g
- Saturated Fat: 5 g
- Unsaturated Fat: 2 g
- Trans Fat: 0 g
- Carbohydrates: 20 g
- Fiber: 0 g
- Protein: 2 g
- Cholesterol: 5 mg


