
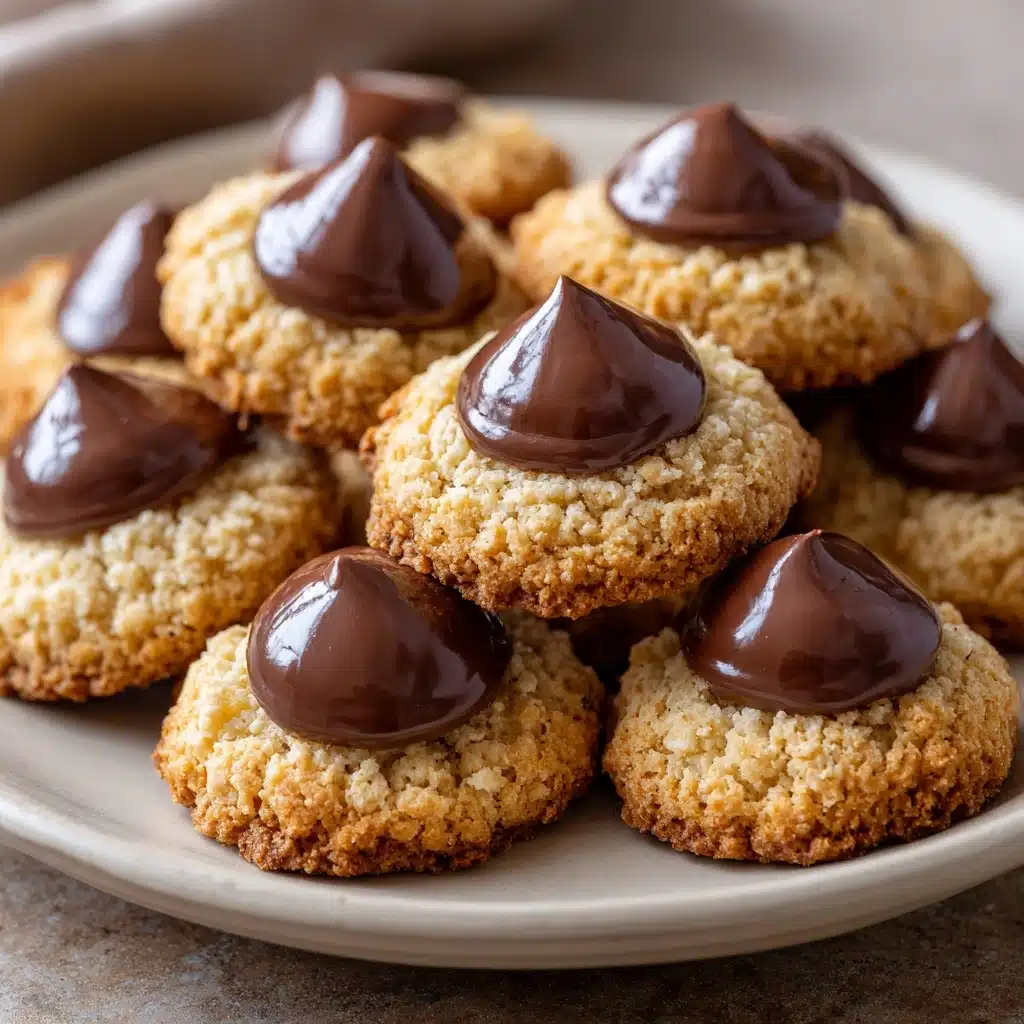
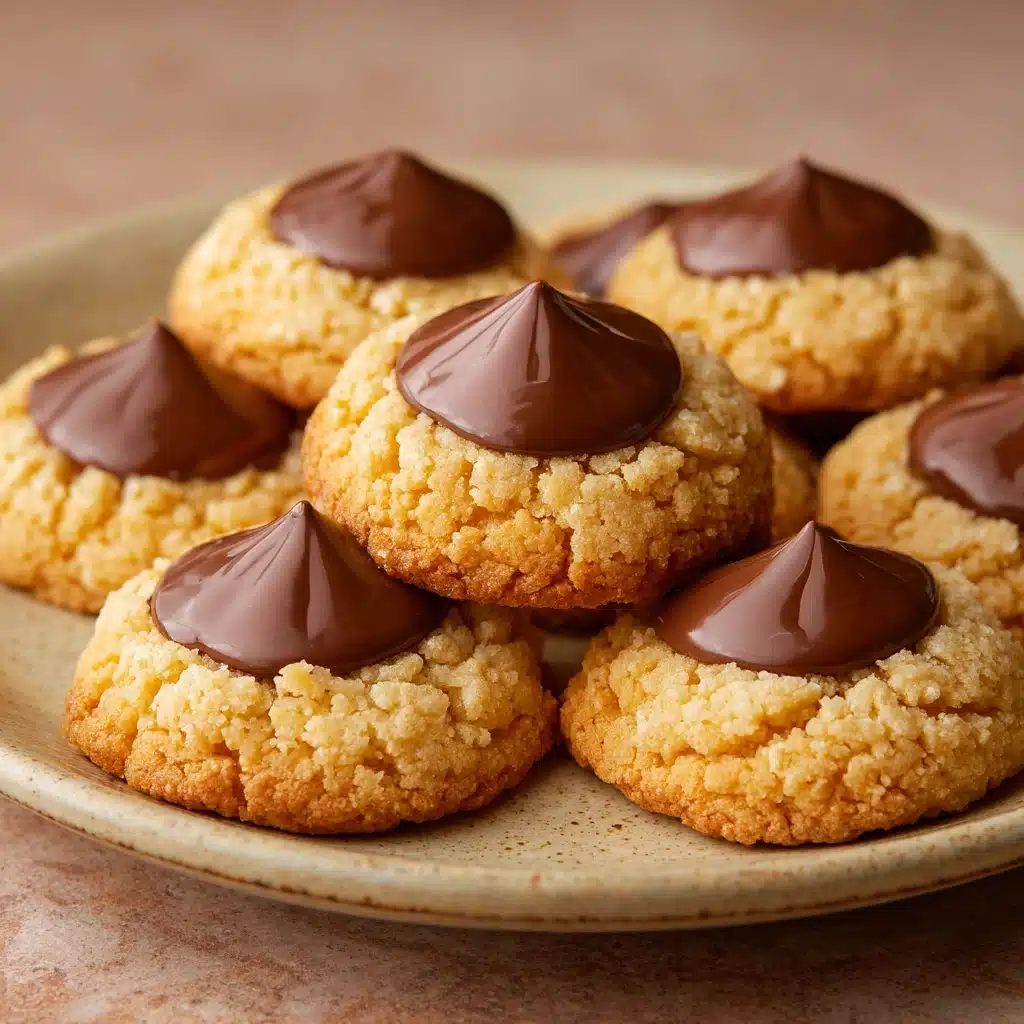
If you’re searching for the ultimate crowd-pleasing treat that brings both nostalgia and charm to any cookie platter, look no further than Peanut Butter Blossoms. With their iconic combination of soft, chewy peanut butter cookies crowned by a silky chocolate kiss, these little gems are as fun to make as they are to eat. Whether you’re baking for a special occasion or simply craving an irresistible bite-sized sweet, this classic recipe never fails to deliver smiles and warm, nutty flavors in every perfect blossom.
Ingredients You’ll Need
Peanut Butter Blossoms come together with a handful of classic pantry staples, yet every ingredient serves a specific and important purpose in both taste and texture. Using real butter and creamy peanut butter guarantees a melt-in-your-mouth richness, while a blend of sugars provides that essential chew and sparkle.
- Unsalted butter, softened (½ cup): Gives the cookies their tender structure and buttery depth; let it come fully to room temperature for best results.
- Creamy peanut butter (½ cup): The star of the show—use a creamy variety for the smoothest texture and fullest peanut flavor.
- Granulated sugar (½ cup + extra for rolling): Adds sweet crunch when you roll the cookie dough balls before baking, plus sweetness throughout.
- Brown sugar, packed (½ cup): Infuses caramel notes and ensures the cookies stay soft after baking.
- Large egg (1): Binds everything together and adds lightness to the dough.
- Vanilla extract (1 teaspoon): Rounds out the flavors with warmth and a hint of creamy sweetness.
- All-purpose flour (1½ cups): The foundation for structure, providing a perfectly chewy bite.
- Baking soda (½ teaspoon): Helps the cookies rise and develop those beautiful crinkly tops.
- Salt (¼ teaspoon): Enhances all the flavors and keeps sweetness in check.
- Chocolate kisses, unwrapped (24): That signature chocolate drop makes Peanut Butter Blossoms instantly recognizable and gives a melty, irresistible finish.
How to Make Peanut Butter Blossoms
Step 1: Prepare and Preheat
Begin your Peanut Butter Blossoms adventure by preheating your oven to 350°F (175°C). Line a baking sheet with parchment paper so your cookies bake evenly and come off effortlessly. Having this ready at the start keeps everything breezy down the line.
Step 2: Cream the Butter, Peanut Butter, and Sugars
In a large mixing bowl, cream together the softened unsalted butter, creamy peanut butter, granulated sugar, and brown sugar. The goal here is to beat until the mixture is light, fluffy, and smooth—this gives the final cookies that irresistible soft bite.
Step 3: Add the Egg and Vanilla
Beat in the egg and a teaspoon of vanilla extract until fully blended. You’ll notice the dough becomes creamier and takes on a lovely sheen; this is a great time to scrape down the sides of the bowl, so every cookie gets the same touch of flavor and love.
Step 4: Combine Dry Ingredients and Mix
In another bowl, whisk together the flour, baking soda, and salt. Gradually add the dry mix to your wet mixture, stirring just until a soft dough forms. You want it to hold its shape without being sticky—if it feels too soft, a short chill in the fridge for 20–30 minutes makes rolling a breeze.
Step 5: Shape and Roll in Sugar
Scoop out heaping teaspoons of dough and roll each into a 1-inch ball. Next, roll every ball in a shallow dish of extra granulated sugar until it’s coated all over; this is the trick for that magical crackled sugar crust.
Step 6: Bake
Spacing is key! Place the sugared dough balls about 2 inches apart on your prepared baking sheet. Slide them into the oven and bake for 8–10 minutes. You’re looking for set edges and cookies with tops just starting to crack—a sign they’re soft and ready for their finishing flourish.
Step 7: Add the Chocolate Kisses
As soon as the cookies emerge hot from the oven, gently press a chocolate kiss into the center of each one. The heat will slightly melt the chocolate, nestling it perfectly into each cookie. Let them cool for 5 minutes on the baking sheet, then transfer to a wire rack to cool completely.
How to Serve Peanut Butter Blossoms
Garnishes
The signature Hershey’s kiss at the center is honestly all the pizzazz Peanut Butter Blossoms need! For special occasions, though, a quick dusting of powdered sugar or a teeny sprinkle of colored sanding sugar before baking can add even more sparkle.
Side Dishes
Pair these cookies with an icy glass of milk, a robust cup of coffee, or a cozy mug of cocoa—simple sides that make the peanut butter and chocolate flavor sing. They also shine alongside an assortment of holiday cookies or brownies for a colorful dessert spread.
Creative Ways to Present
Turn your Peanut Butter Blossoms into edible gifts! Stack them in a Mason jar tied with a ribbon, or arrange them in festive tins. If you’re hosting, try stacking them on a tiered tray or tucking them into cute paper liners for a bakery-worthy look at the next cookie swap or bake sale.
Make Ahead and Storage
Storing Leftovers
Leftover Peanut Butter Blossoms are a beautiful thing—they stay soft and chewy for days! Store baked cookies in an airtight container at room temperature, and enjoy their freshness for up to a week. If layering, place a sheet of wax paper between each layer to prevent sticking.
Freezing
These cookies freeze wonderfully! Arrange completely cooled cookies in a single layer in a freezer-safe container, separating each layer with wax or parchment paper. They’ll keep beautifully for up to 3 months. You can also freeze unbaked, sugar-coated dough balls and bake fresh on demand.
Reheating
Want that just-baked, gooey chocolate kiss experience? Pop a cookie in the microwave for about 6 seconds—just enough to rewarm the chocolate slightly. For freezing leftovers, thaw at room temperature or give a quick zap in the microwave to get them soft and chewy again.
FAQs
Can I use natural peanut butter for Peanut Butter Blossoms?
You can, but keep in mind natural peanut butter tends to be runnier and may change the texture of your cookies. For best results, stick with traditional creamy peanut butter to achieve that classic nutty chewiness.
Why did my cookies come out dry or crumbly?
This usually means there was a bit too much flour or the cookies were overbaked. Spoon and level your flour when measuring for accuracy, and pull the cookies from the oven as soon as the edges are set and the tops just begin to crack.
Can I make Peanut Butter Blossoms gluten-free?
Absolutely! Swap the all-purpose flour for a 1-to-1 gluten-free baking blend. Check your chocolate kisses for gluten content, but most brands are naturally gluten-free as well. The results will be slightly more tender but still delicious.
What if I don’t have chocolate kisses?
No kisses? No problem! Use dark chocolate squares, chocolate chunks, or even mini peanut butter cups in the center. The spirit of Peanut Butter Blossoms is all about that gooey chocolate-meets-peanut butter bite, so get creative with what you have on hand.
How do I prevent my cookies from spreading too much?
If your dough is too warm or soft, the cookies might spread while baking. Popping the dough in the fridge before rolling or baking will help them keep that classic round and puffy shape.
Final Thoughts
There’s truly something magical about baking a batch of Peanut Butter Blossoms—the aroma, the anticipation, and definitely that first bite. Whether you’re introducing these to someone for the first time or rekindling fond memories, this recipe is simply guaranteed to make any day sweeter. Give them a try and watch these delightful cookies blossom into a family favorite at your table!
Print
Peanut Butter Blossoms Recipe
- Total Time: 25 minutes
- Yield: 24 cookies 1x
- Diet: Vegetarian
Description
Peanut Butter Blossoms are classic peanut butter cookies topped with a chocolate kiss. These cookies are perfect for holiday baking and are sure to be a hit with everyone!
Ingredients
Dough:
- ½ cup unsalted butter, softened
- ½ cup creamy peanut butter
- ½ cup granulated sugar (plus extra for rolling)
- ½ cup brown sugar, packed
- 1 large egg
- 1 teaspoon vanilla extract
- 1½ cups all-purpose flour
- ½ teaspoon baking soda
- ¼ teaspoon salt
Topping:
- 24 chocolate kisses (unwrapped)
Instructions
- Preheat Oven: Preheat oven to 350°F (175°C) and line a baking sheet with parchment paper.
- Cream Butter and Sugars: In a large bowl, cream together butter, peanut butter, granulated sugar, and brown sugar until light and fluffy. Beat in the egg and vanilla extract.
- Combine Dry Ingredients: In a separate bowl, whisk together flour, baking soda, and salt. Gradually mix dry ingredients into the wet mixture to form a dough.
- Form Dough Balls: Roll dough into 1-inch balls, coat each ball in granulated sugar, and place on the baking sheet.
- Bake: Bake for 8–10 minutes until edges are set and tops crack slightly.
- Add Chocolate Kisses: Press a chocolate kiss into the center of each cookie immediately after removing from oven.
- Cool: Cool on baking sheet for 5 minutes, then transfer to a wire rack to cool completely.
Notes
- Chill the dough if too soft to roll
- Store cookies in an airtight container for up to 1 week
- Cookies can be frozen for longer storage
- Prep Time: 15 minutes
- Cook Time: 10 minutes
- Category: Dessert
- Method: Baking
- Cuisine: American
Nutrition
- Serving Size: 1 cookie
- Calories: 140
- Sugar: 11 g
- Sodium: 85 mg
- Fat: 8 g
- Saturated Fat: 4 g
- Unsaturated Fat: 3 g
- Trans Fat: 0 g
- Carbohydrates: 16 g
- Fiber: 1 g
- Protein: 2 g
- Cholesterol: 15 mg


