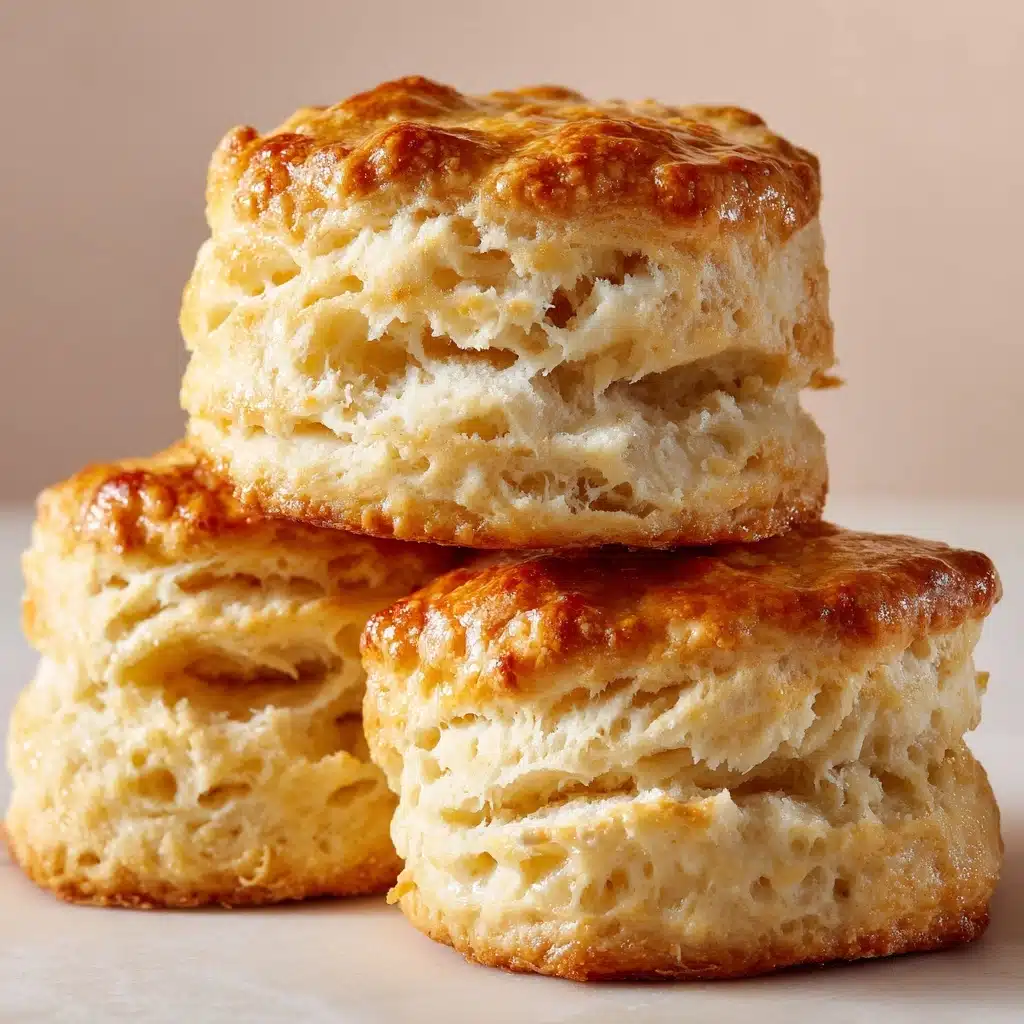
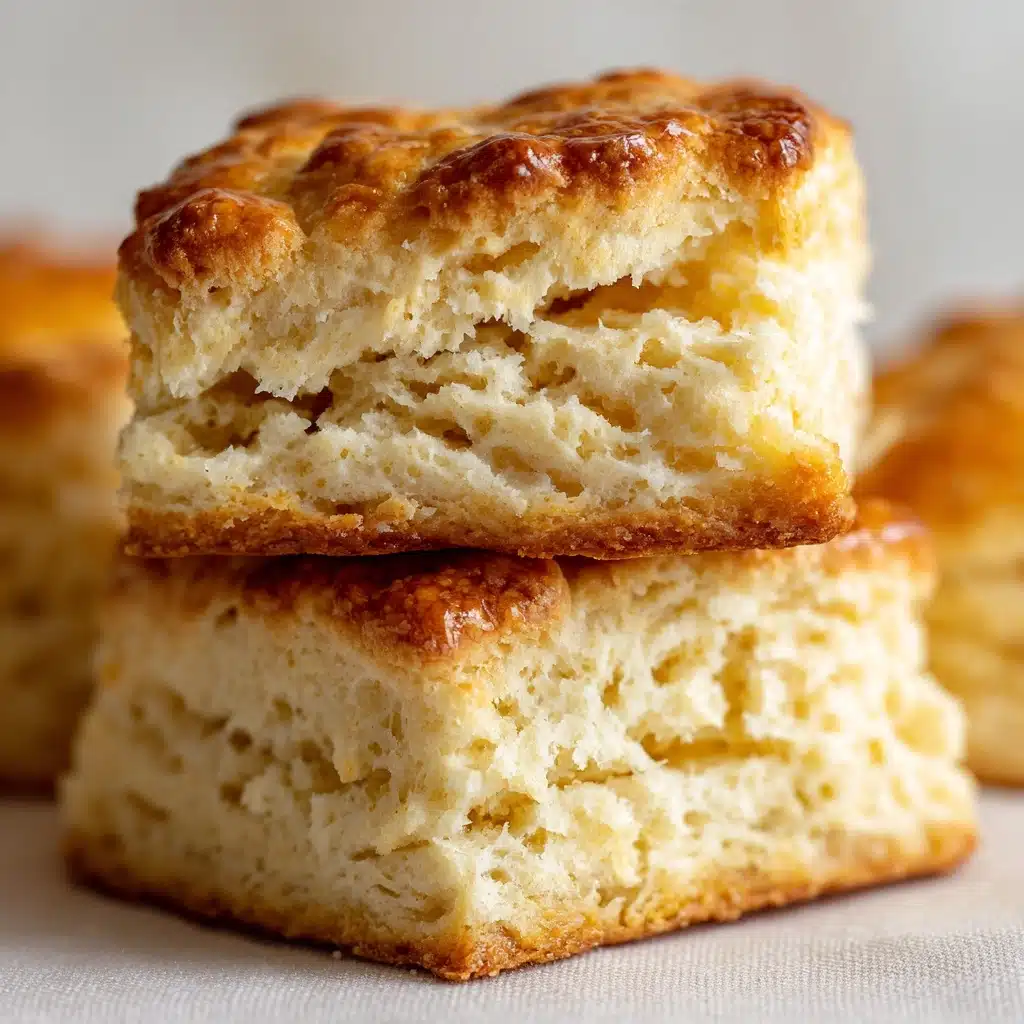
If you’ve never tasted Nun’s Puffs before, prepare to be delighted by a pastry that’s as whimsical as its name. These light, airy wonders are the perfect blend of crisp and tender, balancing a golden, crunchy exterior with a pillowy-soft center. Ideal for breakfast, brunch, or an elegant dessert, Nun’s Puffs will make your kitchen feel like a cozy French patisserie. It’s a deceptively simple recipe with divine results—the kind of treat that disappears just minutes after coming out of the oven!
Ingredients You’ll Need
The magic of Nun’s Puffs comes from simple pantry staples working together in perfect harmony. Each ingredient has its role: giving structure, lift, richness, or that final dusting of sweetness!
- Unsalted butter: Adds richness and helps create the signature puffy texture.
- Whole milk: Gives the puffs moisture and a velvety crumb.
- All-purpose flour: Provides the necessary structure so the puffs can rise and hold their shape.
- Large eggs: Responsible for the gorgeous lift and airy, soufflé-like interior.
- Granulated sugar: Just a touch sweetens the dough, making the flavor subtly addictive.
- Vanilla extract: Brings a hint of warmth and complexity to each bite.
- Salt: Sharpens all the flavors and balances the sweetness.
- Powdered sugar (optional): For a beautiful dusting that adds a little sparkle to your finished puffs.
How to Make Nun’s Puffs
Step 1: Prep Your Oven and Pan
Start by preheating your oven to 375°F (190°C)—a hot oven is essential for perfect puffing! Generously grease a 12-cup muffin tin with butter or nonstick spray. Don’t hold back; this ensures that your Nun’s Puffs slip out easily, revealing their beautiful golden sides.
Step 2: Make the Dough Base
Combine the unsalted butter and whole milk in a medium saucepan. Set over medium heat and bring to a gentle boil. The smell of butter warming with milk is a pure comfort—one of those scents that immediately lifts the spirits!
Step 3: Add Flour and Salt
As soon as the mixture boils, add all of the flour and that little pinch of salt at once. Stir vigorously with a wooden spoon or sturdy spatula until the dough pulls away from the sides and forms a smooth ball. This classic “panade” step is what gives Nun’s Puffs their chewy yet tender bite.
Step 4: Cool, Then Add Eggs One at a Time
Take the pan off the heat and let the dough cool for about 5 minutes. Now, add the eggs—one at a time—beating thoroughly after each addition. At first, it may look a bit odd and slippery, but keep mixing! By the third egg, you’ll have a glossy, beautifully smooth batter begging to be baked.
Step 5: Stir in Sugar and Vanilla
With the eggs now incorporated, fold in the granulated sugar and vanilla extract. This quick step transforms the dough into a delicately sweet, aromatic base for your Nun’s Puffs.
Step 6: Fill the Muffin Tin
Spoon the batter evenly into your prepared muffin tin, filling each cup about halfway. This ensures the puffs have plenty of room to rise and expand without overflowing, so resist the urge to overfill!
Step 7: Bake Until Perfectly Puffy
Bake for 30–35 minutes, or until your Nun’s Puffs are gloriously golden brown and irresistibly puffed. Don’t open the oven door during baking—holding in that heat is crucial for a sturdy rise. Once done, let them cool slightly in the pan, then pop them out and dust with powdered sugar if you like.
How to Serve Nun’s Puffs

Garnishes
For that final elegant touch, a light shower of powdered sugar is classic. You can also drizzle a little honey or your favorite jam on each Nun’s Puff to highlight their delicate flavor. A few fresh berries scattered on the plate transform them into a stunning brunch centerpiece.
Side Dishes
Nun’s Puffs pair beautifully with fruit salad, a dollop of lightly whipped cream, or even thick yogurt for a breakfast with contrast. For dessert, serve alongside warm custard or a scoop of vanilla ice cream for pure indulgence.
Creative Ways to Present
Split your Nun’s Puffs and fill with fruit preserves or lemon curd for mini sandwiches, or stack them up on a tiered stand for a whimsical tea party vibe. If you’re feeling extra creative, top each with a swirl of whipped cream and a sprinkle of citrus zest.
Make Ahead and Storage
Storing Leftovers
Nun’s Puffs are absolutely best straight from the oven, but if you have leftovers, store them in an airtight container at room temperature for up to 1 day. Their crispiness will wane a bit, but they’ll still taste delicious.
Freezing
To freeze Nun’s Puffs, let them cool completely, then place in a single layer inside a freezer bag. They’ll keep well for up to 2 months. Bring them back to life in the oven as described below for a warm, just-baked feel.
Reheating
If you want that just-out-of-the-oven magic, pop the puffs into a 300°F (150°C) oven for 5–8 minutes. This brings back some of their exterior crispness and makes the inside soft and warm again.
FAQs
Can I make Nun’s Puffs without a muffin tin?
Yes! You can scoop the batter onto a parchment-lined baking sheet, spaced well apart. The shape will be more rustic, but you’ll still get that signature airy center and crispy outside.
Why did my Nun’s Puffs deflate?
Nun’s Puffs rely on steam to rise and hold their form. Opening the oven door early or underbaking can cause them to collapse. For best results, bake them fully and peek through the oven glass instead of opening the door.
Is it possible to make Nun’s Puffs gluten-free?
With some experimentation, yes. Try using a cup-for-cup gluten-free flour blend suitable for baking. The texture may change a little, but you’ll still get lovely airy puffs.
Can I add fillings to my Nun’s Puffs?
Absolutely! While they’re incredible plain, you can experiment with sweet fillings like pastry cream, lemon curd, or fruit preserves. Simply split the puffs after baking and spoon in your choice of filling.
What is the difference between Nun’s Puffs and cream puffs or gougères?
Nun’s Puffs are very similar to cream puffs in texture but are generally simpler and baked in muffin tins rather than piped. Gougères, on the other hand, are savory and usually involve cheese. Nun’s Puffs shine for their sweet, simple ingredient list and delicate flavor.
Final Thoughts
Baking a batch of Nun’s Puffs is truly a special treat—the kind of recipe that brings comfort and a little bit of wonder to your table. Whether you serve them warm at breakfast or dress them up for dessert, once you try Nun’s Puffs, you’ll find yourself coming back to this recipe again and again. Happy baking, and enjoy every airy, golden bite!
Print
Nun’s Puffs Recipe
- Total Time: 45 minutes
- Yield: 12 puffs 1x
- Diet: Vegetarian
Description
Nun’s Puffs are delightful choux pastry muffins with a light, airy texture and a crisp exterior. This vintage recipe yields a dozen puffs that are perfect for breakfast or dessert.
Ingredients
Ingredients:
- 1/2 cup unsalted butter
- 1 cup whole milk
- 3/4 cup all-purpose flour
- 3 large eggs
- 1 tablespoon granulated sugar
- 1/2 teaspoon vanilla extract
- a pinch of salt
- powdered sugar for dusting (optional)
Instructions
- Preheat and Prepare: Preheat the oven to 375°F (190°C) and grease a 12-cup muffin tin.
- Mix and Boil: In a saucepan, bring butter and milk to a boil. Add flour and salt, stirring until smooth.
- Add Eggs and Flavor: Let cool, then beat in eggs one at a time. Mix in sugar and vanilla.
- Bake: Spoon batter into muffin cups and bake for 30–35 minutes until golden.
- Finish: Cool slightly, dust with powdered sugar, and serve.
Notes
- Nun’s Puffs have a light, airy texture similar to cream puffs but with a crispier outside.
- Best enjoyed fresh from the oven, plain or with honey or jam for a sweet touch.
- Prep Time: 10 minutes
- Cook Time: 35 minutes
- Category: Breakfast, Dessert
- Method: Baking
- Cuisine: French-American
Nutrition
- Serving Size: 1 puff
- Calories: 120
- Sugar: 2g
- Sodium: 60mg
- Fat: 8g
- Saturated Fat: 5g
- Unsaturated Fat: 2g
- Trans Fat: 0g
- Carbohydrates: 9g
- Fiber: 0g
- Protein: 3g
- Cholesterol: 65mg


