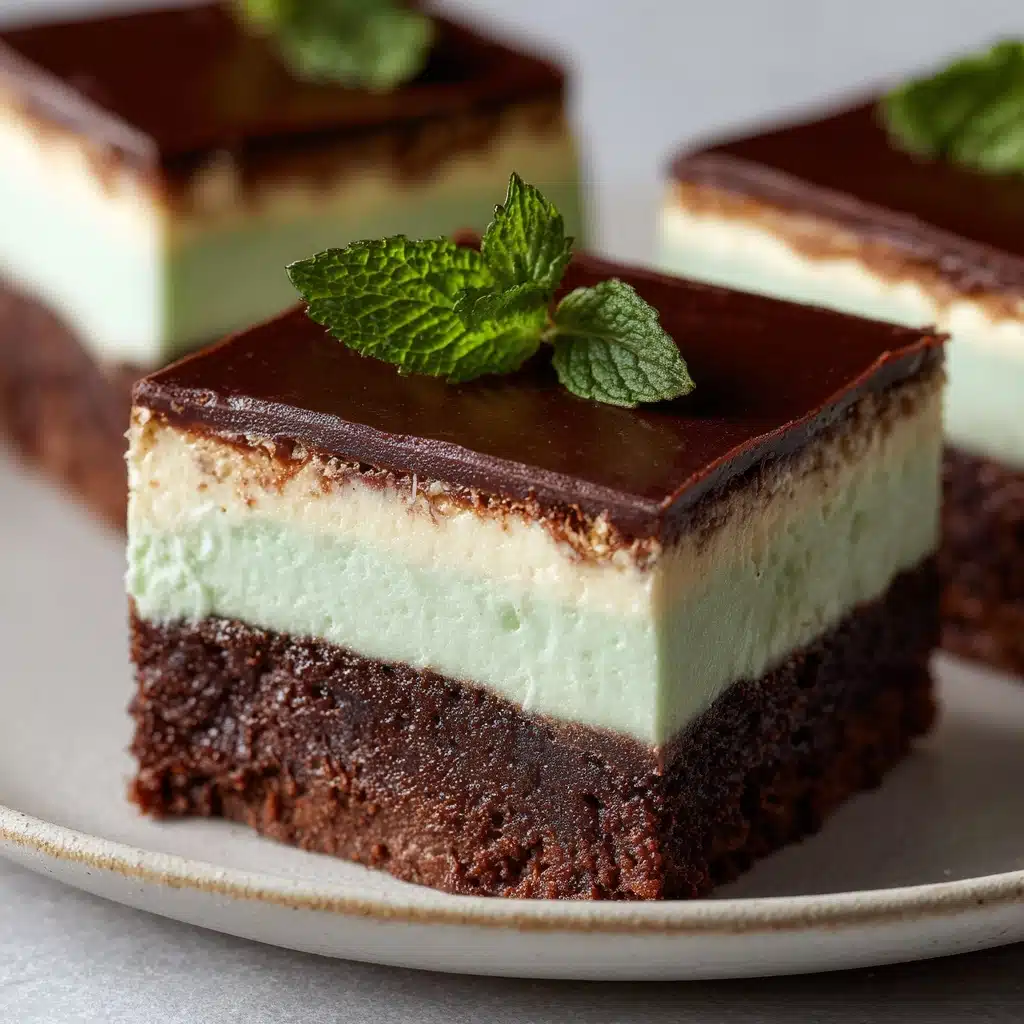
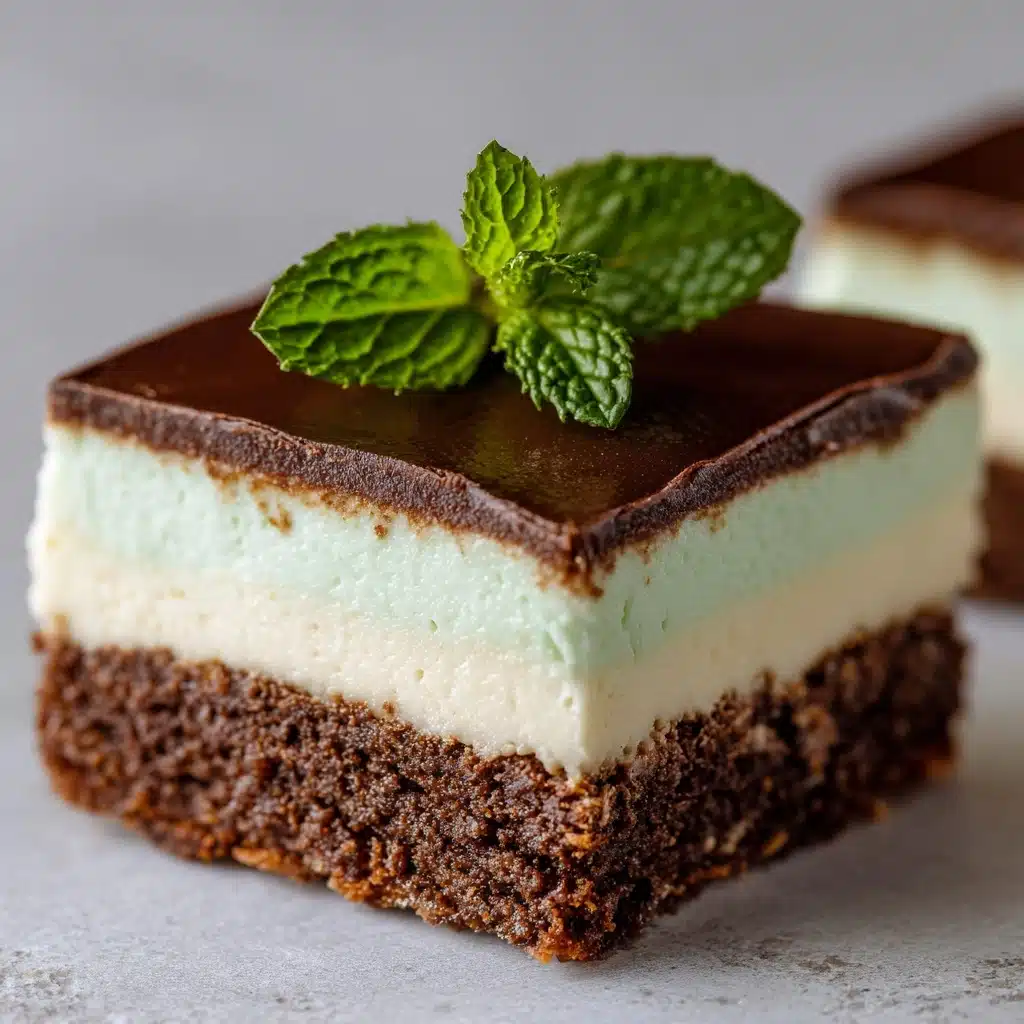
If you’ve ever dreamed of the perfect combination of rich, fudgy chocolate and cool, refreshing mint, let me introduce you to Mint Chocolate Brownies. Every decadent layer offers something to love: a classic chewy brownie base, a silky peppermint cream, and a glossy ganache topping. The result is a show-stopping dessert that’s as gorgeous as it is addictive, making it a crowd-pleaser for holidays, potlucks, or just an indulgent weeknight treat. Trust me, these brownies deliver the ultimate mint-chocolate fix in every bite.
Ingredients You’ll Need
The ingredients for Mint Chocolate Brownies are refreshingly simple, and each one plays an essential role in creating those distinctive layers of flavor and texture. You’ll recognize most of these pantry staples, but together, their magic transforms into something truly special.
- Unsalted butter (for brownie layer): Melted for the base, providing richness and a perfectly moist crumb.
- Granulated sugar: Gives sweetness and helps create that signature shiny brownie crust.
- Large eggs: They bind the ingredients, providing structure and making the brownies delightfully chewy.
- Vanilla extract: A tiny touch enhances all the chocolatey and minty flavors throughout the dessert.
- Unsweetened cocoa powder: The star ingredient for a deep, authentic chocolate flavor in the brownies.
- All-purpose flour: Gives just the right heft to keep the brownies soft but not cakey.
- Salt: Enhances every layer, balancing out the sweetness and making the chocolate pop.
- Baking powder: An extra lift for a slightly lighter texture without losing fudginess.
- Unsalted butter (for mint layer): Softened to make that creamy, dreamy mint filling.
- Powdered sugar: For a smooth, fluffy mint cream that melts on your tongue.
- Milk: A splash brings the mint layer to just the right spreading consistency.
- Peppermint extract: Delivers the cool, invigorating flavor that sets these brownies apart.
- Green food coloring (optional): For that classic minty green hue and a fun visual pop.
- Semi-sweet chocolate chips: The backbone of the ganache topping—silky, decadent, and not too sweet.
- Unsalted butter (for ganache): Ensures the topping is glossy, smooth, and easy to slice.
How to Make Mint Chocolate Brownies
Step 1: Prepare Your Pan and Preheat the Oven
Begin by lining an 8×8-inch baking pan with parchment paper. This not only prevents sticking but makes lifting out and slicing the cooled brownies so much easier. Preheat your oven to 350°F so it’s ready to go as soon as your batter is mixed.
Step 2: Mix Up the Brownie Batter
In a large bowl, whisk together the melted butter and sugar until the mix looks pale and thick. Add the eggs and vanilla, whisking until the batter is smooth and glossy. Now, sift in the cocoa powder, flour, salt, and baking powder. Stir just until combined—stop mixing as soon as you no longer see streaks of flour. Your batter should look dense and fudgy.
Step 3: Bake the Brownies
Pour that luscious chocolate batter into your prepared pan, smoothing the top. Slide the pan into the oven and bake for 20–25 minutes. You’re looking for a toothpick inserted in the center to come out with just a few moist crumbs attached. Let the brownies cool completely in the pan; this step is crucial for perfect layering later on.
Step 4: Prepare the Mint Layer
Once the brownies are completely cool, beat the softened butter until creamy, then gradually add the powdered sugar. Drizzle in the milk and peppermint extract, beating until the mixture is fluffy and pale. If you love that fresh minted look, add a tiny drop of green food coloring. Spread the mint cream evenly over the brownie base and pop the pan in the fridge to chill while you prep the ganache.
Step 5: Make and Add the Chocolate Ganache
Combine the semi-sweet chocolate chips and butter in a microwave-safe bowl. Heat in 30-second increments, stirring after each, until the mixture is totally melted and smooth. Pour the silky ganache over the mint layer, using a spatula to spread it all the way to the edges. Let the Mint Chocolate Brownies chill again until the ganache is set—this not only makes slicing easier but creates those striking, clean layers when you serve them.
How to Serve Mint Chocolate Brownies

Garnishes
For the ultimate finishing touch, try topping each square with a few chocolate curls, a dusting of cocoa powder, or a sprinkle of chopped fresh mint. If you’re feeling extra festive, add a drizzle of melted white chocolate in pretty zigzags for contrast. Every garnish enhances the beauty (and flavor) of your Mint Chocolate Brownies.
Side Dishes
Pairing these brownies with a scoop of vanilla ice cream makes for a dreamy, classic dessert duo. For something lighter, a small bowl of fresh berries or a dollop of whipped cream on the side complements the richness without overpowering the minty freshness.
Creative Ways to Present
Think outside the traditional brownie square! Cut your Mint Chocolate Brownies into neat triangles or use cookie cutters for fun shapes. Arrange them in mini cupcake liners for a party platter, or stack them in cellophane bags tied with ribbon as a thoughtful edible gift.
Make Ahead and Storage
Storing Leftovers
These brownies keep beautifully in the fridge for up to five days. Just layer parchment or wax paper between stacks to prevent sticking. The chilled texture actually makes the layers more pronounced and even more satisfying to bite into.
Freezing
Mint Chocolate Brownies are wonderfully freezer-friendly. Wrap individual squares tightly in plastic wrap, pop them in a freezer-safe bag or container, and store for up to two months. Thaw overnight in the fridge for best texture (or sneak one straight from the freezer for a firmer, frosty treat!).
Reheating
If you prefer your brownies just a little warm and extra gooey, unwrap and microwave a square for about 10–15 seconds. The ganache will soften, the mint cream will become even silkier, and the chocolate aroma will fill your kitchen in seconds.
FAQs
Can I use a different size pan if I don’t have an 8×8-inch one?
Absolutely! A 9×9-inch pan works if you prefer slightly thinner Mint Chocolate Brownies. Just check for doneness a few minutes earlier, as the thinner batter will bake faster.
How strong is the mint flavor?
The mint is refreshingly present but not overpowering. You can easily adjust it by adding a little more or less peppermint extract to the mint layer—taste the cream as you go and customize to your liking!
What’s the best way to get clean, tidy layers when slicing?
Chill your Mint Chocolate Brownies thoroughly after adding the ganache, and use a sharp knife dipped in hot water and wiped dry between slices. This will give you those bakery-worthy clean cuts every time.
Can these be made without food coloring?
Definitely. The food coloring is purely for that classic mint look and doesn’t affect the flavor. You’ll still have beautiful, delicious brownies even without the green hue.
Are these safe for people with nut allergies?
This recipe is nut-free as written, but always check your ingredients, especially the chocolate chips, for possible cross-contamination. If you need to be extra cautious, use brands labeled allergy-friendly.
Final Thoughts
I can’t wait for you to try these Mint Chocolate Brownies—they’re such a joyful treat to bake, share, and devour. With their trio of luscious layers and crowd-pleasing flavor, they promise to become an instant favorite in your dessert rotation. Let me know how yours turn out and if they disappeared as quickly in your house as they always do in mine!
Print
Mint Chocolate Brownies Recipe
- Total Time: 1 hour (including chilling)
- Yield: 16 brownies 1x
- Diet: Vegetarian
Description
Indulge in the perfect combination of rich chocolate and refreshing mint with these decadent Mint Chocolate Brownies. Layers of fudgy brownie, creamy mint filling, and smooth chocolate ganache come together in a delightful dessert that’s sure to impress.
Ingredients
Brownie Layer:
- 1/2 cup unsalted butter (melted)
- 1 cup granulated sugar
- 2 large eggs
- 1 teaspoon vanilla extract
- 1/3 cup unsweetened cocoa powder
- 1/2 cup all-purpose flour
- 1/4 teaspoon salt
- 1/4 teaspoon baking powder
Mint Layer:
- 2 tablespoons unsalted butter (softened)
- 1 1/4 cups powdered sugar
- 1–2 tablespoons milk
- 1/2 teaspoon peppermint extract
- Green food coloring (optional)
Chocolate Ganache Topping:
- 3/4 cup semi-sweet chocolate chips
- 2 tablespoons unsalted butter
Instructions
- Preheat the oven to 350°F and line an 8×8-inch baking pan with parchment paper.
- Make the brownies: Whisk together melted butter and sugar. Add eggs, vanilla, cocoa powder, flour, salt, and baking powder. Pour into the pan and bake.
- Prepare the mint layer: Beat butter, add powdered sugar, milk, peppermint extract, and food coloring. Spread over cooled brownies.
- Make the ganache: Melt chocolate chips and butter, then pour over the mint layer. Chill before slicing.
Notes
- Adjust peppermint extract for desired flavor intensity.
- For best slicing, fully chill brownies before cutting.
- Store in the fridge for up to 5 days or freeze for longer shelf life.
- Prep Time: 20 minutes
- Cook Time: 25 minutes
- Category: Dessert
- Method: Baking
- Cuisine: American
Nutrition
- Serving Size: 1 brownie
- Calories: 230
- Sugar: 22g
- Sodium: 85mg
- Fat: 12g
- Saturated Fat: 7g
- Unsaturated Fat: 4g
- Trans Fat: 0g
- Carbohydrates: 30g
- Fiber: 1g
- Protein: 2g
- Cholesterol: 35mg


