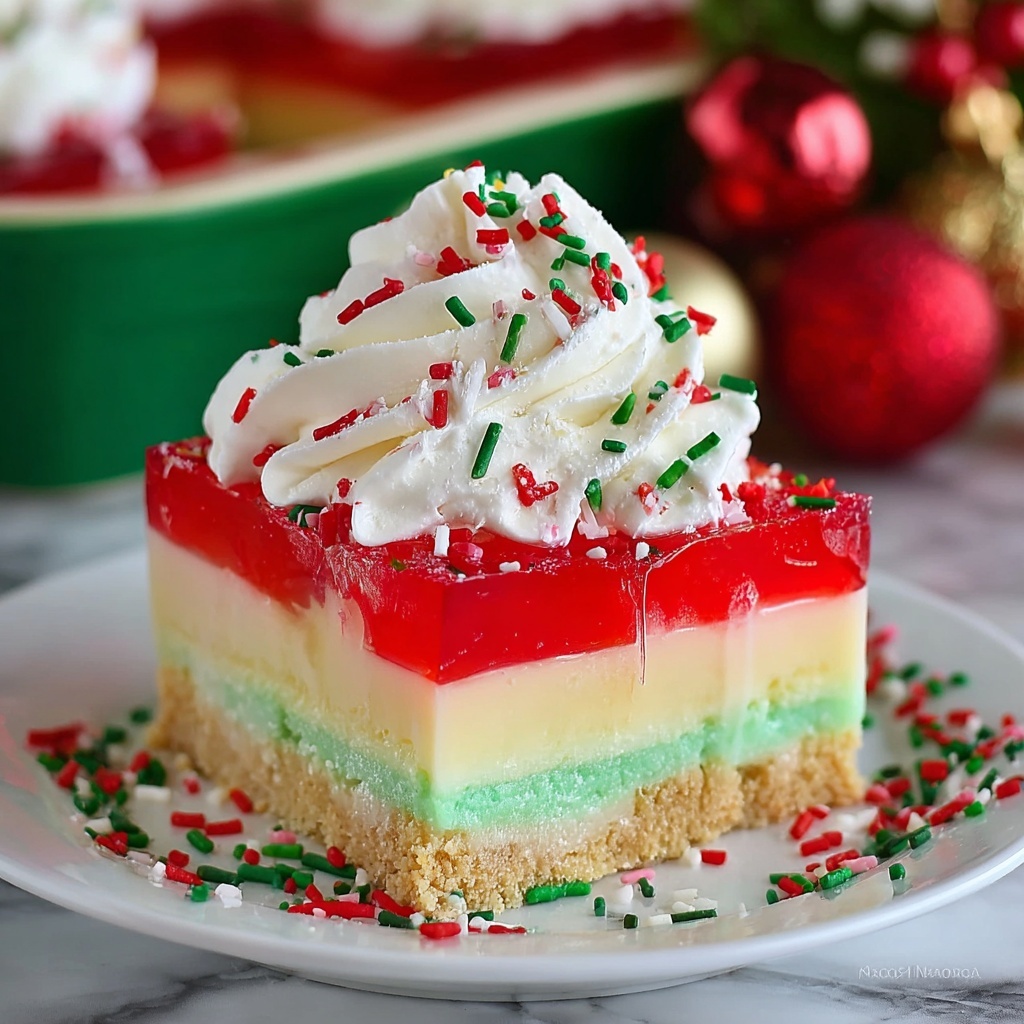
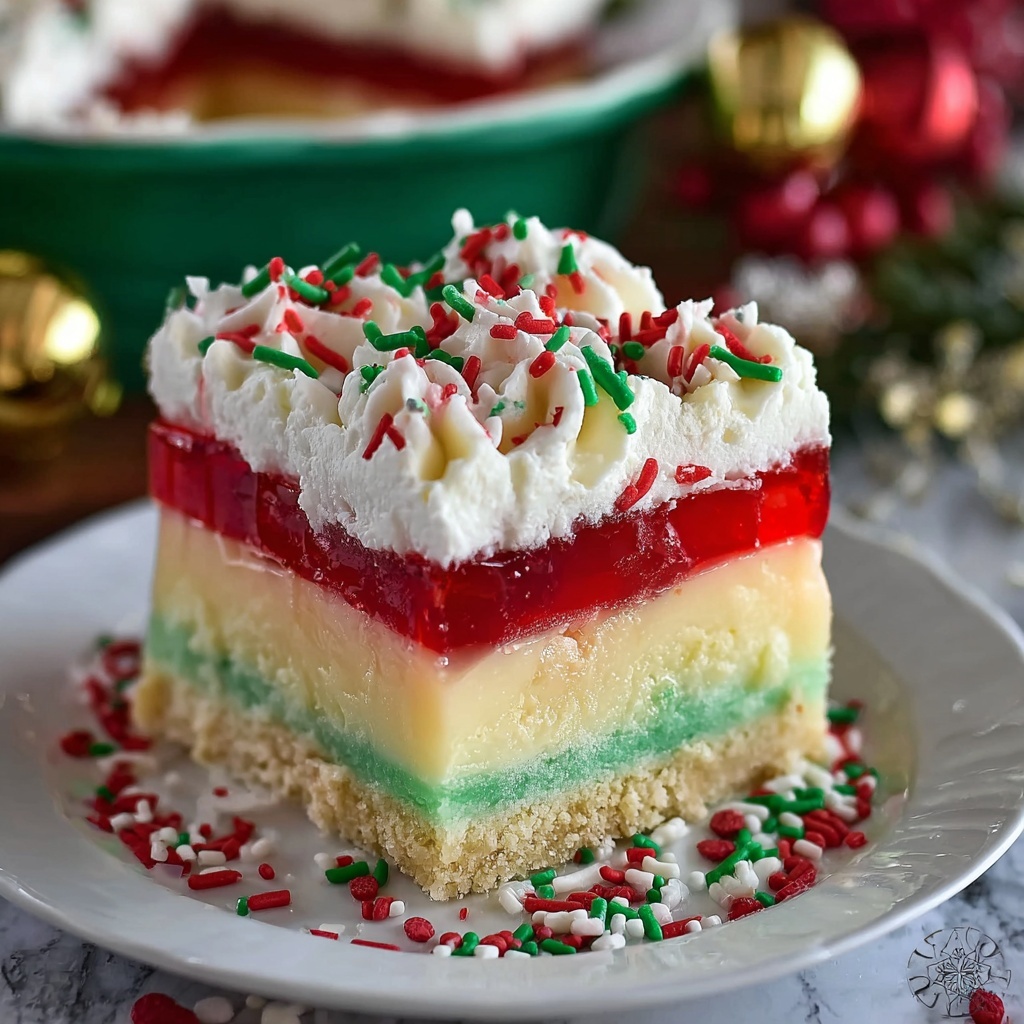
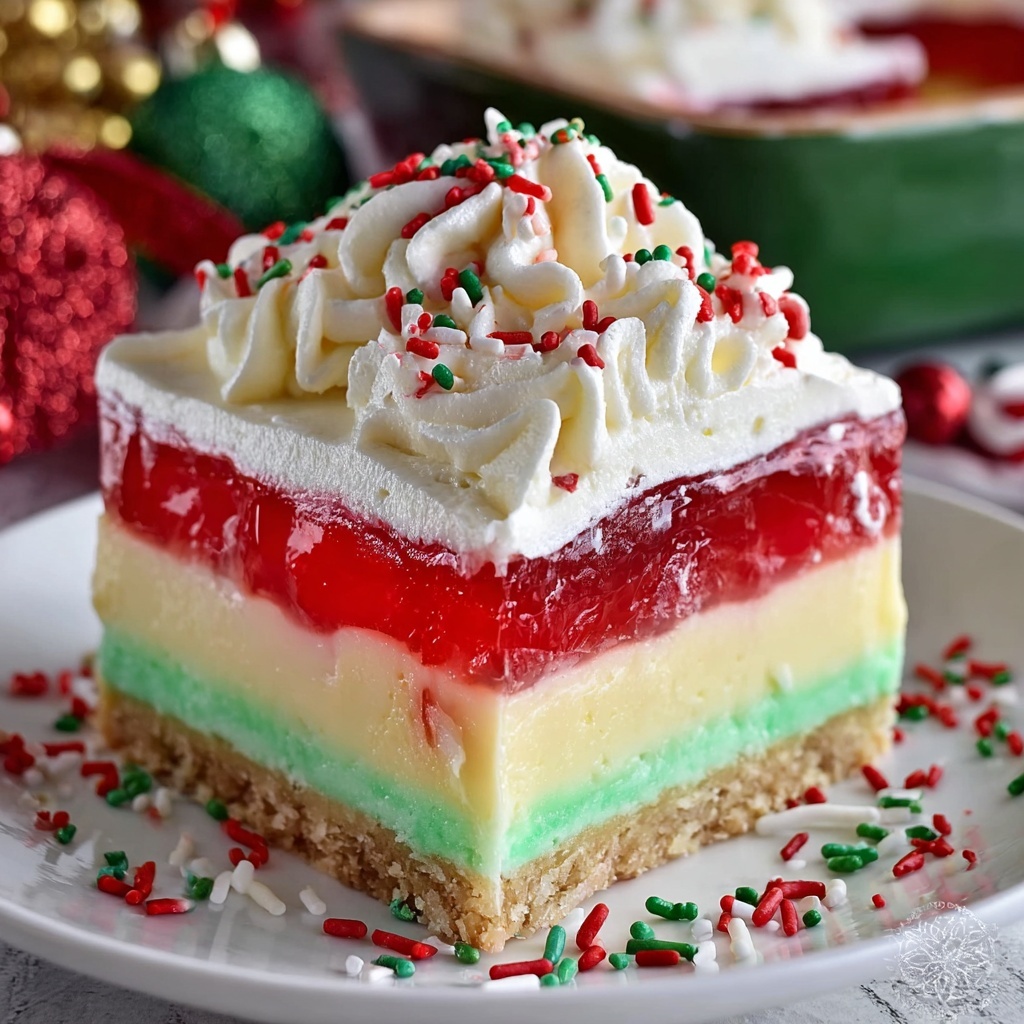
If you are looking for a festive dessert that is as fun to make as it is to eat, this Holiday-Inspired Poke Cake Recipe is a total game-changer. Imagine a moist white cake dotted with vibrant red and green gelatin that bursts with flavor in every bite, topped with fluffy whipped cream and a sprinkle of holiday cheer. It’s a crowd-pleaser with its eye-catching colors and delightful textures, perfect for warming hearts and brightening up any holiday table. Whether you’re hosting a party or just want a sweet treat to celebrate the season, this poke cake combines simplicity and whimsy to create a memorable festive dessert.
Ingredients You’ll Need
Getting ready to make this Holiday-Inspired Poke Cake Recipe is a breeze because it uses simple, pantry-friendly ingredients that come together for a magical result. Each item plays a vital role, from the base of a classic white cake to the colorful gelatin that pokes fun with flavor and flair, finished off with a luscious topping that’s light and creamy.
- 1 box white cake mix: The foundation of your cake, providing a soft and fluffy crumb that complements the gelatin perfectly.
- Ingredients listed on the cake box: Usually oil, eggs, and water—essential for bringing the cake mix to life.
- 1 teaspoon vanilla extract (optional): Adds a warm, rich depth of flavor that elevates the cake beyond the basics.
- 1 (3 oz) box red gelatin (e.g., cherry or strawberry): Brings a festive pop of red with fruity sweetness that shines through each poke.
- 1 (3 oz) box green gelatin (e.g., lime): Offers a tangy green contrast that’s both tart and refreshing.
- 2 cups boiling water (1 cup per gelatin flavor): Needed to dissolve the gelatin powder to perfection.
- 1 (8 oz) container whipped topping (e.g., Cool Whip), thawed: Creamy, airy topping to crown your cake with festive elegance.
- Holiday sprinkles, crushed candy canes, or other festive decorations: These add a final decorative flourish that makes every slice feel like a celebration.
How to Make Holiday-Inspired Poke Cake Recipe
Step 1: Bake the Perfect Cake
Start by preheating your oven to 350°F (175°C) and greasing a 9×13-inch baking dish to prevent sticking. Prepare the white cake mix according to the package instructions, and if you want to add a touch of extra warmth, stir in a teaspoon of vanilla extract. Pour the batter into your prepared dish and bake it for 25 to 30 minutes. You’ll know it’s done when a toothpick inserted in the center comes out clean. Then let the cake cool completely—this step is super important to ensure the gelatin doesn’t melt when added.
Step 2: Poke the Cake with Holiday Cheer
Once your cake is completely cooled, grab the handle of a wooden spoon or a skewer and poke holes about 1 inch apart all over the surface. This evenly spaced pattern lets the gelatin seep deeply for a burst of flavor in every bite. It’s also what gives the poke cake its signature look and texture.
Step 3: Prepare the Colorful Gelatin Filling
In two separate bowls, dissolve the red and green gelatin powders each with 1 cup of boiling water. Stir until completely dissolved with no granules left; the gelatin should be smooth and glossy. This step is key to getting that delightful, jiggly filling to set perfectly in the poke holes.
Step 4: Fill the Cake with Festive Gelatin
Carefully spoon or pour the red gelatin into half of the holes and the green gelatin into the other half. Go slowly to prevent the liquids from overflowing. The colors will seep into the cake, creating a beautiful mosaic of red and green on your holiday dessert.
Step 5: Chill to Set
Cover the filled cake with plastic wrap and refrigerate it for at least 2 hours. During this chilling period, the gelatin will set in its little pockets, giving your cake that fun, textured surprise that makes this Holiday-Inspired Poke Cake Recipe so irresistible.
Step 6: Add the Whipped Topping and Decorations
After your gelatin has set, spread the thawed whipped topping evenly over the entire cake. This soft white layer contrasts beautifully with the colorful gelatin below. Finally, sprinkle on holiday sprinkles, crushed candy canes, or any festive decorations you love to add sparkle and a little crunch. Now your dessert is ready to dazzle!
How to Serve Holiday-Inspired Poke Cake Recipe
Garnishes
To make your poke cake even more inviting, consider garnishing with festive touches like red and green sprinkles, crushed peppermint candy, or edible glitter. These toppings bring texture, flavor, and holiday sparkle that make each slice feel extra special and festive.
Side Dishes
This poke cake pairs beautifully with simple sides like vanilla ice cream or a scoop of sorbet. The cold, creamy contrast complements the gelatin-filled cake and adds a refreshing coolness to every bite, perfect for balancing out the sweetness and texture.
Creative Ways to Present
For a real showstopper, serve your Holiday-Inspired Poke Cake Recipe on a decorative holiday platter or cut it into festive shapes using cookie cutters. Layering it in clear glass trifle dishes to showcase the red and green gelatin pockets is another stunning way to present this dessert. Little touches like these can turn your delightful treat into a centerpiece your friends and family will remember.
Make Ahead and Storage
Storing Leftovers
If you happen to have leftovers (which might be tough!), store them in an airtight container in the refrigerator. The poke cake will stay fresh and moist for up to 3 days, making it a convenient make-ahead dessert for holiday gatherings.
Freezing
This cake is best enjoyed fresh and chilled, so freezing is not recommended for maintaining the gelatin’s texture. Freezing can cause the gelatin to break down and become watery upon thawing, which would affect the beautiful poke effect you worked hard to create.
Reheating
Since this is a chilled dessert, reheating is not necessary or suggested. Keep it cold and serve straight from the fridge to enjoy the contrast between the fluffy cake, the smooth gelatin bites, and the creamy topping.
FAQs
Can I use other gelatin flavors in this Holiday-Inspired Poke Cake Recipe?
Absolutely! Feel free to experiment with your favorite red and green gelatin flavors or even try other holiday-inspired colors to match your theme. Just keep the flavors complementary to the cake for the best taste.
Is it necessary to use white cake mix?
While white cake is classic and provides a neutral base that lets the gelatin colors pop, you can use yellow or vanilla cake mixes if you prefer. Just keep in mind that chocolate or very dark cakes won’t show the gelatin colors as vibrantly.
Can I make this recipe gluten-free?
Yes! Using a gluten-free white cake mix and ensuring your gelatin and whipped topping are gluten-free will make this dessert safe for gluten-sensitive guests without sacrificing flavor or texture.
What can I use instead of whipped topping?
If you prefer homemade options, you can whip up heavy cream with a bit of powdered sugar and vanilla extract until stiff peaks form. This fresh whipped cream adds a lovely richness and pairs beautifully with the gelatin.
How far in advance can I make this cake?
You can prepare the entire cake—including chilling and topping—a day before your event. Just keep it refrigerated in a covered dish to maintain freshness and texture for that perfect holiday presentation.
Final Thoughts
This Holiday-Inspired Poke Cake Recipe is such a joyful way to celebrate the season with a delicious and colorful dessert that everyone will love. It’s straightforward enough for bakers of all levels and stunning enough to be the star of any holiday table. So gather your ingredients, invite your loved ones to help, and get ready to create a dessert that not only tastes amazing but spreads holiday cheer one bite at a time!
Print
Holiday-Inspired Poke Cake Recipe
- Prep Time: 20 minutes
- Cook Time: 30 minutes
- Total Time: 2 hours 50 minutes
- Yield: 12 servings
- Category: Dessert
- Method: Baking
- Cuisine: American
Description
This festive Holiday-Inspired Poke Cake is a delightful twist on a classic white cake with vibrant red and green gelatin filling, topped with whipped cream and decorated with seasonal sprinkles and crushed candy canes. Perfect for holiday gatherings, this cake combines simple baking with a colorful, flavorful gelatin surprise inside, offering a refreshing and visually appealing dessert.
Ingredients
Cake
- 1 box white cake mix (plus ingredients listed on the box)
- 1 teaspoon vanilla extract (optional)
Gelatin Filling
- 1 (3 oz) box red gelatin (cherry or strawberry flavor)
- 1 (3 oz) box green gelatin (lime flavor)
- 2 cups boiling water (1 cup per gelatin flavor)
Topping and Decoration
- 1 (8 oz) container whipped topping (e.g., Cool Whip), thawed
- Holiday sprinkles, crushed candy canes, or other festive decorations
Instructions
- Bake the Cake: Preheat your oven to 350°F (175°C) and grease a 9×13-inch baking dish thoroughly to prevent sticking. Prepare the cake batter according to the package instructions; if desired, add a teaspoon of vanilla extract for enhanced flavor. Pour the batter into the prepared dish and bake for 25-30 minutes until a toothpick inserted in the center comes out clean. Allow the cake to cool completely before proceeding.
- Poke the Cake: Once cooled, use the handle of a wooden spoon or a skewer to poke holes about 1 inch apart across the entire surface of the cake. This step creates pockets that will hold the gelatin mixture for a colorful surprise inside the cake.
- Prepare Gelatin Filling: In two separate bowls, dissolve one box of red gelatin in 1 cup of boiling water and one box of green gelatin in another cup of boiling water. Stir each until fully dissolved and smooth.
- Fill the Holes with Gelatin: Carefully spoon or pour the red gelatin into half of the holes evenly and then fill the remaining holes with the green gelatin. Be gentle to avoid spilling the gelatin outside the holes.
- Chill the Cake: Cover the baking dish loosely with plastic wrap or foil and place it in the refrigerator. Chill for at least 2 hours to allow the gelatin to fully set within the cake holes, giving the cake its festive colors and flavors.
- Add Topping: Once the gelatin has set, spread the thawed whipped topping evenly over the entire surface of the cake to add a creamy texture and sweetness.
- Garnish: Decorate the cake with holiday sprinkles, crushed candy canes, or any other festive decorations to enhance its holiday appeal and add texture.
- Serve: Slice the cake into servings and serve chilled for the best flavor and refreshing texture. This cake is ideal for holiday parties and celebrations.
Notes
- Ensure the cake is completely cooled before poking holes to prevent crumbling.
- You can use any flavors of gelatin to fit your holiday theme or personal preferences.
- For a stronger vanilla flavor, add vanilla extract directly to the cake batter.
- Use a plastic knife to slice the cake to prevent disturbing the gelatin pockets.
- The cake should be stored refrigerated and is best enjoyed within 2 days for optimal freshness.
- Substitute whipped topping with homemade whipped cream for a fresher option.


