
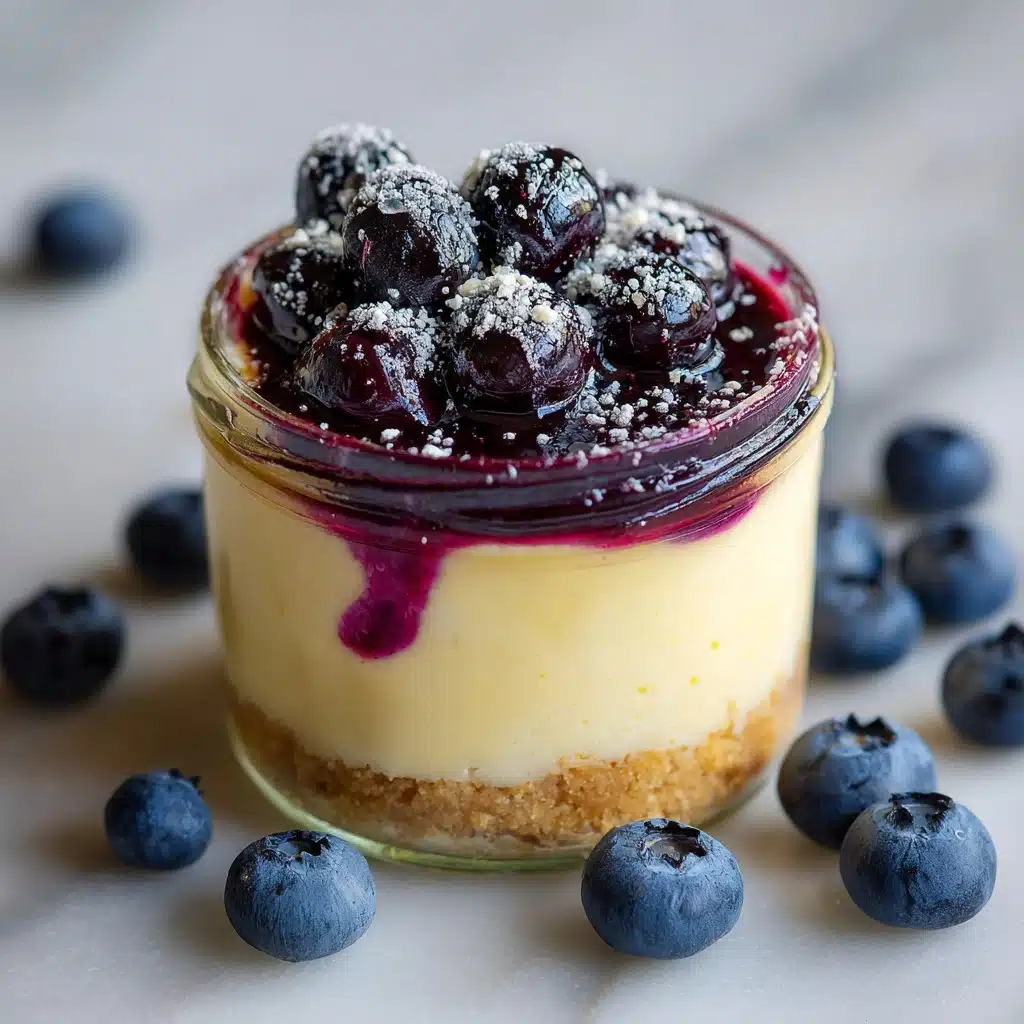
If you’re searching for a treat that satisfies your sweet tooth and packs a big boost of nutrition, look no further than these High Protein Cheesecake Jars. Imagine rich, velvety cheesecake filling layered over a buttery graham cracker crust, all topped with jewel-bright berries — and every creamy spoonful comes with a wholesome punch of protein. They’re no-bake, super easy to whip up, and irresistibly cute served in jars. These are the kind of desserts that make weeknights feel like a mini celebration, minus the guilt.
Ingredients You’ll Need
The magic of these High Protein Cheesecake Jars is in their simple, wholesome ingredients. Each one does its part: creamy for richness, crunchy for contrast, naturally sweet for guilt-free indulgence, and, of course, that vital protein boost. Let’s break down exactly what you’ll need and why:
- Nonfat Greek Yogurt: Gives the cheesecake filling its extra protein and signature tangy creaminess.
- Reduced-Fat Cream Cheese (softened): The classic cheesecake ingredient, made a little lighter but just as decadent in texture.
- Honey or Maple Syrup: Natural sweetness with a subtle floral or earthy note, blending perfectly into the creamy base.
- Vanilla Extract: Adds warmth and aroma, enhancing the dessert’s overall flavor.
- Vanilla or Unflavored Protein Powder: The powerhouse ingredient that transforms this treat into a true high-protein snack.
- Graham Cracker Crumbs: Bring a classic cheesecake crust flavor and a bit of crunchy texture to each jar.
- Melted Coconut Oil or Butter: Binds the crumbs together and infuses them with rich, buttery goodness.
- Fresh Berries or Fruit Topping of Choice: Bright, fresh fruit balances the creamy filling with tart, juicy bursts and vibrant color.
How to Make High Protein Cheesecake Jars
Step 1: Make the Cheesecake Filling
Start by grabbing a mixing bowl and combining the Greek yogurt, softened cream cheese, honey (or maple syrup), vanilla extract, and your protein powder. With an electric hand mixer or a sturdy whisk, blend everything until the mixture is silky-smooth and perfectly creamy. This lush base is the heart of your High Protein Cheesecake Jars — it should taste lightly sweet, tangy, and rich all at once.
Step 2: Prepare the Crust
In a small bowl, toss together the graham cracker crumbs and your melted coconut oil or butter. Mix until the crumbs have soaked up the fat, turning into something that looks and feels like wet sand. This step is what gives your jars their familiar, satisfying cheesecake crunch at the bottom.
Step 3: Assemble the Jars
Grab your small glass jars or cups. Spoon about 2 tablespoons of the graham mixture into the bottom of each one, then gently press it down with the back of a spoon to form a neat crust. Next, evenly divide your creamy cheesecake filling among the jars, smoothing it over the crust for a pretty layered effect. This part is where those High Protein Cheesecake Jars start to look too good to resist!
Step 4: Add the Fruit Topping
Time for the finishing touch! Sprinkle a generous amount of fresh berries or your favorite fruit topping over each jar. Whether you go with classic strawberries, tangy blueberries, or juicy diced peaches, fruit adds the perfect burst of freshness to balance the richness below.
Step 5: Chill and Serve
Patience pays off here! Pop the jars into your fridge for at least an hour so the filling can set and flavors meld together. Chilling will bring out the very best cheesecake texture, making each spoonful taste like a decadent (but healthy) treat.
How to Serve High Protein Cheesecake Jars

Garnishes
The right garnishes can take your High Protein Cheesecake Jars from tasty to spectacular. Try a sprinkle of lemon zest, a drizzle of extra honey, a few fresh mint leaves, or a dusting of cinnamon. Each little touch adds a flash of color or a new layer of flavor.
Side Dishes
Pair these jars with a hot cup of coffee or a refreshing iced tea for the perfect afternoon pick-me-up. If you’re feeling extra fancy, a few pieces of crunchy biscotti or a bowl of lightly salted almonds on the side make for a fun, complete snack plate.
Creative Ways to Present
Presentation matters, especially if you’re sharing these at a brunch or special gathering. For effortless wow-factor, layer the cheesecake and fruit in clear jars or stemless wine glasses. Tiny mason jars look adorable at picnics, while shot glasses work brilliantly for bite-sized, party-ready High Protein Cheesecake Jars.
Make Ahead and Storage
Storing Leftovers
One of the best things about High Protein Cheesecake Jars is how well they keep. Just cover each jar with a lid or plastic wrap and store them in the refrigerator for up to four days. The crust will stay pleasantly moist, and the filling gets creamier with time.
Freezing
If you want to make a big batch ahead of time, these jars are freezer-friendly! Seal each jar tightly, then freeze for up to a month. To enjoy, let them thaw overnight in the fridge — bonus points if you add fresh fruit just before serving for the best texture and flavor.
Reheating
No reheating needed (that’s the beauty of a no-bake). If frozen, just give your jars ample time to thaw in the fridge. Avoid microwaving, as that can make the filling watery and the crust soggy.
FAQs
Can I make High Protein Cheesecake Jars dairy-free?
Absolutely! Simply swap in your favorite dairy-free Greek-style yogurt and cream cheese. There are also solid plant-based protein powders on the market to keep the protein level high.
What’s the best protein powder to use?
Stick with vanilla or unflavored protein powder so it won’t overpower the cheesecake flavor. Whey, plant-based, or even collagen protein all work nicely — just pick one you already love.
How can I make these jars lower in sugar?
Try using stevia, monk fruit sweetener, or a sugar-free syrup in place of the honey or maple syrup. The flavor will still be delicious and the texture just as creamy!
Can I use other toppings besides fresh berries?
Definitely! Sliced bananas, stewed fruits, or a swirl of nut butter or fruit compote are all fantastic alternatives. Let your cravings and what’s in-season guide you.
How far in advance can I assemble High Protein Cheesecake Jars?
You can easily prep them two to three days ahead of time. The graham crust softens a bit but still tastes fabulous, and the jars are perfect for grab-and-go snacks or stress-free entertaining.
Final Thoughts
Once you try these High Protein Cheesecake Jars, you’ll find yourself reaching for this easy recipe time and again — they’re pure comfort in a jar, with a nutritious twist. Give them a whirl and discover how effortlessly healthy dessert can fit into everyday life. Happy spooning, friends!
Print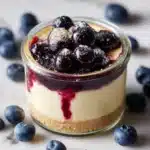
High Protein Cheesecake Jars Recipe
- Total Time: 10 minutes (plus chilling)
- Yield: 4 jars 1x
- Diet: Non-Vegetarian
Description
Indulge in a guilt-free treat with these High Protein Cheesecake Jars. Creamy and decadent, yet packed with protein, these no-bake cheesecakes are the perfect balance of health and indulgence.
Ingredients
Cheesecake Filling:
- 1 cup nonfat Greek yogurt
- 8 ounces reduced-fat cream cheese (softened)
- 2 tablespoons honey or maple syrup
- 1 teaspoon vanilla extract
- 1/4 cup vanilla or unflavored protein powder
Graham Cracker Crust:
- 1/2 cup graham cracker crumbs
- 2 tablespoons melted coconut oil or butter
Topping:
- 1 cup fresh berries or fruit topping of choice
Instructions
- Cheesecake Filling: In a mixing bowl, blend the Greek yogurt, cream cheese, honey, vanilla extract, and protein powder until smooth and creamy.
- Graham Cracker Crust: In a small bowl, mix the graham cracker crumbs with melted coconut oil or butter until it resembles wet sand. Spoon 2 tablespoons of the crumb mixture into each jar and press down gently.
- Assembly: Divide the cheesecake filling among the jars, spooning it over the crust layer. Top with fresh berries or fruit topping.
- Chill: Refrigerate the jars for at least 1 hour before serving for the best texture.
Notes
- You can make these ahead and store in the fridge for up to 4 days.
- For a dairy-free version, use dairy-free yogurt and cream cheese.
- Use stevia or monk fruit instead of honey for a lower sugar option.
- Prep Time: 10 minutes
- Cook Time: 0 minutes
- Category: Dessert
- Method: No-Bake
- Cuisine: American
Nutrition
- Serving Size: 1 jar
- Calories: 260
- Sugar: 9g
- Sodium: 220mg
- Fat: 14g
- Saturated Fat: 8g
- Unsaturated Fat: 5g
- Trans Fat: 0g
- Carbohydrates: 18g
- Fiber: 1g
- Protein: 16g
- Cholesterol: 30mg


