
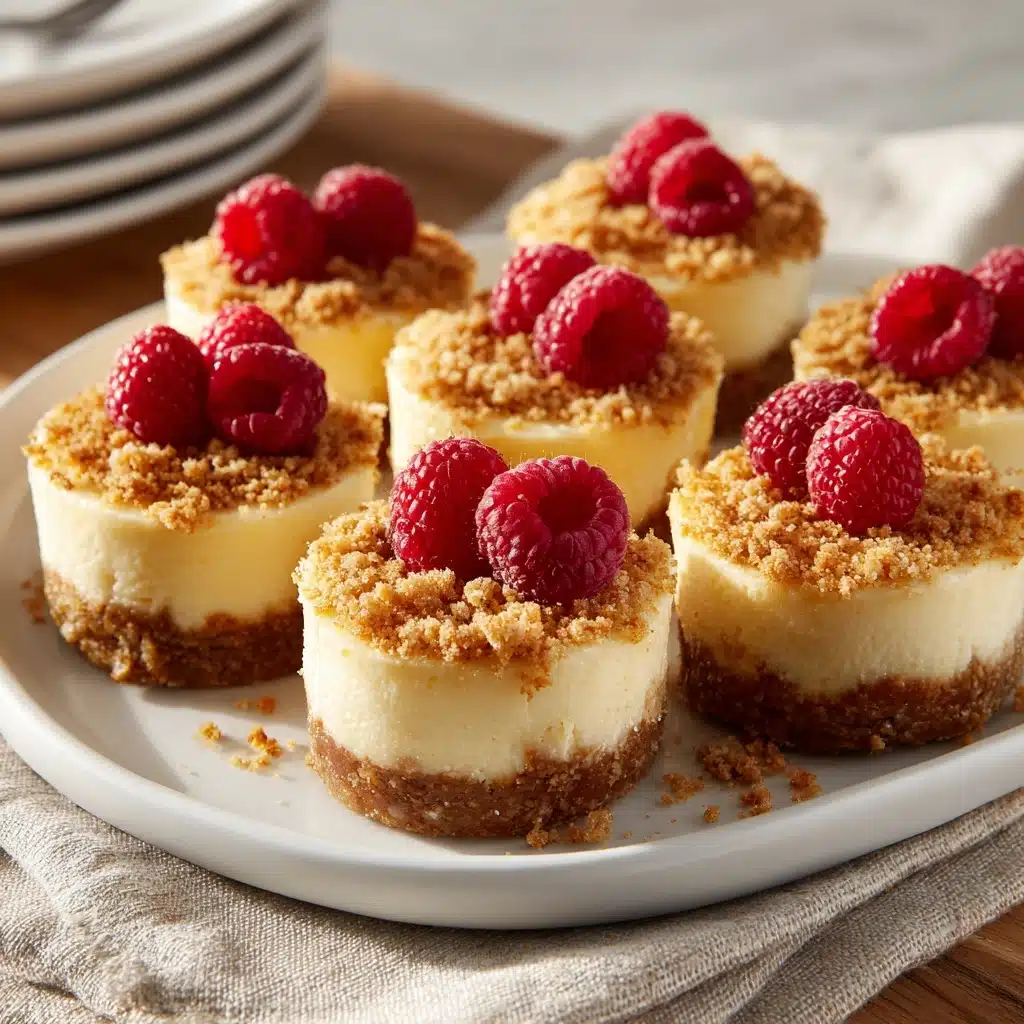
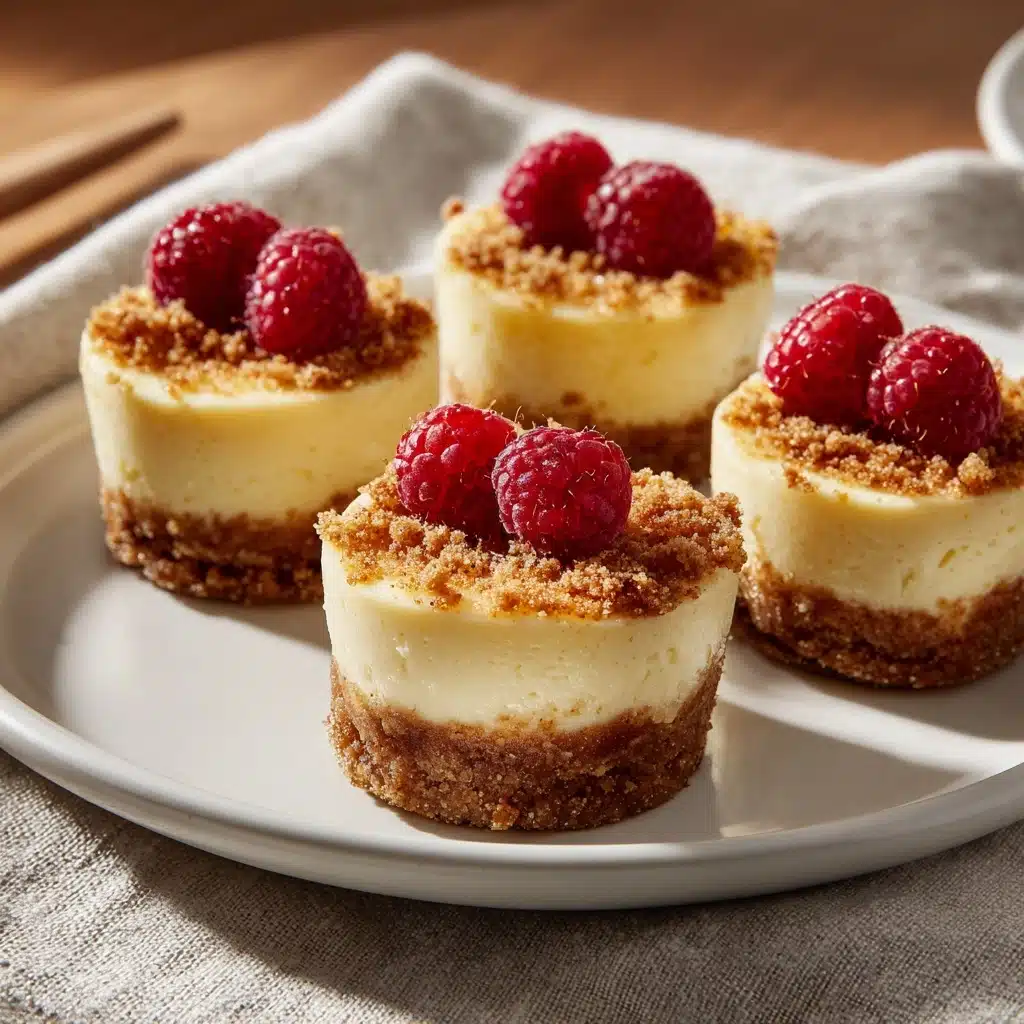
If you’ve ever wished for a perfectly creamy, tangy dessert that just happens to be gluten-free, let me introduce you to Gluten-Free Mini Cheesecakes. These adorable individual treats are a game-changer for parties, potlucks, or any night when you want to treat yourself without the fuss of a full-sized cake. Each bite delivers that classic cheesecake experience: a buttery crust, luscious filling, and endless topping possibilities. Trust me, you’ll want to make a double batch!
Ingredients You’ll Need
The beauty of these Gluten-Free Mini Cheesecakes is in their simplicity. Every ingredient is essential, working together to create just the right balance of flavor, texture, and color. You probably have most of these in your kitchen already!
- Gluten-free graham cracker crumbs: Gives the crust that classic flavor and a welcome crunch, minus the gluten.
- Melted butter: Helps bind the crust, adding richness and a golden hue.
- Granulated sugar: Sweetens both the crust and the creamy cheesecake filling, making each bite irresistible.
- Cream cheese (softened): The star of the show! Smooth, rich, and perfectly creamy when brought to room temperature before mixing.
- Large eggs: Bind the filling together while adding a lovely, custard-like texture.
- Sour cream: Adds a subtle tang and extra velvetiness to the cheesecake.
- Vanilla extract: Balances and enhances the sweetness, lending warm, aromatic notes.
- Pinch of salt: Just a touch makes all the flavors pop and keeps things from getting too sweet.
How to Make Gluten-Free Mini Cheesecakes
Step 1: Prepare Your Baking Equipment
Start by preheating your oven to 325°F (165°C). Line a standard 12-cup muffin tin with paper liners—this keeps the cheesecakes from sticking and makes removing them a breeze. While the oven heats, gather and measure all your ingredients for seamless assembly.
Step 2: Make the Gluten-Free Crust
In a small bowl, combine the gluten-free graham cracker crumbs, melted butter, and 1 tablespoon of granulated sugar. Mix until everything looks like wet sand. Spoon about 1 tablespoon of this mixture into each muffin cup, pressing it down firmly to form an even crust. Use a small glass or the back of a spoon for really tight, compact crusts.
Step 3: Mix the Cheesecake Filling
In a large bowl, beat the softened cream cheese until it’s completely smooth and lump-free. Add the remaining 1/2 cup of granulated sugar, beating until the mixture becomes light and airy. Next, crack in the eggs one at a time, mixing well after each addition. Fold in the sour cream, vanilla extract, and a pinch of salt, mixing just until everything is combined—overmixing can make the cheesecakes dense.
Step 4: Fill and Bake
Spoon the cheesecake filling over the prepared crusts, dividing it evenly among the cups and filling each one nearly to the top. Pop the muffin tin into the oven and bake for 18 to 20 minutes, or until the centers are just set and no longer wobbly. Once done, turn off the oven and let the mini cheesecakes rest inside for 5 minutes; this gentle cool-down prevents cracking.
Step 5: Cool and Chill
Transfer the muffin tin to a wire rack and let your Gluten-Free Mini Cheesecakes cool completely. Once cooled, move them to the fridge for at least 2 hours (overnight is even better). This chilling time is the secret to getting that perfectly creamy, rich texture every time.
How to Serve Gluten-Free Mini Cheesecakes
Garnishes
Now comes the fun part—toppings! A fresh berry medley, a dollop of sweetened whipped cream, or a spoonful of fruit compote all play perfectly with the creamy base. For a glamorous touch, try a drizzle of chocolate sauce or a sprinkle of lemon zest for added freshness.
Side Dishes
If you’re serving these Gluten-Free Mini Cheesecakes at a gathering, round things out with a colorful fruit platter or a crisp green salad. These accompaniments balance the richness of the cheesecake and make your dessert spread both inviting and satisfying.
Creative Ways to Present
For parties, arrange the mini cheesecakes on a tiered dessert stand or vintage platter—absolutely adorable! You can also place each one in a decorative cupcake wrapper or top with tiny edible flowers for a whimsical look. If you’re packing lunchboxes, nestle them in reusable containers for a surprise sweet treat.
Make Ahead and Storage
Storing Leftovers
Simply cover any leftover Gluten-Free Mini Cheesecakes with plastic wrap or store in an airtight container in the fridge. They’ll stay fresh, creamy, and delicious for up to 4 days, making them the ideal make-ahead dessert for busy weeks or last-minute cravings.
Freezing
To freeze, place the completely cooled cheesecakes on a tray and freeze until solid. Then, transfer them to a zip-top bag or airtight container. When a craving strikes, just thaw in the fridge overnight. They’ll taste just as wonderful as the day you baked them.
Reheating
While Gluten-Free Mini Cheesecakes are best enjoyed chilled or at room temperature, if you prefer a slightly softer center, let them sit out for 15–20 minutes before serving. Avoid microwaving, as it can affect the texture.
FAQs
Can I use dairy-free cream cheese for this recipe?
Absolutely! Substitute your favorite dairy-free cream cheese and sour cream alternatives, and you’ll still achieve a rich and creamy cheesecake. Just make sure they’re labeled gluten-free if necessary.
Do I have to use graham cracker crumbs for the crust?
Nope! Try gluten-free ginger snaps, vanilla wafer cookies, or even gluten-free chocolate cookies for a different twist. Just pulse them into fine crumbs and use the same amounts listed.
How do I prevent the cheesecakes from cracking?
Mix the batter until just combined and avoid overbaking. The extra step of letting them rest in the turned-off oven also helps keep the tops smooth and crack-free.
Can I make these Gluten-Free Mini Cheesecakes ahead of time?
Yes! In fact, they taste even better after chilling overnight. Just prepare as directed, chill, and enjoy when you’re ready to serve.
What are some easy topping ideas for Gluten-Free Mini Cheesecakes?
Keep it simple with fresh berries, a dusting of powdered sugar, or a swirl of chocolate or caramel sauce. You can also pile on diced mango, pomegranate seeds, or even toasted coconut for a fun twist.
Final Thoughts
Once you take your first bite into these Gluten-Free Mini Cheesecakes, you’ll see why they’ve become a favorite in my home—and I bet they’ll soon be a favorite in yours too. They’re proof that gluten-free baking can deliver all the creaminess and joy of classic cheesecake, with zero fuss and tons of flavor. Give them a try, and don’t be surprised if they disappear in a flash!
Print
Gluten-Free Mini Cheesecakes Recipe
- Total Time: 2 hours 35 minutes (including chilling)
- Yield: 12 mini cheesecakes 1x
- Diet: Non-Vegetarian
Description
Indulge in these delicious Gluten-Free Mini Cheesecakes that are perfect for any occasion. Creamy, perfectly sweet, and easy to make, these individual cheesecake bites will impress your guests and satisfy your sweet tooth.
Ingredients
For the Crust:
- 1 cup gluten-free graham cracker crumbs
- 3 tablespoons melted butter
- 1 tablespoon granulated sugar
For the Filling:
- 16 oz cream cheese (softened)
- 1/2 cup granulated sugar
- 2 large eggs
- 1/3 cup sour cream
- 1 teaspoon vanilla extract
- pinch of salt
Instructions
- Preheat Oven: Preheat oven to 325°F (165°C) and line a standard 12-cup muffin tin with paper liners.
- Prepare Crust: In a small bowl, mix the gluten-free graham cracker crumbs, melted butter, and sugar. Press mixture into each muffin cup to form the crust.
- Make Filling: In a large bowl, beat cream cheese until smooth. Add sugar, eggs, sour cream, vanilla extract, and salt. Mix until combined.
- Fill Muffin Cups: Spoon filling evenly over crusts, filling each cup nearly to the top.
- Bake: Bake for 18–20 minutes until set. Let cool in the oven, then refrigerate for at least 2 hours.
Notes
- Top with fresh berries, fruit compote, or whipped cream before serving.
- Can be made a day ahead and stored covered in the fridge.
- Prep Time: 15 minutes
- Cook Time: 20 minutes
- Category: Dessert
- Method: Baking
- Cuisine: American
Nutrition
- Serving Size: 1 mini cheesecake
- Calories: 220
- Sugar: 13g
- Sodium: 140mg
- Fat: 16g
- Saturated Fat: 9g
- Unsaturated Fat: 6g
- Trans Fat: 0g
- Carbohydrates: 16g
- Fiber: 0g
- Protein: 4g
- Cholesterol: 60mg


