
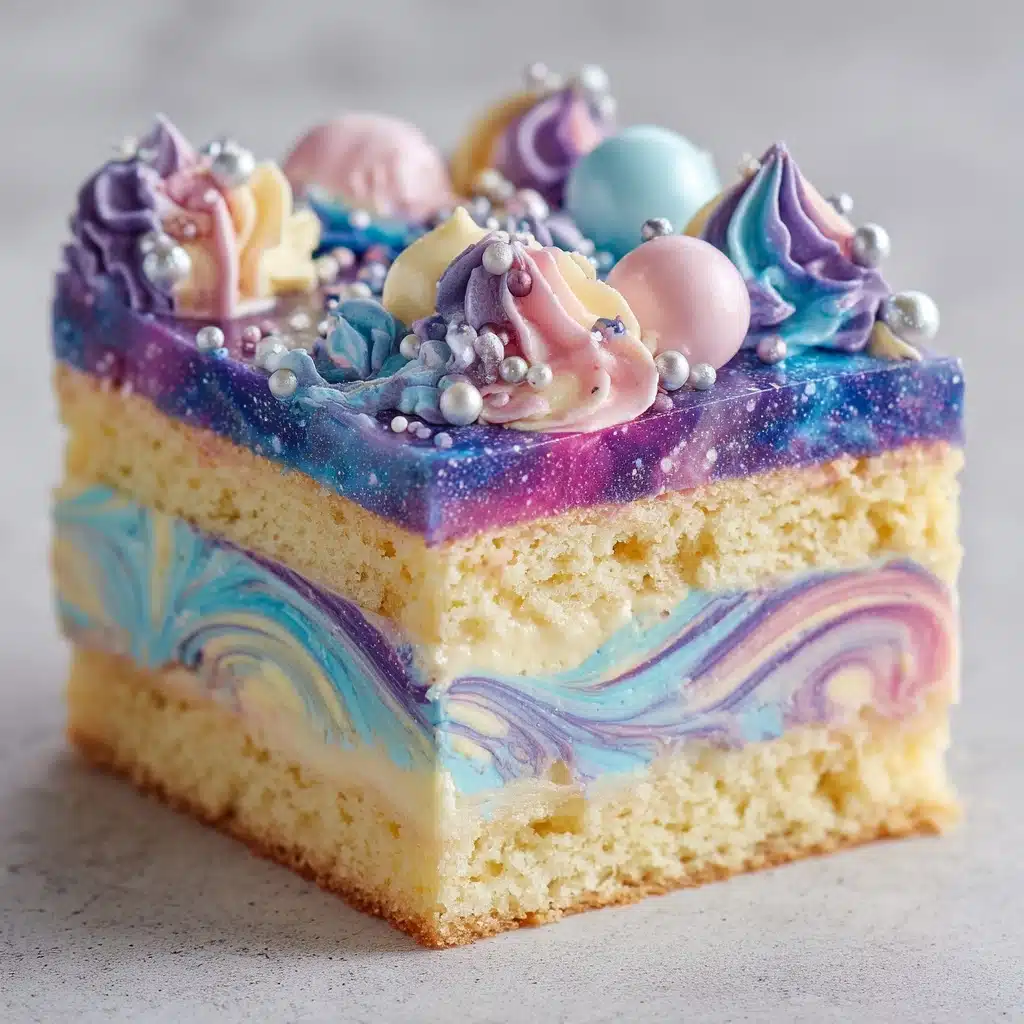
If you’ve ever wished for a dessert that packs the irresistible crunch of Galaxy Ripple chocolate with the creamy decadence of ice cream, let me introduce you to a true frozen showstopper: Galaxy Ripple Ice Cream Cake. This layered masterpiece weaves together velvety chocolate and vanilla ice creams, buttery biscuit crunch, swirls of melted chocolate, and generous ripples of Galaxy bar magic—all in every dreamy spoonful. Get ready to leave your guests clamoring for seconds, because this no-bake sensation might just redefine what dessert means at your table!
Ingredients You’ll Need
It’s amazing how just a handful of well-chosen staples can create something so extraordinary. These ingredients are the unsung heroes—each one playing a vital role in the taste, texture, and visual flair that make Galaxy Ripple Ice Cream Cake unforgettable.
- Vanilla ice cream (1.5 liters, softened): Acts as a sweet, creamy layer and keeps everything dreamy and light.
- Chocolate ice cream (1.5 liters, softened): Brings rich cocoa notes that play perfectly with Galaxy bar pieces.
- Galaxy Ripple bars (200g, chopped): The absolute star—these flakes melt, fold, and crunch through every bite for out-of-this-world flavor.
- Chocolate digestive biscuits (200g, crushed): Create the perfect biscuit base for structure and a pop of chocolate flavor in each slice.
- Unsalted butter (100g, melted): Binds the biscuit crust, adding richness and keeping the base firm and sliceable.
- Heavy cream (150ml): Fluffed into a cloud, this sits atop the cake as a billowy finish.
- Milk chocolate (100g, melted): Drizzled for a glossy, decadent topping (and extra chocolate, which never hurts!).
- Vanilla extract (1 teaspoon): Adds beautiful depth to the whipped cream.
- Pinch of salt: Enhances all the flavors, keeping things balanced and bright.
How to Make Galaxy Ripple Ice Cream Cake
Step 1: Build the Biscuit Base
Start by lining a 9-inch springform pan with parchment paper to guarantee easy removal later (because nobody wants a stuck cake!). Mix your crushed chocolate digestives and melted butter in a bowl until everything looks like chocolatey sand. Press this mixture into the pan, creating an even, compact crust—this will be your delicious foundation. Pop it in the freezer for 15 minutes to set up while you prep the next layers.
Step 2: Layer the Chocolate Ice Cream
While your base chills, combine the softened chocolate ice cream with half of the chopped Galaxy Ripple bars. Give it a gentle mix—enough to marble in those ripples without crushing all that flakiness. Spread this mixture onto your chilled crust, smoothing it out with a spatula. Freeze again for 30 minutes to firm up that indulgent chocolate layer.
Step 3: Add the Vanilla Galaxy Ripple Swirl
Mix the remaining Galaxy Ripple pieces into your vanilla ice cream, letting their caramel chocolate flecks peek through. Spread this creamy vanilla mixture evenly over your set chocolate ice cream. At this point, patience is a virtue: freeze the cake for 1 to 2 hours, or until everything is wonderfully firm and ready for its crowning glory.
Step 4: Whip Up the Creamy Topping
In a clean bowl, whip the heavy cream with the vanilla extract and a pinch of salt until you have soft, billowy peaks. This cloudlike topping adds an irresistible lightness. Gently spread or pipe your whipped cream over the ice cream cake, covering it like a soft blanket.
Step 5: Drizzle, Decorate, and Final Freeze
The last flourish is pure fun: drizzle that smooth melted milk chocolate generously across the top. Sprinkle over any extra Galaxy Ripple shavings, if you’d like extra drama. Freeze the entire cake for at least 2 more hours, or overnight if you can wait. When ready to serve, release it from the pan, slice, and prepare for oohs and aahs!
How to Serve Galaxy Ripple Ice Cream Cake

Garnishes
A classic garnish for this cake is extra Galaxy Ripple shavings or curls of chocolate—simply use a vegetable peeler on a cold Galaxy bar. A dusting of cocoa powder or a scattering of mini chocolate pearls can also make your Galaxy Ripple Ice Cream Cake shine! To really wow, you could even dot the whipped cream with edible stars or a few fresh berries for a pop of color.
Side Dishes
This decadent cake is a dessert superstar, but it pairs beautifully with simple side accompaniments. Try a small bowl of mixed berries to cut through the richness, or offer a shot of espresso or cold brew for grown-up gatherings. If you want even more luxury, serve with a scoop of fresh whipped cream or a drizzle of warm salted caramel sauce.
Creative Ways to Present
For a showy twist, slice your Galaxy Ripple Ice Cream Cake into wedges and plate each with a smear of melted chocolate and a fizzy spun sugar “galaxy.” Individual mini ice cream cakes are adorable for parties, or you could make parfaits in tall glasses, layering all the elements so every spoonful holds a hint of each component. Let your creativity orbit freely!
Make Ahead and Storage
Storing Leftovers
If you’re lucky enough to have leftovers, store slices of Galaxy Ripple Ice Cream Cake in an airtight container or wrap tightly with plastic wrap. Return them to the freezer promptly to keep the layers neat and the texture fresh. The crumb base might soften a little after a few days, but the flavors only get better!
Freezing
This cake is a make-ahead dream. Galaxy Ripple Ice Cream Cake can be made up to three days in advance, giving you one less thing to worry about before entertaining. To keep it pristine, cover the cake tightly so it doesn’t absorb any freezer aromas, and decorate just before serving if you prefer the ultimate crisply-finished look.
Reheating
No reheating required—just the opposite! When ready to serve, let the cake sit at room temperature for 10 to 15 minutes to soften slightly for easier slicing. A hot, dry knife makes perfect slices. Then it’s straight to the table for the ultimate chilled treat.
FAQs
Can I make Galaxy Ripple Ice Cream Cake with other ice cream flavors?
Absolutely! While chocolate and vanilla are a classic duo, you can experiment with caramel, coffee, or even hazelnut gelato. The main thing is that the ice cream layers compliment the chocolatey Galaxy Ripple bars and biscuit base for that signature taste.
What’s the best way to chop Galaxy Ripple bars for mixing?
Pop the bars in the fridge first so they’re firm and less likely to crumble. Use a sharp knife to slice across the ripples into little flakes and chunky shards—these will melt a bit into the ice cream, creating dreamy swirls in every layer.
Can this recipe be made gluten-free?
Yes! Simply replace the chocolate digestive biscuits with gluten-free chocolate cookies. Double-check your chosen Galaxy Ripple bars for gluten and you’ll have a stunning gluten-free dessert with every bit of the original charm.
How do I prevent the layers from blending together?
Patience is your friend. Make sure you freeze each layer until it’s firm before adding the next. Spread the ice cream gently and evenly using a spatula, and freeze longer than you think if your kitchen is warm—this helps keep those beautiful, distinct stripes.
What are some fun ways to personalize my Galaxy Ripple Ice Cream Cake?
Try sprinkling chopped hazelnuts or adding a swirl of caramel sauce between the layers; even a pinch of sea salt over the top can lift the flavors beautifully. Kids love a scatter of mini marshmallows or colorful sprinkles on top for a party-perfect finish!
Final Thoughts
If you’re looking for a guaranteed crowd-pleaser that’s both playful and sophisticated, you can’t go wrong with Galaxy Ripple Ice Cream Cake. It’s as fun to make as it is to eat, and just one slice is sure to win over anyone who adores chocolate and creamy, chilled desserts. Don’t wait for a special occasion—gather your ingredients and treat yourself to a little homemade magic today!
Print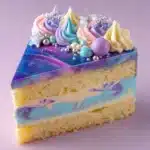
Galaxy Ripple Ice Cream Cake Recipe
- Total Time: 3 hours 25 minutes
- Yield: 10 servings 1x
- Diet: Vegetarian
Description
Indulge in the creamy, chocolatey goodness of a Galaxy Ripple Ice Cream Cake. This no-bake dessert features layers of vanilla and chocolate ice cream studded with Galaxy Ripple bars, all nestled on a buttery biscuit crust and topped with whipped cream and milk chocolate drizzle.
Ingredients
- 200g chocolate digestive biscuits, crushed
- 100g unsalted butter, melted
- 1.5 liters vanilla ice cream, softened
- 1.5 liters chocolate ice cream, softened
- 200g Galaxy Ripple bars, chopped
- 150ml heavy cream
- 100g milk chocolate, melted
- 1 teaspoon vanilla extract
- Pinch of salt
For the Crust:
For the Cake:
For Topping:
Instructions
- Prepare the Crust: Line a 9-inch springform pan with parchment paper. Mix crushed biscuits with melted butter and press into pan. Freeze for 15 minutes.
- Layer the Chocolate Ice Cream: Mix softened chocolate ice cream with half of the Galaxy Ripple bars. Spread over the chilled crust. Freeze for 30 minutes.
- Layer the Vanilla Ice Cream: Mix softened vanilla ice cream with remaining Galaxy Ripple. Spread over chocolate layer. Freeze for 1–2 hours.
- Top with Whipped Cream: Whip cream with vanilla and salt until soft peaks form. Spread over cake. Drizzle with melted chocolate and Galaxy Ripple shavings. Freeze for at least 2 hours.
- Serve: Slice and enjoy!
Notes
- Soften ice cream for easier spreading.
- Add chopped hazelnuts for a nutty twist.
- Cake can be made ahead and stored in the freezer.
- Prep Time: 25 minutes
- Cook Time: 0 minutes
- Category: Dessert
- Method: Freezing
- Cuisine: British
Nutrition
- Serving Size: 1 slice
- Calories: 480
- Sugar: 35g
- Sodium: 160mg
- Fat: 30g
- Saturated Fat: 18g
- Unsaturated Fat: 9g
- Trans Fat: 0.3g
- Carbohydrates: 45g
- Fiber: 1g
- Protein: 5g
- Cholesterol: 65mg


