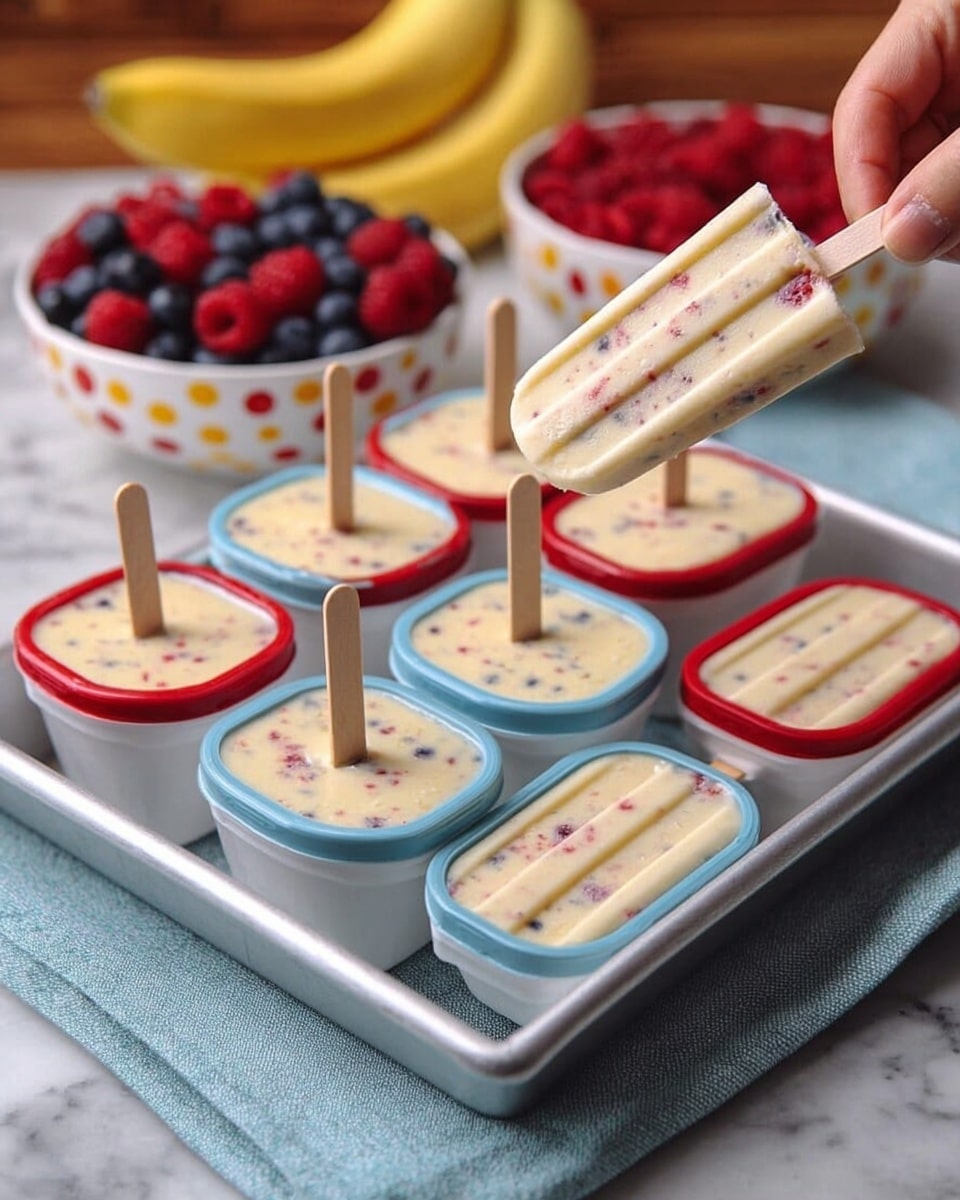
If you’re searching for a refreshing, wholesome, and delightfully simple dessert, look no further than Frozen Yogurt Pops: The Ultimate Guide to Homemade Treats Recipe. These icy bites combine creamy Greek yogurt with vibrant fresh or frozen fruit, lightly sweetened and perfectly frozen to deliver a treat that’s both nourishing and fun. Whether it’s a hot summer day or you just need a guilt-free snack to brighten your afternoon, these pops are easy to customize, irresistibly delicious, and guaranteed to become a regular in your freezer.
Ingredients You’ll Need
The magic of this recipe lies in its simple, wholesome ingredients that come together perfectly to create texture, flavor, and the beautiful colors of these frozen pops. Each component plays a crucial role to ensure every bite is creamy, sweet, and satisfying.
- 4 cups plain Greek yogurt: The base of your pops that brings creaminess and protein-packed goodness.
- 1 cup fresh or frozen fruit: Adds natural sweetness, color, and bursts of flavor – berries, mango, and peaches work great.
- ½ cup honey or maple syrup: Sweetener to balance the tartness of yogurt, adjustable to your taste buds.
- 1 teaspoon vanilla extract (optional): Gives a lovely aromatic depth that complements the fruit perfectly.
- ¼ cup milk or additional yogurt: Used if the mixture needs thinning for easy pouring into molds.
- Pinch of salt: Enhances all the natural flavors and keeps the sweetness balanced.
- Optional toppings: Granola, chocolate chips, shredded coconut, or chopped nuts add fun textures and extra flavor.
How to Make Frozen Yogurt Pops: The Ultimate Guide to Homemade Treats Recipe
Step 1: Prepare the Fruit
Start by washing and chopping fresh fruit into small bits, or if you’re using frozen fruit, no need to thaw – you can use it right away. For a smoother texture, puree about half the fruit and mix it back with the rest, giving you a nice balance of creamy and chunky fruit pops in every bite.
Step 2: Make the Yogurt Mixture
In a large bowl, whisk together the Greek yogurt, honey or maple syrup, and vanilla extract if you’re using it. This blend should be smooth and sweet, forming the luscious creamy base for your frozen treats.
Step 3: Adjust Sweetness
Give your mixture a quick taste test and tweak the sweetness if needed by adding a little more honey or maple syrup, making sure it suits your personal preference perfectly.
Step 4: Thin the Mixture if Needed
If the yogurt mixture feels too thick to pour easily, gradually add milk or more yogurt, one tablespoon at a time, until the perfect pouring consistency is achieved without losing creaminess.
Step 5: Add Salt
A pinch of salt might seem small, but it truly works wonders in enhancing all the sweetness and fruit flavors in your pops, so don’t skip this step.
Step 6: Combine Fruit and Yogurt
Gently fold the prepared fruit into the yogurt mixture, taking care to distribute fruit evenly without mashing it down – this preserves tasty bursts of flavor and color in every pop.
Step 7: Fill Popsicle Molds
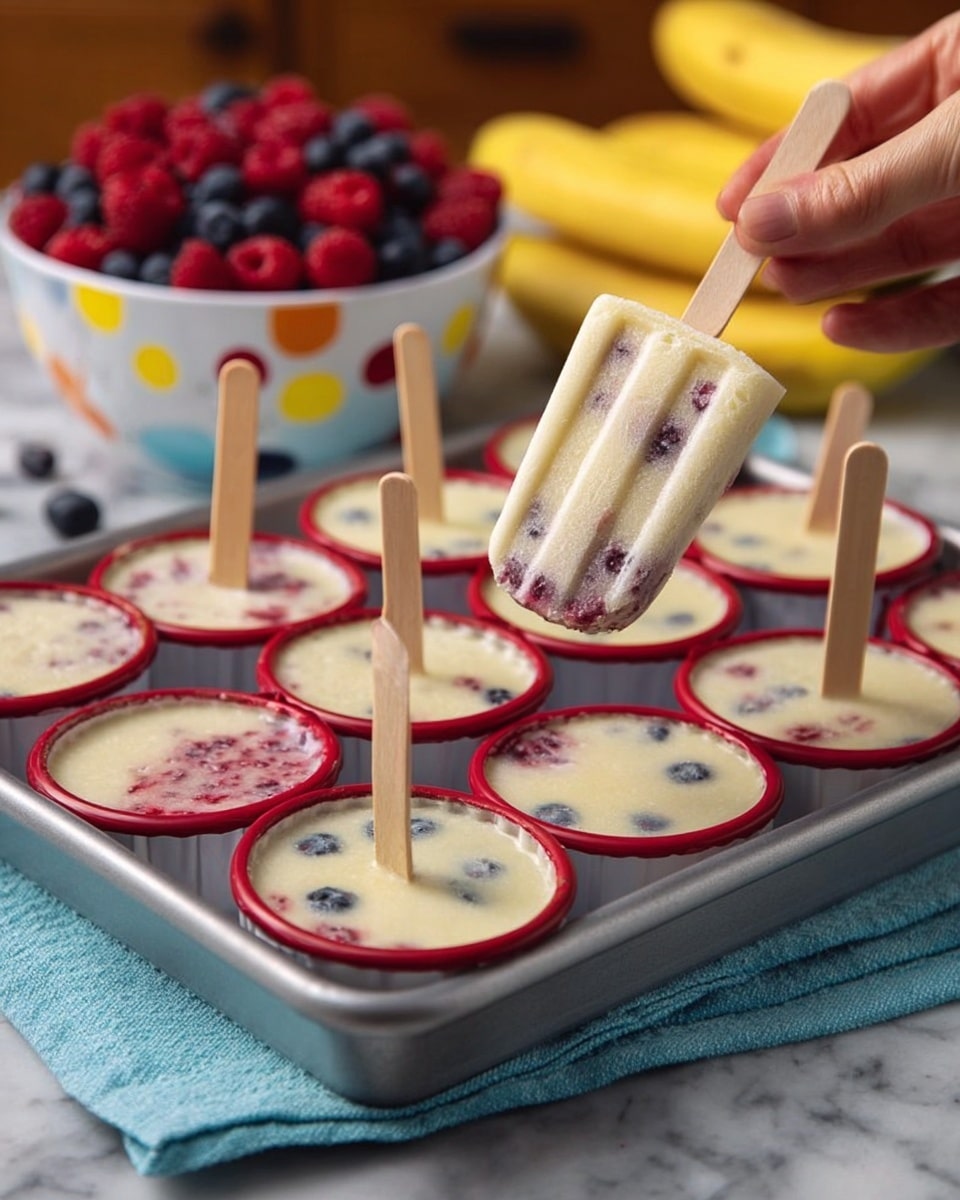
Pour the combined yogurt and fruit into your molds, leaving a bit of space at the top because the mixture will expand slightly as it freezes.
Step 8: Add Toppings (Optional)
Now’s a great time to sprinkle on any crunchy or sweet toppings like granola, mini chocolate chips, shredded coconut, or chopped nuts to add texture and extra yum.
Step 9: Insert Popsicle Sticks
Place the popsicle sticks in the center of each mold, ensuring they stand upright and will serve as easy handles when frozen.
Step 10: Freeze
Pop your molds into the freezer and let them set for at least 4 to 6 hours, ideally overnight, until they’re solid and ready to satisfy your craving.
Step 11: Remove from Molds
To easily release your pops, briefly run the molds under warm water for a few seconds, then gently pull on the sticks to remove them cleanly without breaking.
Step 12: Enjoy
Serve your Frozen Yogurt Pops immediately or store them in an airtight container in the freezer for whenever you need a cool, delicious snack.
How to Serve Frozen Yogurt Pops: The Ultimate Guide to Homemade Treats Recipe
Garnishes
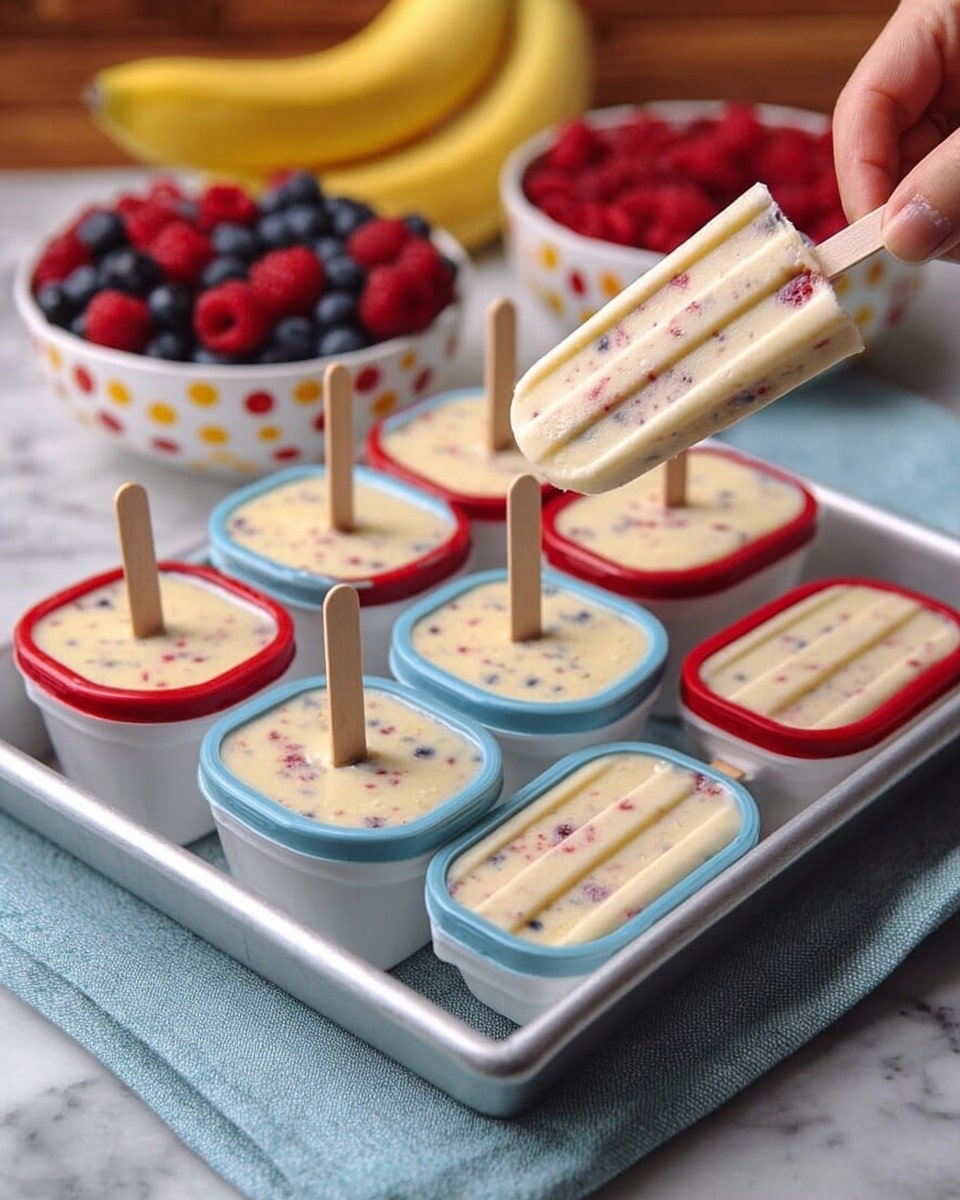
Adding garnishes can turn these simple pops into an eye-catching and even more irresistible delight. Try rolling the pops in finely chopped nuts or shredded coconut just after pouring, or sprinkle granola and mini chocolate chips on top for crunchy pops that double as a snack and dessert.
Side Dishes
These frozen treats pair beautifully with a fresh fruit salad or a light summer smoothie for a complete cool-down combo. For kids’ parties, serve alongside colorful fruit skewers or a small bowl of fresh berries to keep the theme bright and fresh.
Creative Ways to Present
Try using clear popsicle molds for a picture-perfect view of the colorful fruit inside, or switch up your popsicle sticks with fun shapes or reusable silicone ones for a playful touch. You can even layer different fruit purees in the molds to create beautiful ombré or striped effects that wow at any gathering.
Make Ahead and Storage
Storing Leftovers
If you happen to have leftovers or want to prepare in advance, simply keep your frozen yogurt pops in an airtight container or zipped freezer bag to prevent freezer burn and maintain their fresh flavor and texture.
Freezing
The recipe freezes exceptionally well, allowing you to prepare these pops ahead of a busy week. Just be sure your freezer stays consistently at 0°F to keep the pops firm and ready whenever you want them.
Reheating
Frozen yogurt pops are best enjoyed cold, so reheating is not recommended. If you want them softer quickly, just leave them at room temperature for a few minutes rather than trying to microwave or warm them.
FAQs
Can I use flavored yogurt instead of plain Greek yogurt?
You can, but keep in mind flavored yogurts often contain added sugars that might make the pops too sweet or affect the balance of flavors. Plain Greek yogurt gives you full control over sweetness and tang.
What fruits work best for these frozen yogurt pops?
Berries like strawberries, blueberries, and raspberries are fantastic, as are tropical fruits like mango and peaches. Frozen fruit works well too, especially for a smooth texture or when fresh options aren’t available.
Can I make these dairy-free?
Absolutely! Substitute Greek yogurt with coconut or almond milk yogurt, and use a plant-based milk to thin the mixture if needed. It will slightly change the flavor but still be delicious.
How do I prevent ice crystals from forming in the pops?
Using Greek yogurt helps keep the texture creamy. Also, blending fruit purees in the mixture and avoiding too much liquid helps. Adding a small amount of sweetener and salt also reduces ice crystallization.
How long can I store Frozen Yogurt Pops in the freezer?
They stay best when eaten within 1 to 2 weeks. Beyond that, they may start to lose flavor and develop freezer burn, so for peak freshness, enjoy them sooner rather than later.
Final Thoughts
I can’t recommend enough giving Frozen Yogurt Pops: The Ultimate Guide to Homemade Treats Recipe a try – it’s one of those recipes that feels like a little moment of joy in your day. They’re simple, nourishing, endlessly customizable, and absolutely perfect for cooling off or just treating yourself to something wholesome. Your freezer is going to love you for keeping these pops stocked and ready to brighten any day!
Print
Frozen Yogurt Pops: The Ultimate Guide to Homemade Treats Recipe
- Total Time: 4 hours 15 minutes
- Yield: 8 servings 1x
- Diet: Low Fat
Description
Discover the joy of making refreshing and healthy Frozen Yogurt Pops at home with this ultimate guide. Combining creamy Greek yogurt with fresh or frozen fruit and natural sweeteners, these popsicles are easy to prepare, customizable with your favorite toppings, and perfect for a guilt-free summer treat or dessert.
Ingredients
Main Ingredients
- 4 cups plain Greek yogurt (full-fat or non-fat)
- 1 cup fresh or frozen fruit (berries, mango, peaches, etc.)
- ½ cup honey or maple syrup (adjust to taste)
- 1 teaspoon vanilla extract (optional)
- ¼ cup milk or yogurt (if needed, to thin the mixture)
- Pinch of salt
Optional Toppings
- Granola
- Chocolate chips
- Shredded coconut
- Chopped nuts
Instructions
- Prepare the Fruit: Wash and chop fresh fruit into small pieces. If using frozen fruit, use directly from frozen. Puree half of the fruit for a smoother texture (optional). Combine all prepared fruit in a bowl.
- Make the Yogurt Mixture: In a large bowl, combine Greek yogurt, honey (or maple syrup), and vanilla extract (if using). Mix until smooth.
- Adjust Sweetness: Taste and add more honey or maple syrup to reach desired sweetness.
- Thin the Mixture (if needed): If too thick, add milk or yogurt, a tablespoon at a time, until pourable.
- Add Salt: Add a pinch of salt to enhance the sweetness.
- Combine Fruit and Yogurt: Gently fold the prepared fruit into the yogurt mixture until evenly distributed.
- Fill Popsicle Molds: Pour the yogurt and fruit mixture into popsicle molds, leaving a little space at the top.
- Add Toppings (optional): Sprinkle toppings like granola, chocolate chips, or nuts over the filled molds.
- Insert Popsicle Sticks: Insert popsicle sticks into the center of each mold.
- Freeze: Place the molds in the freezer and freeze for at least 4-6 hours, or preferably overnight, until completely frozen solid.
- Remove from Molds: Run the popsicle molds under warm water for a few seconds to loosen the pops. Gently pull on the popsicle sticks to remove the pops.
- Enjoy: Serve immediately or store in the freezer.
Notes
- For a smoother texture, puree half of the fruit before mixing.
- Adjust the amount of sweetener based on the sweetness of your fruit and personal preference.
- Use full-fat yogurt for creamier pops or non-fat for a lighter option.
- Add a tablespoon of milk or yogurt if the mixture is too thick to ease pouring.
- Optional toppings add texture and flavor but can be omitted for a simpler treat.
- Freeze popsicles overnight for best results and firmer texture.
- Running molds under warm water briefly helps to remove popsicles easily.
- Prep Time: 15 minutes
- Cook Time: 4 hours 0 minutes (freezing time)
- Category: Dessert
- Method: Freezing
- Cuisine: American
