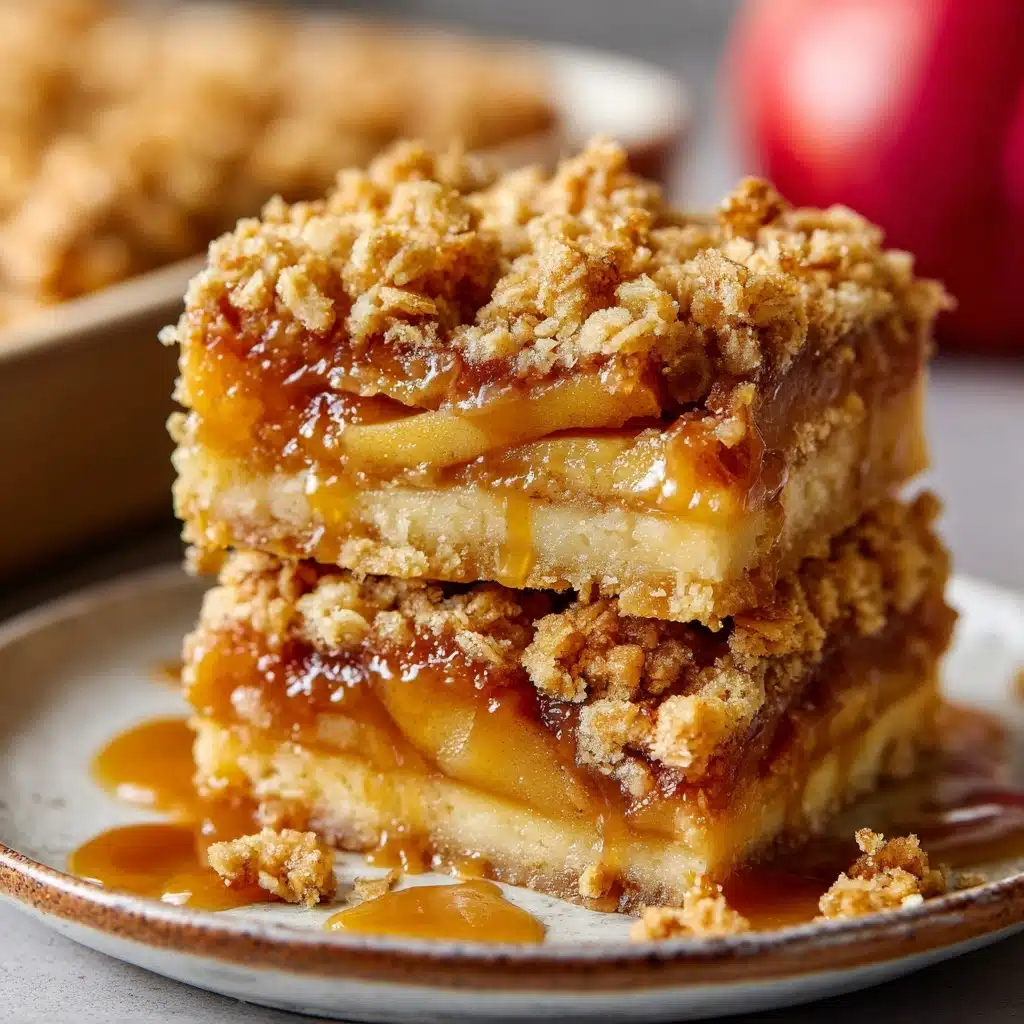
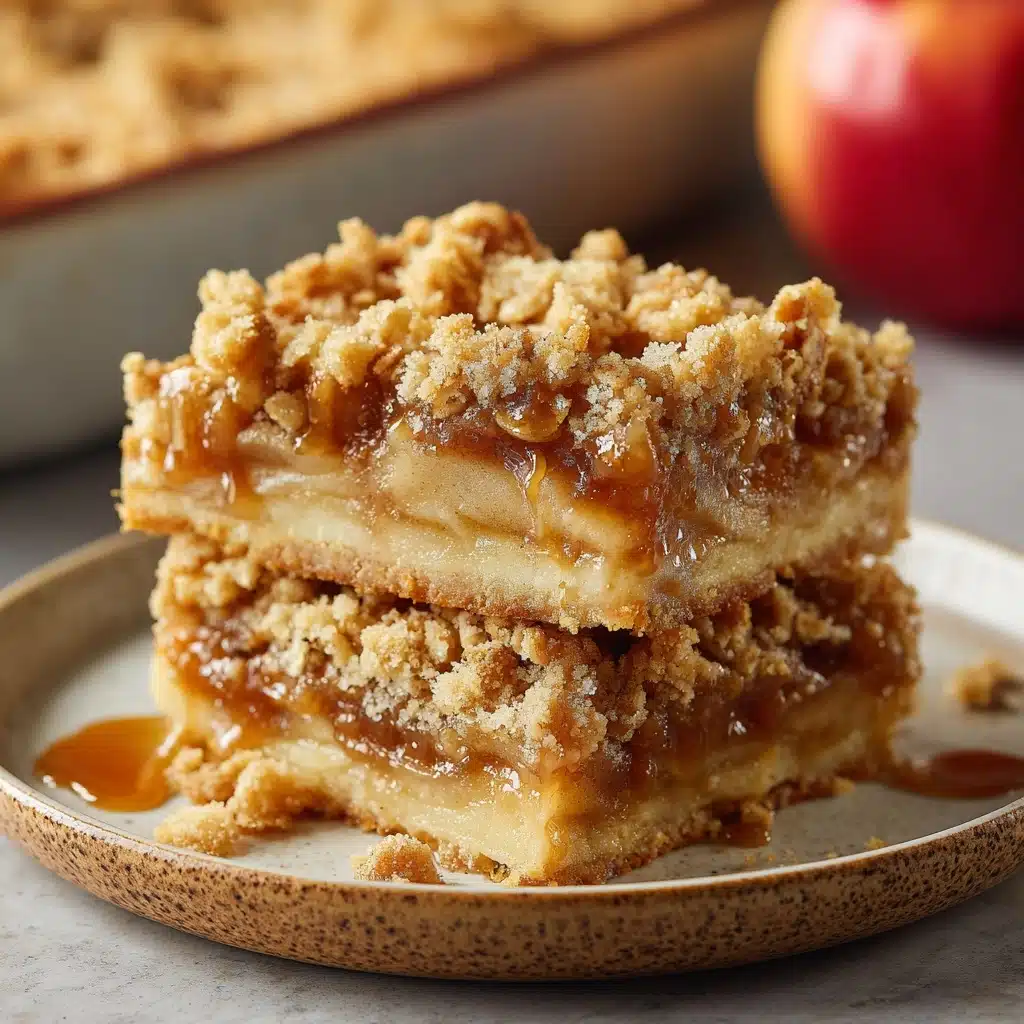
If you’re craving a cozy, crowd-pleasing dessert that combines the nostalgia of classic apple pie with the ease of a handheld treat, Apple Pie Bars are about to become your new obsession. Imagine tender cinnamon-kissed apples nestled between buttery layers of crumbly crust, all crowned with a sweet vanilla glaze. These bars are everything you want from an apple dessert—delicious, practical, and utterly irresistible for family gatherings, lunchboxes, or a well-deserved afternoon pick-me-up. Apple Pie Bars are fall comfort at its very finest, but I promise you’ll want to bake them all year long!
Ingredients You’ll Need
What makes Apple Pie Bars so wonderful is how a handful of everyday ingredients can create layers of rich flavor and perfect texture. Each component works its magic to deliver that classic pie taste in a convenient bar form.
- All-purpose flour: The backbone of both the crust and crumble, keeping things tender and sturdy.
- Granulated sugar: Adds a subtle sweetness that enhances the apples without overpowering them.
- Salt: A pinch brings out all the other flavors and keeps the dessert from tasting flat.
- Cold unsalted butter (cubed): The secret to those irresistible crumbly layers—cold butter creates a perfect, delicate texture.
- Large egg: Helps bind the dough so your bars slice cleanly and hold together.
- Medium apples (peeled, cored, and thinly sliced): The star of Apple Pie Bars! Use a mix of tart and sweet apples for a well-rounded flavor.
- Brown sugar: Brings warmth and a touch of caramel, making the apple layer extra inviting.
- Ground cinnamon: No apple pie bar is complete without this classic spice—cozy, fragrant, and comforting.
- Ground nutmeg: Just a hint deepens the flavor profile and adds depth.
- Lemon juice: Balances the sweetness and keeps apples bright and flavorful.
- Cornstarch: Thickens the apple filling ever so slightly so it sets up perfectly.
- Vanilla extract: Infuses the filling with a mellow, sweet aroma that ties everything together.
- Powdered sugar: The base for the glaze, adding a gentle sweetness on top.
- Milk (for glaze): Thins the powdered sugar to the perfect drizzling consistency.
How to Make Apple Pie Bars
Step 1: Prepare Your Pan and Preheat the Oven
Start by preheating your oven to 350°F (175°C). Line a 9×13-inch baking dish with parchment paper, making sure there’s some overhang on the sides—this simple trick will make it so much easier to lift out your Apple Pie Bars later. A well-lined pan means perfect bars every time!
Step 2: Mix the Crust and Crumble Topping
Grab a large bowl and mix together the all-purpose flour, granulated sugar, and salt. Add your cold, cubed butter and, using a pastry cutter or your fingertips, work it in until the mixture forms pea-sized crumbs. Stir in the egg until your dough just starts to come together—don’t overmix. Press two-thirds of this mixture firmly and evenly into the bottom of your prepared pan to create a thick, buttery base.
Step 3: Toss the Apple Filling
In a separate bowl, combine your sliced apples with brown sugar, cinnamon, nutmeg, lemon juice, cornstarch, and vanilla extract. Gently toss everything together until the apples are evenly coated in all that spiced, sweet goodness. This step ensures that every bite of the filling is packed with flavor and perfectly tender when baked.
Step 4: Layer and Top
Spread the apple mixture as evenly as you can over your pressed crust. Then, take the remaining dough and crumble it in generous handfuls over the top of the apples. You want little peaks and valleys—these become beautifully golden as they bake, adding delicious texture to your Apple Pie Bars.
Step 5: Bake to Golden Perfection
Slide the pan into your preheated oven and bake for 45 to 50 minutes. You’ll know they’re done when the top is beautifully golden and you can see bubbling around the edges. Your kitchen should smell absolutely divine by now! Once baked, let the bars cool completely in the pan so they firm up nicely for slicing.
Step 6: Glaze, Slice, and Enjoy
Whisk together the powdered sugar and just enough milk to make a smooth, pourable glaze. Drizzle it over the cooled bars for a gorgeous glossy finish. Use the parchment to lift the whole slab out and cut into 16 neat squares—then try not to steal “just one more” for yourself!
How to Serve Apple Pie Bars

Garnishes
A simple vanilla glaze is all these treats need for show-stopping appeal, but you can always add a dusting of cinnamon, a sprinkle of extra powdered sugar, or even a handful of finely chopped toasted nuts for crunch and color. If you want to take the decadence up a notch, a little dollop of whipped cream on each bar feels super festive!
Side Dishes
While Apple Pie Bars easily stand on their own as a sweet bite, they’re even better alongside a scoop of your favorite vanilla ice cream or a drizzle of warm caramel sauce. For a brunch spread, pair with hot coffee or spiced apple cider—it’s a combo that practically shouts “cozy afternoon.”
Creative Ways to Present
You can stack the bars on a rustic wooden platter for a laid-back, family-style dessert, or plate them individually with a small fork and artful drizzle of glaze. For parties, tiny cupcake wrappers turn these into adorable, portable treats. And don’t forget a festive napkin if you’re serving them at a picnic or potluck!
Make Ahead and Storage
Storing Leftovers
Leftover Apple Pie Bars store beautifully in the fridge for up to four days. Just transfer them to an airtight container, then let them come to room temperature for the best texture before serving. The flavors even seem to deepen as they rest—if you can wait that long!
Freezing
Want to save some treats for another day? Apple Pie Bars freeze wonderfully. Arrange cut bars in a single layer on a baking sheet to freeze solid, then pack them into a zip-top bag or airtight storage container separated by parchment paper. They’ll stay tasty for up to three months. Thaw overnight in the fridge before enjoying.
Reheating
To bring back that fresh-from-the-oven experience, reheat individual bars in the microwave for about 10–15 seconds. If you’re warming a whole batch, cover with foil and pop into a low oven (300°F/150°C) for 10–15 minutes. If glazed, they may look a bit matte after reheating, but the flavor and that cozy apple aroma will return in full force!
FAQs
Can I use a different fruit instead of apples?
Absolutely! While classic Apple Pie Bars are hard to beat, you can swap in pears or even a mix of berries for a delicious twist. Adjust the sugar to suit the sweetness of your fruit, and remember that strawberries and other juicy berries may need extra cornstarch to thicken the filling.
What’s the best apple variety for these bars?
For the best flavor and texture, use a combination of tart and sweet apples. Granny Smith adds tang and structure while Honeycrisp, Fuji, or Gala bring natural sweetness and juiciness. Mixing varieties gives your Apple Pie Bars a lovely depth of flavor.
How do I keep my crust from getting soggy?
Pressing the crust firmly into the pan and coating the apples with cornstarch helps prevent excess moisture. Also, make sure you let the bars cool completely before slicing, which gives the layers a chance to set perfectly.
Can I make Apple Pie Bars gluten-free?
Yes! Replace the all-purpose flour with your favorite 1:1 gluten-free baking blend. The bars will still have a lovely crumb and all the same comforting flavors.
Do these bars travel well for parties or potlucks?
They sure do! Apple Pie Bars are wonderfully sturdy and slice cleanly, so they’re ideal for bake sales, picnics, or any gathering where you want to share a sweet treat. Just pack them in a single layer if possible to keep the glaze looking its best.
Final Thoughts
Baking a batch of Apple Pie Bars is like wrapping all the warmth and comfort of homemade pie into a dessert you can share anywhere, anytime. They’re easy, adaptable, and always a hit—so go ahead, preheat your oven and treat yourself and your loved ones to a slice (or two) of pure apple bliss!
Print
Apple Pie Bars Recipe
- Total Time: 1 hour 15 minutes
- Yield: 16 bars 1x
- Diet: Vegetarian
Description
These Apple Pie Bars are a delightful twist on traditional apple pie, with a buttery crust, sweet apple filling, and a perfect hint of warm spices. Easy to make and even easier to enjoy, these bars are a must-have for your fall baking lineup.
Ingredients
For the Crust and Topping:
- 2 ½ cups all-purpose flour
- ½ cup granulated sugar
- ½ teaspoon salt
- 1 cup cold unsalted butter (cubed)
- 1 large egg
For the Apple Filling:
- 6 medium apples (peeled, cored, and thinly sliced)
- ½ cup brown sugar
- 1 teaspoon ground cinnamon
- ¼ teaspoon ground nutmeg
- 1 tablespoon lemon juice
- 1 tablespoon cornstarch
- 1 teaspoon vanilla extract
For the Glaze:
- ½ cup powdered sugar
- 1–2 tablespoons milk
Instructions
- Preheat the oven and prepare the pan: Preheat the oven to 350°F (175°C) and line a 9×13-inch baking dish with parchment paper.
- Make the crust: Mix flour, sugar, and salt. Cut in butter, add egg, and press two-thirds of the dough into the pan.
- Prepare the apple filling: Combine apples, brown sugar, spices, lemon juice, cornstarch, and vanilla. Spread over crust.
- Add the topping: Crumble remaining dough over the apples.
- Bake: Bake for 45–50 minutes until golden brown.
- Glaze and serve: Whisk powdered sugar and milk, drizzle over cooled bars, and slice.
Notes
- Use a mix of tart and sweet apples for best results.
- Bars can be made ahead and refrigerated for up to 4 days.
- Prep Time: 25 minutes
- Cook Time: 50 minutes
- Category: Dessert
- Method: Baking
- Cuisine: American
Nutrition
- Serving Size: 1 bar
- Calories: 270
- Sugar: 18g
- Sodium: 90mg
- Fat: 13g
- Saturated Fat: 8g
- Unsaturated Fat: 4g
- Trans Fat: 0g
- Carbohydrates: 38g
- Fiber: 2g
- Protein: 2g
- Cholesterol: 40mg


