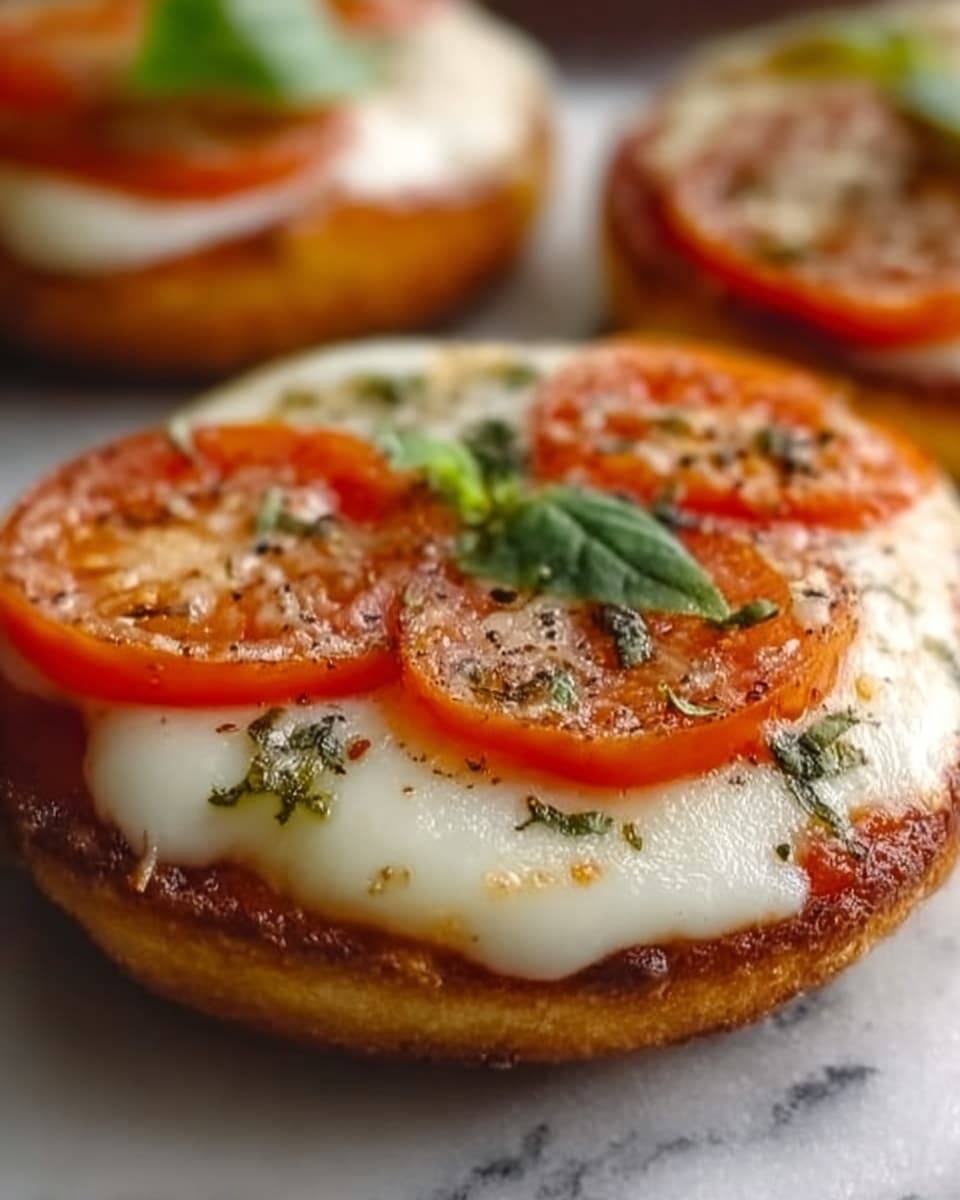
If you’re hunting for a fun, tasty, and super simple way to jazz up lunchtime, this Easy Mini Lunchbox Pizzas Recipe is an absolute winner. These little pizzas are perfect for packing into lunchboxes or serving as a quick snack, combining a crisp base with melty cheese, vibrant toppings, and just the right amount of seasoning. They prove that you don’t need fuss or fancy ingredients to create something delicious that everyone will love — just a handful of basics and a little love!

Ingredients You’ll Need
This recipe shines because it calls for straightforward ingredients that work beautifully together. Each brings its own magic: the pita bread or English muffins provide a sturdy yet crispy base, the pizza sauce adds a comforting tang, and the mozzarella delivers that irresistible cheesy pull. Throw in some colorful veggies and optional pepperoni to make it even more exciting.
- 4 small whole wheat or regular pita bread (or English muffins): These form the perfect mini pizza base, offering a nice crunch when baked.
- 1/2 cup pizza sauce or marinara sauce: Adds that classic tomato flavor and moistness to keep the pizzas juicy.
- 1 cup shredded mozzarella cheese: Melts beautifully and brings the gooey, cheesy goodness everyone craves.
- 1/4 cup pepperoni slices (optional): For a classic pizza feel and a savory punch.
- 1/4 cup diced bell peppers (optional): Adds a fresh crunch and vibrant color to every bite.
- 1/4 cup black olives, sliced (optional): Their salty, briny flavor is a perfect contrast to the sweetness of the sauce.
- 1/4 cup fresh basil leaves (optional): Introduces a refreshing herbal note that lifts the entire dish.
- 1/4 teaspoon dried oregano or Italian seasoning: Sprinkled on top, it boosts the classic pizza aroma and flavor.
- Salt and pepper, to taste: A subtle seasoning to balance and enhance all the flavors.
- Olive oil for brushing (optional): Helps crisp the base and adds a lovely richness.
How to Make Easy Mini Lunchbox Pizzas Recipe
Step 1: Preheat Your Oven
Begin by setting your oven to 375°F (190°C). This temperature ensures the bases get golden and crispy while the cheese melts perfectly. If you’re using an air fryer, preheat it to 350°F (175°C) — it’s a fantastic alternative for quick results.
Step 2: Prepare the Base
Place your pita breads or English muffins on a baking sheet. For that extra crunch and a hint of richness, lightly brush the tops with olive oil. This simple step elevates the texture, making each mini pizza irresistibly crispy on the outside.
Step 3: Spread the Sauce
Using about one tablespoon per base, spread the pizza sauce evenly, leaving a small border around the edges. This helps prevent the toppings from sliding off and keeps the crust perfectly crisp.
Step 4: Add Cheese and Toppings
Generously sprinkle shredded mozzarella over the sauce — this is the gooey heart of your mini pizzas. Now, have fun with toppings: add pepperoni slices for savory depth, bell peppers for crunch and color, black olives for a salty touch, and fresh basil for a burst of herbal freshness. Finish with a pinch of dried oregano or Italian seasoning to bring everything together.
Step 5: Bake to Perfection
Slide your mini pizzas into the oven and bake for 8-10 minutes. You’ll know they’re ready when the cheese is melted and bubbly, and the edges of the pita or muffin turn beautifully golden and crisp. The smell alone will make it hard to wait!
Step 6: Let Cool and Serve
Once out of the oven, let your mini pizzas cool just a bit. This keeps the cheese from being too hot to enjoy and helps the flavors settle. These pockets of deliciousness are now ready to be packed in lunchboxes or served as a crowd-pleasing snack.
How to Serve Easy Mini Lunchbox Pizzas Recipe

Garnishes
Consider adding a sprinkle of freshly grated Parmesan or a drizzle of balsamic glaze before serving. A handful of chopped fresh basil or parsley adds not only color but a fresh herbal aroma that lifts the flavors beautifully. Garnishes can make these mini pizzas feel extra special and restaurant-worthy.
Side Dishes
Pair these mini pizzas with a crisp side salad filled with greens, cherry tomatoes, and a zesty lemon vinaigrette for a fresh counterbalance. Or serve with crunchy veggie sticks and a cooling ranch or hummus dip to create a well-rounded, fun meal everyone will love.
Creative Ways to Present
Arrange the mini pizzas on a large platter garnished with extra basil leaves or colorful veggies for a vibrant lunch spread. You can also stack them in small reusable containers for an easy grab-and-go lunchbox option. For parties, serve them with wooden picks to make eating mess-free and simple for little hands.
Make Ahead and Storage
Storing Leftovers
Leftover mini lunchbox pizzas can be stored in an airtight container in the refrigerator for up to 3 days. Keep them in a single layer or separated by parchment paper to preserve their texture and prevent sticking.
Freezing
To freeze, place cooled mini pizzas on a baking sheet, freeze until firm, then transfer to a freezer-safe bag or container. They’ll keep well for up to 2 months, making them excellent make-ahead snacks or lunches.
Reheating
Reheat leftover or frozen mini pizzas in a preheated oven at 350°F (175°C) for about 7-10 minutes, or until warmed through and the cheese is bubbly again. Avoid microwave reheating if you want to keep the crust crisp and delicious.
FAQs
Can I use other types of bread besides pita or English muffins?
Absolutely! You can swap in small bagels, mini naan breads, or even tortilla rounds for different textures and flavor profiles. Just adjust the baking time slightly based on the thickness of your base.
Is this recipe suitable for kids?
Yes! These mini pizzas are perfect for kids as they’re the perfect size, customizable, and made with simple ingredients. Plus, kids can get involved with adding their favorite toppings, making lunch or snack time more fun.
Can I make these gluten-free?
Definitely. Use gluten-free pita, English muffins, or your preferred gluten-free flatbread as the base. Just be sure to check that your pizza sauce and toppings are also gluten-free.
What are some good vegetarian topping ideas?
Besides bell peppers, olives, and basil, sautéed mushrooms, artichoke hearts, spinach, and sliced tomatoes make fantastic vegetarian toppings that add flavor and nutrition.
How can I make the crust extra crispy?
Brushing the base with olive oil before adding sauce is key to a crispy crust. You can also bake the bases for a few minutes alone before adding the toppings, then finish baking once the cheese is added.
Final Thoughts
This Easy Mini Lunchbox Pizzas Recipe is a delightful little crowd-pleaser that brings warmth and joy to any mealtime. Whether packed in lunchboxes or enjoyed fresh from the oven, these mini pizzas capture all the deliciousness of traditional pizza with a portable twist. Give it a try — it’s a surefire way to brighten up your day and satisfy those pizza cravings with ease!
Print
Easy Mini Lunchbox Pizzas Recipe
- Total Time: 20 minutes
- Yield: 4 mini pizzas 1x
- Diet: Vegetarian
Description
These Easy Mini Lunchbox Pizzas are a quick and customizable meal perfect for kids’ lunches or a light snack. Using whole wheat pita bread or English muffins as the base, they’re topped with pizza sauce, melted mozzarella cheese, and your choice of classic toppings like pepperoni, bell peppers, olives, and fresh basil. Baked to golden perfection, these mini pizzas are delicious, convenient, and easy to prepare.
Ingredients
Base
- 4 small whole wheat or regular pita bread (or English muffins)
Sauce
- 1/2 cup pizza sauce or marinara sauce
Cheese
- 1 cup shredded mozzarella cheese
Toppings (Optional)
- 1/4 cup pepperoni slices
- 1/4 cup diced bell peppers
- 1/4 cup black olives, sliced
- 1/4 cup fresh basil leaves
Seasoning and Others
- 1/4 teaspoon dried oregano or Italian seasoning
- Salt and pepper, to taste
- Olive oil for brushing (optional)
Instructions
- Preheat the oven: Preheat your oven to 375°F (190°C). If using an air fryer, preheat it to 350°F (175°C) to ensure even cooking.
- Prepare the base: Lay the pita bread or English muffins flat on a baking sheet. For a crispier crust, lightly brush the tops with a small amount of olive oil before adding toppings.
- Add the sauce: Spread approximately 1 tablespoon of pizza sauce evenly on each pita or muffin base, leaving a small border around the edges to prevent spillage while baking.
- Top with cheese and toppings: Generously sprinkle shredded mozzarella cheese over the sauce. Add your preferred toppings such as pepperoni slices, diced bell peppers, sliced black olives, or fresh basil leaves. Finish with a pinch of dried oregano or Italian seasoning for an extra flavor boost. Season with salt and pepper to taste.
- Bake the pizzas: Place the prepared mini pizzas in the preheated oven and bake for 8-10 minutes. Bake until the cheese is melted, bubbly, and slightly golden, and the edges of the pita or muffin are crispy.
- Serve: Remove the mini pizzas from the oven and allow them to cool slightly. Serve warm as a satisfying snack or pack them for a delicious lunchbox option.
Notes
- You can customize the toppings based on preference or dietary restrictions.
- Using whole wheat pita adds extra fiber and nutrition.
- For a crispier base, consider toasting the pita or muffins lightly before adding toppings.
- Leftover mini pizzas can be reheated in the oven or air fryer for a few minutes for best texture.
- Oven baking is the primary method here, but air frying is an excellent alternative.
- Prep Time: 10 minutes
- Cook Time: 10 minutes
- Category: Lunch, Snack
- Method: Baking
- Cuisine: Italian-American
