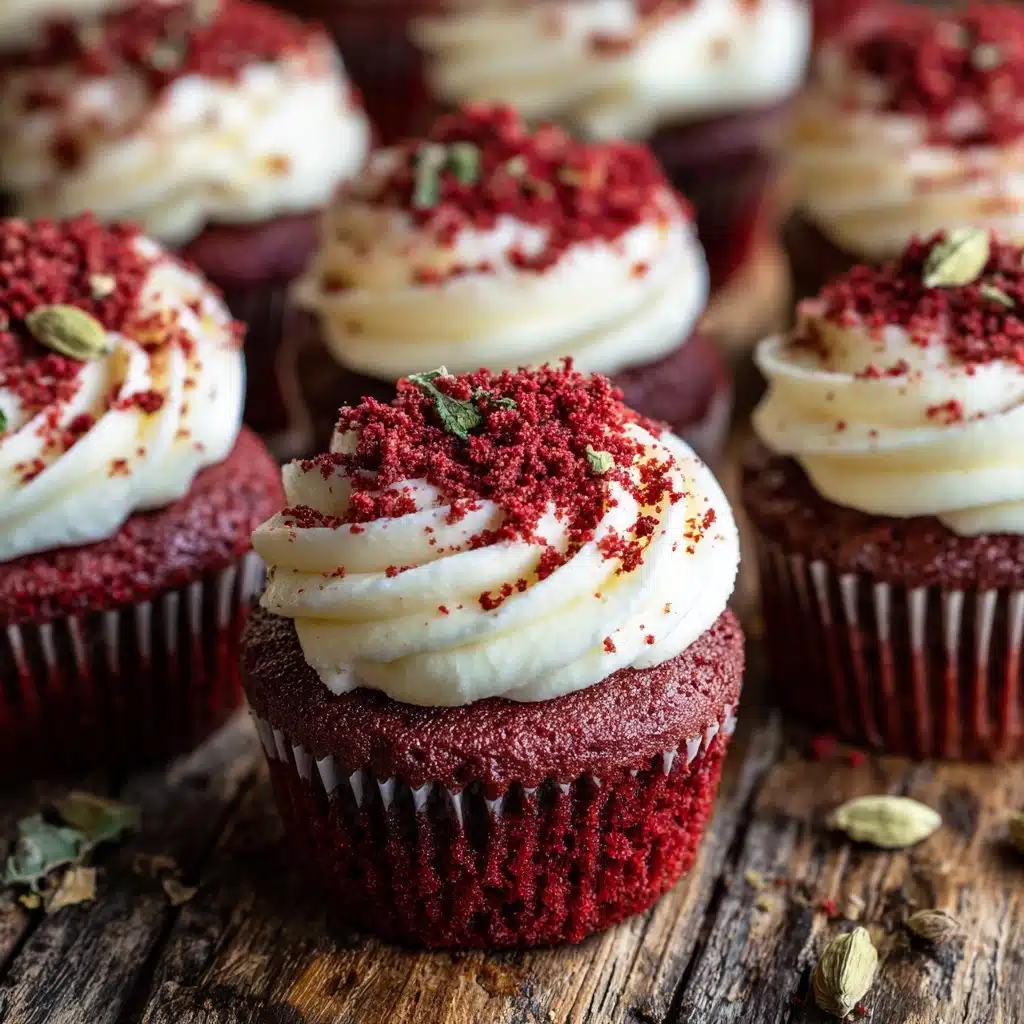
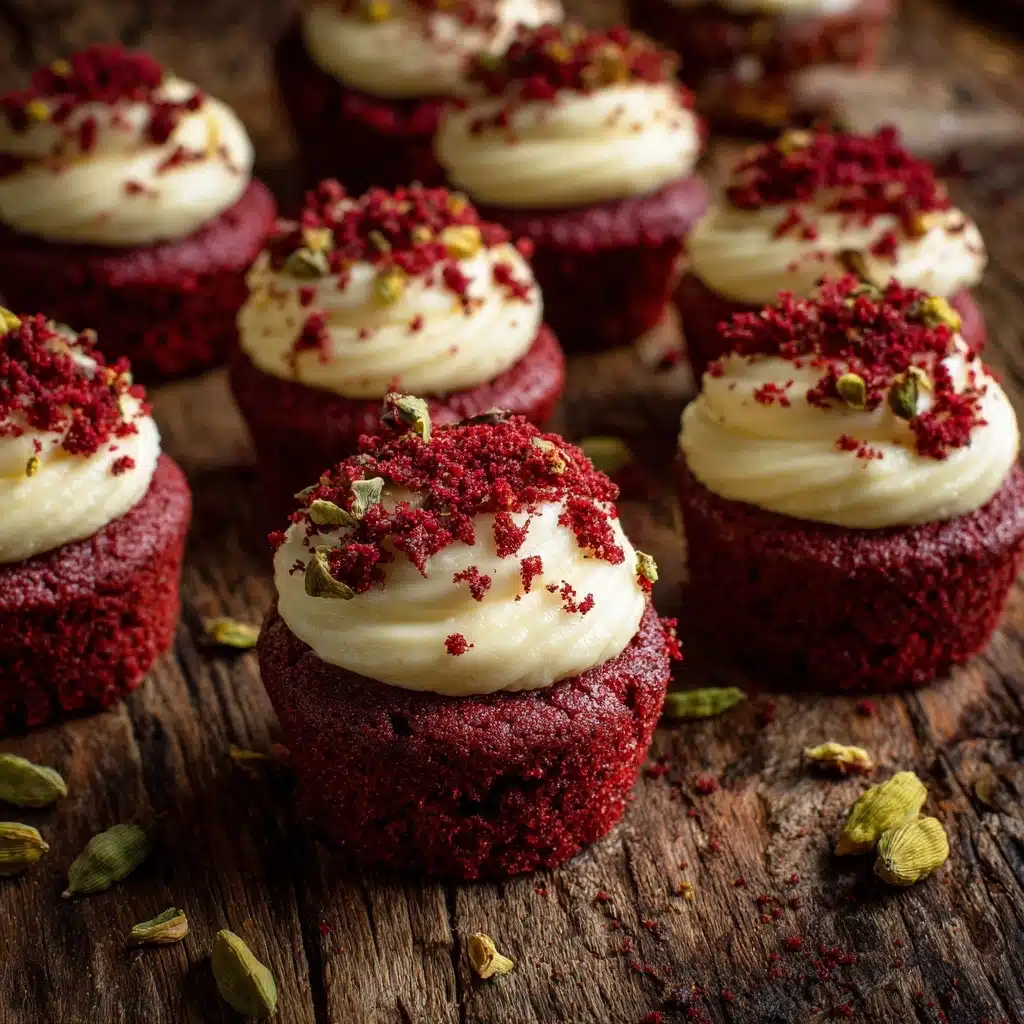
If you’re looking to dazzle your taste buds and impress guests, Red Velvet Cheesecake Mini Pies are the answer. These charming little treats blend the rich, cocoa-kissed flavor of classic red velvet with the silky tang of cheesecake—all nestled into a crisp chocolate crust. Whether you’re planning a holiday dessert table, a romantic dinner, or simply craving a sweet pick-me-up, these mini pies bring big flavor in a bite-sized package. Plus, they’re easy to make ahead and perfect for sharing, making them a go-to dessert you’ll want to bake again and again.
Ingredients You’ll Need
Gathering your ingredients for Red Velvet Cheesecake Mini Pies is wonderfully simple, and each one plays an essential role in creating those signature textures and colors. From the chocolatey base to the creamy, vibrant filling, here’s what you’ll need and why it matters:
- Crushed chocolate graham crackers (or chocolate cookie crumbs): These form the rich, crisp crust that anchors every mini pie and balances the creamy filling.
- Unsalted butter, melted: Butter binds the chocolate crumbs together and adds a subtle richness to the base.
- Cream cheese, softened: The heart of the cheesecake layer, bringing that signature creamy texture and slight tang.
- Granulated sugar: Sweetens the cheesecake filling just enough to complement the cocoa and tangy flavors.
- Sour cream: Adds extra creaminess and a touch of tartness, making the filling smooth and lush.
- Large egg: Binds the filling, giving structure and silkiness to every bite.
- Vanilla extract: Rounds out the flavors and adds a gentle warmth to the cheesecake.
- Unsweetened cocoa powder: Delivers that classic hint of chocolate that defines red velvet desserts.
- Red food coloring: Gives the pies their signature vibrant hue—totally irresistible!
- Whipped cream and chocolate shavings (optional, for topping): The perfect finishing touch for extra flair and flavor.
How to Make Red Velvet Cheesecake Mini Pies
Step 1: Prepare Your Oven and Pan
Start by preheating your oven to 325°F (160°C). Line a muffin tin with 9 paper liners—this makes serving and cleanup a breeze, and helps your Red Velvet Cheesecake Mini Pies keep their adorable shape.
Step 2: Make the Chocolate Crust
In a small bowl, mix together the crushed chocolate graham crackers (or cookie crumbs) with the melted butter. Stir until the mixture looks like damp sand. This is the secret to a perfectly crispy, flavorful base that won’t crumble apart. Spoon about a tablespoon of the crust mixture into each muffin liner and press it down firmly with the back of a spoon.
Step 3: Whip Up the Cheesecake Filling
In a large mixing bowl, beat the softened cream cheese and sugar until the mixture is completely smooth and creamy—no lumps allowed! Add the sour cream, egg, vanilla extract, unsweetened cocoa powder, and red food coloring. Continue mixing until everything is fully combined and the batter is evenly tinted a vibrant red.
Step 4: Fill and Bake
Evenly divide the cheesecake filling among the prepared crusts. Fill each liner nearly to the top for a satisfyingly thick cheesecake layer. Bake in the preheated oven for 18–20 minutes, or until the centers are just set. Don’t overbake; you want the centers to have a slight jiggle for the creamiest texture.
Step 5: Cool and Chill
Let your Red Velvet Cheesecake Mini Pies cool in the pan for about 10 minutes—this helps them firm up and makes removal easier. Then, transfer them to a wire rack to cool completely. For the best flavor and texture, refrigerate them for at least 2 hours before serving. This chilling time is key for that classic, dense cheesecake bite.
Step 6: Add Finishing Touches
Just before serving, top each mini pie with a generous swirl of whipped cream and a sprinkle of chocolate shavings if you like. It’s the ultimate way to make these treats look as irresistible as they taste!
How to Serve Red Velvet Cheesecake Mini Pies

Garnishes
For a show-stopping finish, top your Red Velvet Cheesecake Mini Pies with a dollop of whipped cream and a scattering of chocolate shavings. You could also try a drizzle of chocolate sauce or a sprinkle of festive sprinkles for a playful twist. Garnishes not only add flavor but also make these minis look truly special for any occasion.
Side Dishes
Pair these mini pies with a fresh fruit salad, a cup of coffee, or even a glass of bubbly for a decadent treat. The tangy cheesecake and cocoa notes work beautifully with berries or lightly sweetened cream, making every bite even more delightful.
Creative Ways to Present
Arrange your Red Velvet Cheesecake Mini Pies on a tiered dessert stand for parties, or box them up in pretty cupcake containers as edible gifts. You can even set up a mini dessert bar with a variety of toppings so guests can customize their own pies—fun and interactive for any gathering!
Make Ahead and Storage
Storing Leftovers
Keep any leftover Red Velvet Cheesecake Mini Pies in an airtight container in the refrigerator. They’ll stay fresh and delicious for up to 4 days, making them a perfect make-ahead dessert for busy weeks or special events.
Freezing
If you want to make these in advance, freezing is a great option! Let the mini pies cool completely, then wrap each one individually in plastic wrap and place them in a freezer-safe bag or container. They’ll keep beautifully for up to one month. Just thaw overnight in the fridge before serving.
Reheating
Since these are best enjoyed chilled, there’s no need to reheat. Simply remove them from the refrigerator about 10 minutes before serving to take the chill off and let the flavors shine.
FAQs
Can I make Red Velvet Cheesecake Mini Pies gluten-free?
Absolutely! Just swap out the regular chocolate graham crackers or cookies for a gluten-free version. The rest of the recipe is naturally gluten-free, so everyone can enjoy these delightful treats.
How do I know when the mini pies are done baking?
The centers should be just set with a slight jiggle when you gently tap the pan. Overbaking can dry out the cheesecake, so start checking around the 18-minute mark for perfect results.
Can I use natural food coloring instead of regular red food coloring?
Yes, you can! Beet juice or a natural red food coloring can be used, though the hue may be a bit softer. Either way, your Red Velvet Cheesecake Mini Pies will still look and taste amazing.
What’s the best way to crush the chocolate graham crackers?
You can use a food processor for fine, even crumbs, or place the crackers in a zip-top bag and smash them with a rolling pin for a little therapeutic fun. Either method works great for the crust.
Can I double the recipe for a larger crowd?
Definitely! This recipe doubles easily—just use two muffin tins or bake in batches. It’s a fantastic way to ensure everyone gets a taste of these irresistible mini pies.
Final Thoughts
I hope you’re as excited as I am to bake up a batch of Red Velvet Cheesecake Mini Pies! They’re a true celebration in miniature form: rich, creamy, and undeniably fun to share. Give them a try, and don’t be surprised if they become your new go-to dessert for every special occasion—or just because!
Print
Red Velvet Cheesecake Mini Pies Recipe
- Total Time: 2 hours 40 minutes
- Yield: 9 mini pies 1x
- Diet: Non-Vegetarian
Description
Delightfully rich and creamy Red Velvet Cheesecake Mini Pies with a chocolate graham cracker crust, perfect for holidays, parties, or anytime you crave an individual indulgence. These moist cheesecake bites are enhanced with cocoa and vibrant red food coloring, topped optionally with whipped cream and chocolate shavings for an elegant finish.
Ingredients
For the Crust
- 1 cup crushed chocolate graham crackers (or chocolate cookie crumbs)
- 3 tablespoons unsalted butter, melted
For the Filling
- 8 ounces cream cheese, softened
- 1/4 cup granulated sugar
- 1/4 cup sour cream
- 1 large egg
- 1/2 teaspoon vanilla extract
- 1 tablespoon unsweetened cocoa powder
- 1 tablespoon red food coloring
For Topping (Optional)
- Whipped cream
- Chocolate shavings
Instructions
- Prepare the oven and muffin tin: Preheat the oven to 325°F (160°C) and line a muffin tin with 9 paper liners to ensure easy removal of the mini pies.
- Make the crust: In a small bowl, combine the crushed chocolate graham crackers and melted butter, stirring until the mixture resembles wet sand. Press about 1 tablespoon of this crust mixture firmly into the bottom of each muffin liner, flattening it with the back of a spoon to create an even base.
- Mix the filling: In a large mixing bowl, beat the softened cream cheese and granulated sugar together until smooth and creamy. Add the sour cream, egg, vanilla extract, cocoa powder, and red food coloring, mixing thoroughly until the batter is completely combined and has an even vibrant red tint.
- Fill the crusts: Divide the cheesecake filling evenly over the prepared crusts, smoothing the tops gently for uniform mini pies.
- Bake: Place in the preheated oven and bake for 18–20 minutes, or until the centers are just set but still slightly jiggly to ensure creamy texture.
- Cool: Let the mini pies cool in the pan for 10 minutes to firm up slightly, then transfer them to a wire rack to cool completely at room temperature.
- Chill: Refrigerate the mini pies for at least 2 hours to allow them to set fully and develop optimal flavors.
- Serve and garnish: Before serving, optionally top the mini pies with whipped cream and chocolate shavings for added decadence and presentation appeal.
Notes
- These mini pies are excellent for holiday celebrations or parties and can be prepared a day ahead for convenience.
- For a gluten-free version, substitute regular chocolate graham crackers or cookie crumbs with gluten-free alternatives.
- The red food coloring is key for the classic red velvet appearance; adjusting the quantity slightly can intensify or soften the red hue to your preference.
- Ensure cream cheese is softened to room temperature for smooth mixing and a creamy texture.
- Do not overbake; the filling should still jiggle slightly in the center to avoid dryness.
- Prep Time: 20 minutes
- Cook Time: 20 minutes
- Category: Dessert
- Method: Baking
- Cuisine: American
Nutrition
- Serving Size: 1 mini pie
- Calories: 210
- Sugar: 14g
- Sodium: 160mg
- Fat: 14g
- Saturated Fat: 8g
- Unsaturated Fat: 5g
- Trans Fat: 0g
- Carbohydrates: 18g
- Fiber: 1g
- Protein: 3g
- Cholesterol: 55mg


