
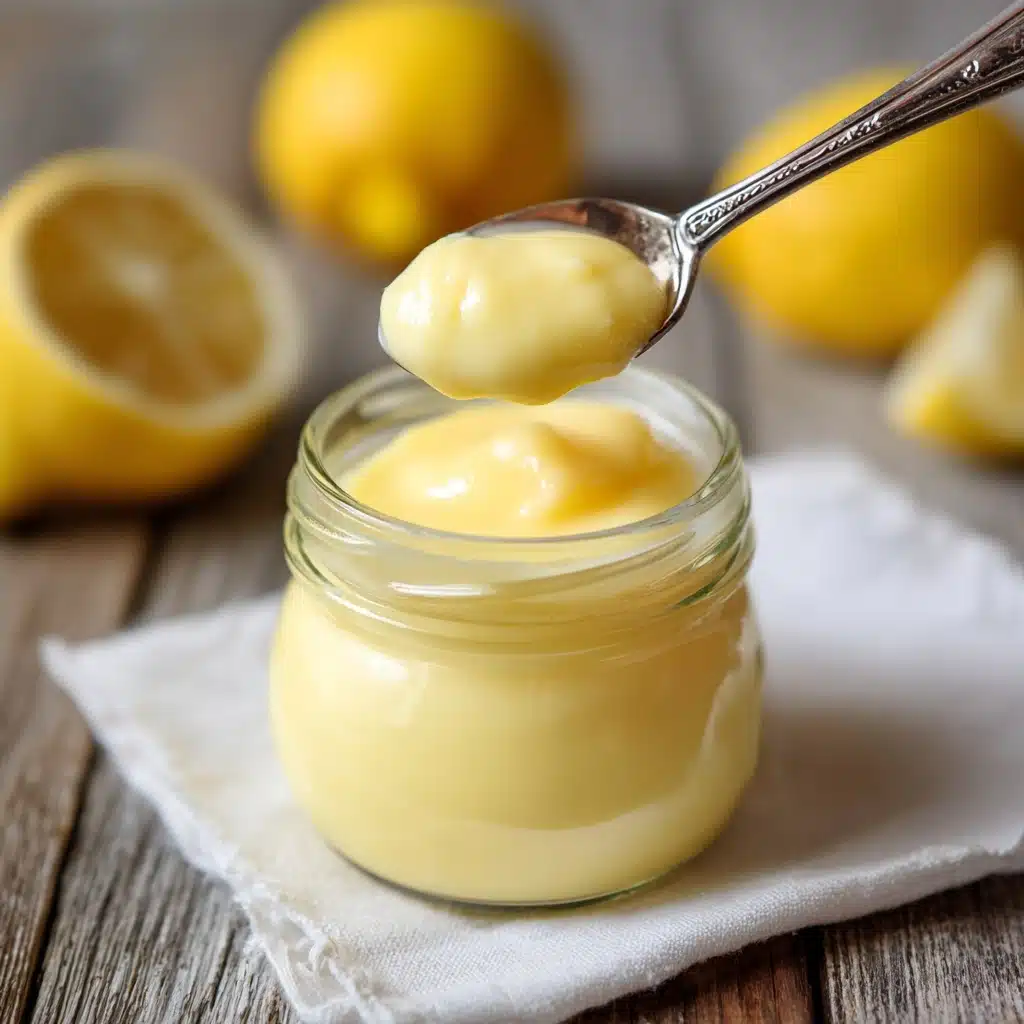
If you’ve ever tasted the magic of bright, silky lemon curd, then you know why Homemade Lemon Curd holds a cherished place in every baker’s repertoire. This simple-yet-luxurious spread is a ray of sunshine in a jar, bursting with tangy citrus flavor and a rich, creamy texture that elevates everything from a humble slice of toast to a towering layer cake. Making it yourself not only saves you a trip to the store, but ensures every spoonful has that vibrant, just-made freshness. Let’s dive in and create a batch of pure golden happiness!
Ingredients You’ll Need
Great lemon curd is all about quality ingredients, each playing its own starring role. With only a handful of staples, you’ll be amazed how easily they transform into something extraordinary — it’s proof that the simplest things really are the best.
- Fresh Lemon Juice: Delivers that essential zippy citrus flavor; always choose freshly squeezed for the brightest taste.
- Lemon Zest: Intensifies the lemony aroma and adds a burst of natural oils and vibrant color.
- Granulated Sugar: Sweetens and balances out the tartness, resulting in a smooth, mellow finish.
- Large Eggs: Provide rich structure and help give the curd its luscious, custard-like consistency.
- Unsalted Butter: Gives the curd its silkiness and rounds out the flavor with a creamy finish; cut it into small pieces to melt quickly and evenly.
How to Make Homemade Lemon Curd
Step 1: Whisk Together the Base
In a medium heatproof bowl, combine the fresh lemon juice, lemon zest, sugar, and eggs. Whisk until the mixture looks smooth and thoroughly blended, with no visible streaks of egg. This foundational step ensures the curd cooks evenly and turns out beautifully silky.
Step 2: Gently Cook Over a Double Boiler
Set the bowl over a saucepan with barely simmering water, ensuring the bowl doesn’t touch the water. Stir with a whisk constantly for about 10 to 12 minutes. You’ll know it’s done when the mixture thickens enough to coat the back of a spoon — patience here pays off with the perfect soft-set texture.
Step 3: Add the Butter
Immediately after removing from heat, whisk in the butter, a few pieces at a time. The warmth of the curd will melt the butter seamlessly, giving your Homemade Lemon Curd its signature glossy finish and creamy taste. Don’t rush; let each piece melt before adding more.
Step 4: Strain for Smoothness
Pour the lemon curd through a fine mesh sieve into a clean bowl. This removes lemon zest and any little bits of cooked egg, leaving you with an irresistibly smooth consistency worthy of a patisserie.
Step 5: Cool and Chill
Let the curd cool slightly, then transfer to a jar or airtight container. Refrigerate until fully chilled. This chilling step thickens the curd even more and sets the flavors for a bright, balanced result that’s ready for just about anything.
How to Serve Homemade Lemon Curd
Garnishes
Sprinkle with a little extra lemon zest, a few fresh berries, or even delicate edible flowers for a beautiful finishing touch. These simple additions highlight the curd’s sunny color and make each serving look especially inviting.
Side Dishes
Pair with warm scones, fluffy pancakes, or toasted brioche to let Homemade Lemon Curd steal the spotlight. A dollop alongside Greek yogurt or cottage cheese instantly transforms breakfast into something special.
Creative Ways to Present
Layer your curd in parfait glasses with whipped cream and crumbled cookies for a dreamy dessert, swirl it into vanilla ice cream, or use it as a show-stopping filling for tartlets and cupcakes. The possibilities are as endless as your imagination!
Make Ahead and Storage
Storing Leftovers
Once cool, keep your Homemade Lemon Curd in a tightly sealed jar or container in the fridge. It’ll stay fresh and delicious for up to 2 weeks, making it perfect for spontaneous treats or planned desserts alike.
Freezing
Want to savor your sunshine longer? Homemade Lemon Curd freezes beautifully. Spoon into freezer-safe containers, leaving some headroom for expansion, and freeze for up to 3 months. Thaw overnight in the fridge before using for best results.
Reheating
If your chilled curd thickens a bit too much, gently warm it by stirring over low heat or microwaving in short bursts, just until spreadable. Be careful not to overheat, as curd can separate if it gets too hot.
FAQs
Can I use bottled lemon juice instead of fresh?
Fresh is always best when it comes to Homemade Lemon Curd — bottled juice just can’t match the bright depth and delicate aroma of real lemons. If possible, reach for ripe, juicy lemons for the brightest flavor.
Why did my lemon curd turn out lumpy?
Lumpy curd usually means the eggs cooked too quickly or boiled. Always cook gently over low heat and keep whisking constantly. Don’t worry if it happens; straining the curd fixes most tenderness issues and will smooth things out.
Can I make lemon curd dairy-free?
Absolutely! Swap the unsalted butter for a good-quality vegan butter. The flavor and texture will still be lovely, and you’ll get a dairy-free version to enjoy or gift to friends with dietary needs.
What can I do with leftover egg whites if I use yolks only?
Whip up some meringues, a fluffy omelet, or fold them into pancakes for extra lift. Egg whites are kitchen gold — don’t let them go to waste!
Is Homemade Lemon Curd gluten-free?
Yes, this recipe is naturally gluten-free, so it’s a fantastic option for those watching their gluten intake. Just be sure all utensils and jars are clean and gluten-free as well for sensitive diners.
Final Thoughts
There’s nothing quite like the experience of savoring a spoonful of Homemade Lemon Curd made from scratch, so I hope you’ll treat yourself and give this recipe a try! It’s a guaranteed way to brighten your day, impress your loved ones, and add a burst of zesty joy to any dessert or breakfast. Happy cooking!
Print
Homemade Lemon Curd Recipe
- Total Time: 22 minutes
- Yield: About 1 1/4 cups 1x
- Diet: Vegetarian
Description
Learn how to make delicious homemade lemon curd from scratch with this easy recipe. Perfect as a spread, filling, or topping for various desserts.
Ingredients
Lemon Curd:
- 1/2 cup fresh lemon juice (about 2–3 lemons)
- 1 tbsp lemon zest
- 3/4 cup granulated sugar
- 3 large eggs
- 1/2 cup unsalted butter (cut into small pieces)
Instructions
- Combine Ingredients: In a medium heatproof bowl, whisk together lemon juice, lemon zest, sugar, and eggs until fully combined.
- Create Double Boiler: Place the bowl over simmering water in a saucepan to create a double boiler.
- Cook Mixture: Whisk constantly for 10–12 minutes until thick enough to coat a spoon; do not boil.
- Whisk in Butter: Remove from heat, whisk in butter pieces until smooth.
- Strain and Cool: Strain through a sieve, cool slightly, then transfer to a jar and refrigerate until chilled.
Notes
- Lemon curd can be stored in the refrigerator for up to 2 weeks.
- Use as a spread, cake/tart filling, or mix into yogurt or ice cream.
- For a richer curd, use 4 egg yolks instead of 3 whole eggs.
- Prep Time: 10 minutes
- Cook Time: 12 minutes
- Category: Condiment
- Method: Stovetop
- Cuisine: British
Nutrition
- Serving Size: 1 tablespoon
- Calories: 70
- Sugar: 6g
- Sodium: 5mg
- Fat: 5g
- Saturated Fat: 3g
- Unsaturated Fat: 2g
- Trans Fat: 0g
- Carbohydrates: 7g
- Fiber: 0g
- Protein: 1g
- Cholesterol: 45mg


