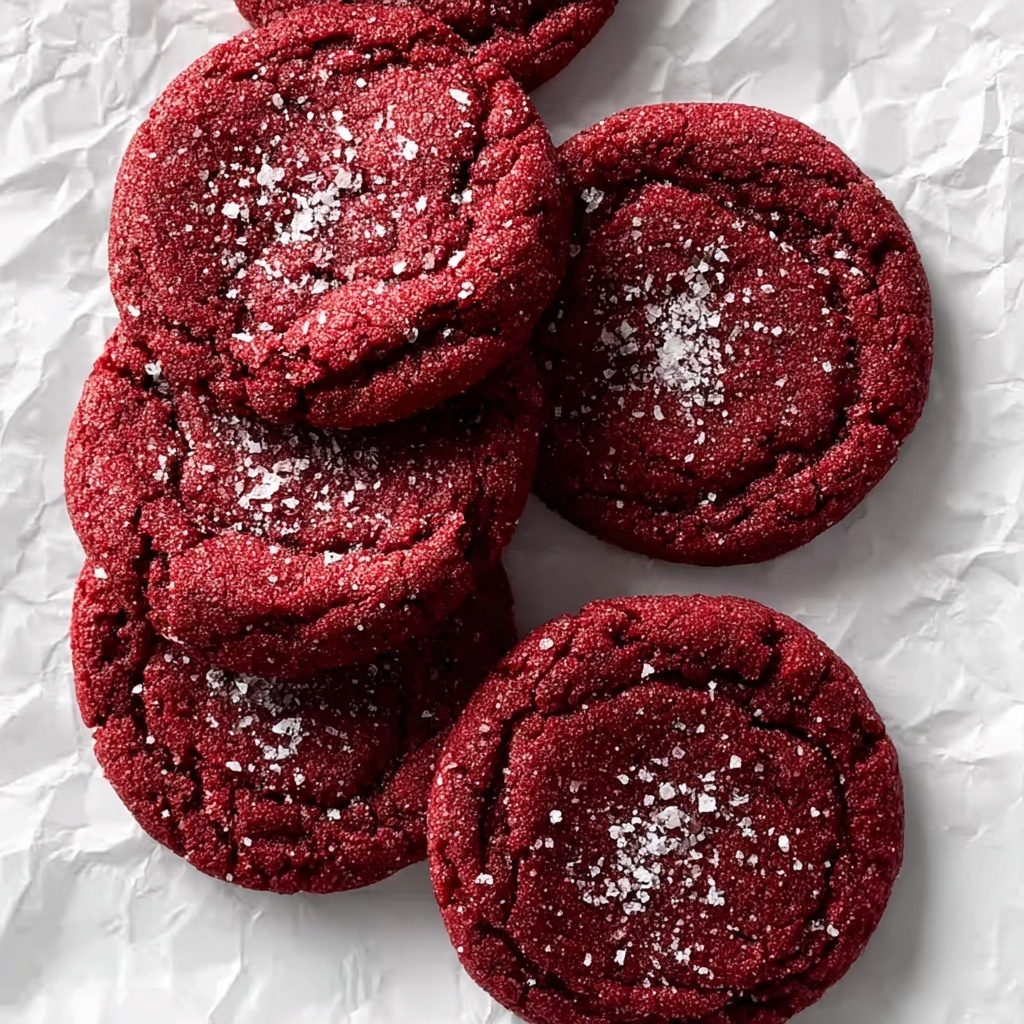
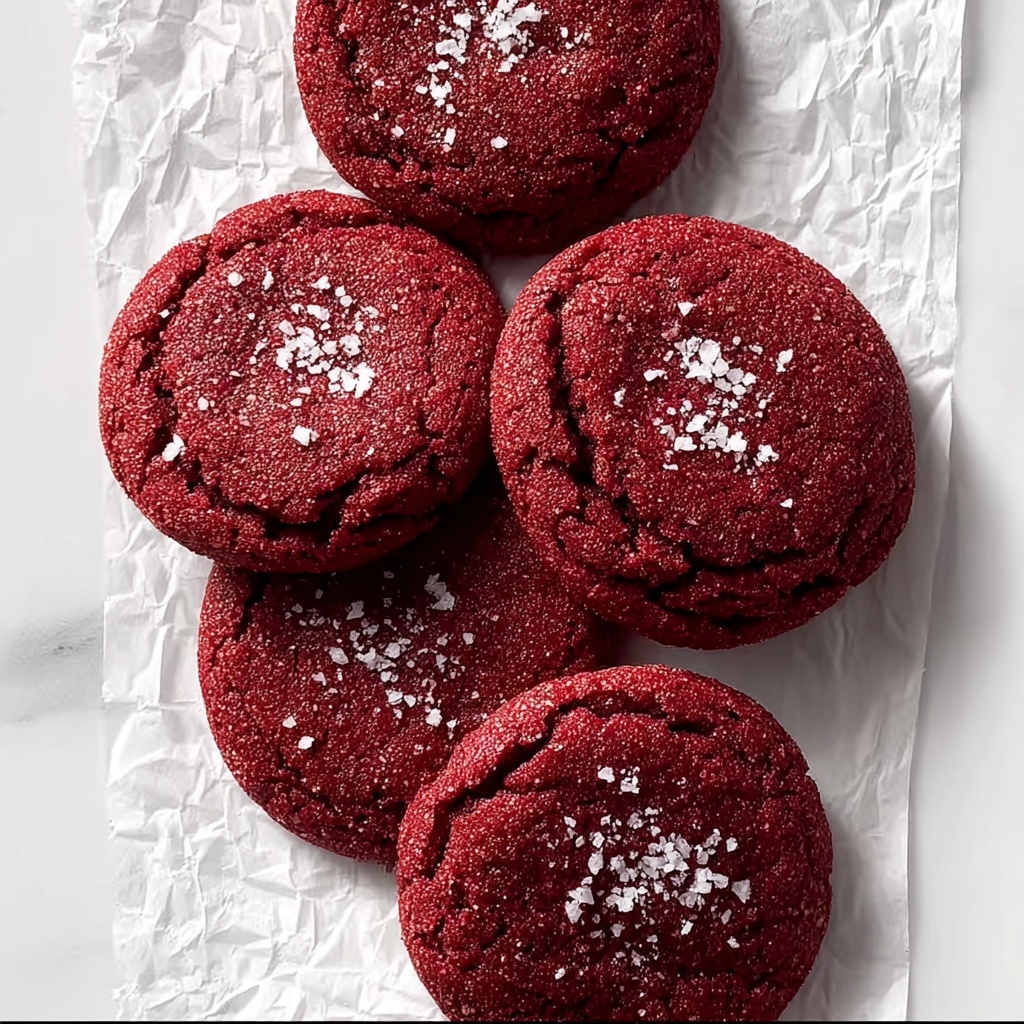
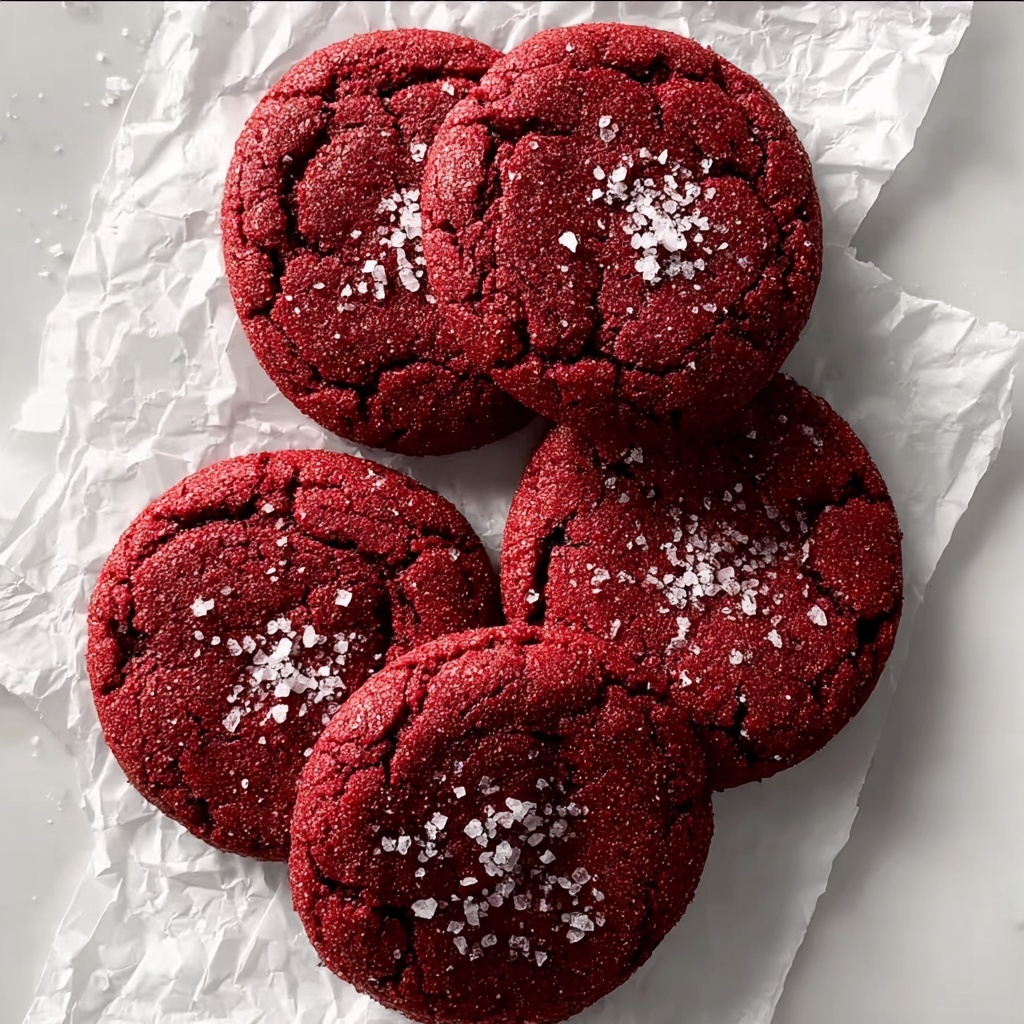
If you’ve ever wondered how to elevate classic cookies into something dazzlingly festive, the Red Velvet Cookies with Red Sanding Sugar Recipe is here to blow your mind and your taste buds. These cookies brilliantly combine that iconic red velvet flavor—rich cocoa and creamy vanilla—with a tender, chewy texture and a sparkling coat of vibrant red sanding sugar that adds just the right amount of crunch and eye-catching sparkle. They’re perfect for holidays, special occasions, or just when you want to treat yourself and share some truly show-stopping homemade sweets with friends and family.
Ingredients You’ll Need
Getting ready to bake these Red Velvet Cookies with Red Sanding Sugar Recipe is a breeze because the ingredients list is straightforward yet essential for capturing that perfect flavor and texture. Each ingredient plays its part: butter lends richness, brown sugar gives moistness, cocoa powder adds depth, and the gel food coloring ensures that brilliant red hue without compromising texture.
- Unsalted butter (1/2 cup / 113 g): Use real butter for rich flavor and a tender crumb in your cookies.
- Light brown sugar (1/2 cup plus 1 tablespoon / 110 g): Adds moisture and caramel notes that keep cookies soft and chewy.
- Granulated sugar (1/4 cup / 50 g): Balances sweetness and helps create that slightly crisp edge.
- Large egg (room temperature): Binds the ingredients and adds lift for just the right cookie structure.
- Vanilla extract (1 1/2 teaspoons): Brings warmth and enhances overall flavor depth.
- Red gel food coloring (1 1/2 teaspoons plus a dollop for sanding sugar): Ensures vivid color without thinning the dough like liquid colorings might.
- All-purpose flour (1 1/4 cups / 160 g): Provides structure and body to the dough without heaviness.
- Cocoa powder (2 tablespoons, sifted): Use Dutch-process or Hershey’s Special Dark for the truest red velvet flavor.
- Baking soda (1/2 teaspoon) and baking powder (1/2 teaspoon): These leavening agents help the cookies rise just enough without spreading too thin.
- Salt (1/2 teaspoon): Balances sweetness and intensifies the cocoa flavor.
- Red sanding sugar (1/2 cup): Gives the cookies their signature sparkle and adds a subtle crunch.
- Granulated or coarse sugar for sanding (1/4 cup / 50 g): Used to create homemade red sanding sugar if you want to custom-make yours.
How to Make Red Velvet Cookies with Red Sanding Sugar Recipe
Step 1: Melt the Butter
Start by gently melting the butter in a small saucepan over medium-low heat or in short bursts in the microwave. Pour it onto a shallow plate or bowl and place it in the freezer for about 5 to 8 minutes, just enough so it cools down without solidifying. This step ensures your dough won’t cook the eggs when combined, giving you smooth and creamy cookie batter.
Step 2: Mix Wet Ingredients
In a medium mixing bowl, combine the slightly cooled melted butter with light brown sugar, granulated sugar, egg, vanilla extract, and that gorgeous red gel food coloring. Whisk everything together thoroughly until the mixture is smooth and uniform. The richness of the butter and sugars combined here sets the foundation for those chewy, moist cookies.
Step 3: Combine Dry Ingredients
In a separate bowl, sift together the all-purpose flour, cocoa powder, baking soda, baking powder, and salt. Mixing your dry ingredients ensures an even distribution of leavening and cocoa, which is essential for consistent flavor and texture in every cookie bite.
Step 4: Fold Ingredients
Gently fold the dry ingredients into the wet mixture with a large spatula. Be patient and careful to mix only until everything is combined—overmixing can lead to tough cookies, and that’s the last thing you want here. You want that tender, melt-in-your-mouth texture true to a red velvet cookie.
Step 5: Preheat Oven and Prepare Sheets
Let your dough take a little rest while you preheat the oven to 350°F (177°C). Line two baking sheets with parchment paper — this not only prevents sticking but makes cleanup a breeze and helps your cookies bake evenly.
Step 6: Shape Cookies
Using a medium cookie scoop (about 2 ounces), portion dough into balls. Roll each one lovingly in the red sanding sugar until completely coated—this step adds that sparkle and delightful surface texture. Place the sugared dough balls onto the prepared parchment-lined sheets, giving each cookie about 2 to 3 inches of breathing room so they can spread out beautifully.
Step 7: Bake Cookies
Bake your cookies for 9 to 10 minutes. You’re looking for edges that are set and centers that stay slightly puffed and just underbaked—this keeps them soft and chewy rather than dry. Keep a close eye to avoid overbaking because these cookies taste best when tender.
Step 8: Cool and Finish
After baking, remove the cookies from the oven and, if you want an extra dazzling finish, sprinkle on a touch more red sanding sugar while still warm. Let them cool on the baking sheets—this allows them to deflate just a little, locking in that soft texture and a gorgeous flat top.
Step 9: Prepare Red Sanding Sugar (Optional)
If you prefer to make your own red sanding sugar, preheat your oven to 250°F (121°C) and line a baking sheet with parchment. In a large plastic bag, combine 1/4 cup granulated sugar with a dollop of red gel food coloring, shaking and massaging until evenly tinted. Sift out clumps and repeat if needed. Spread it on the baking sheet and bake for 10 minutes. Allow it to cool completely before using for perfectly homemade sparkle.
How to Serve Red Velvet Cookies with Red Sanding Sugar Recipe
Garnishes
These cookies are stunning on their own but taste incredible with a dollop of whipped cream or a sprinkle of powdered sugar. If you’re feeling decadent, a drizzle of cream cheese glaze elevates the classic red velvet flavor while adding a luscious finishing touch.
Side Dishes
Pair these Red Velvet Cookies with a cold glass of milk or a cup of hot coffee or tea. The creamy beverage balances the rich sweetness beautifully. For a festive occasion, serve alongside a light fruit salad or fresh berries to add vibrant freshness.
Creative Ways to Present
Looking to impress at your next gathering? Arrange these cookies on a decorative platter layered with parchment paper and fresh mint leaves for pops of green. You can also stack them with wax paper in between, tied with a festive ribbon for a charming homemade gift. Or, sandwich them with cream cheese frosting for an indulgent red velvet cookie sandwich.
Make Ahead and Storage
Storing Leftovers
Keep your Red Velvet Cookies with Red Sanding Sugar Recipe fresh by storing them in an airtight container at room temperature. They’ll stay soft and full of flavor for up to 4 days, perfect for enjoying over a few days or sharing with friends.
Freezing
If you want to save some for later, freeze the baked cookies by placing them in a single layer on a baking sheet until firm, then stacking them in a sealed freezer-safe bag or container. They will keep well for up to 3 months and thaw quickly at room temperature.
Reheating
To bring back that fresh-baked softness, warm the cookies in a 300°F (150°C) oven for about 5 minutes. This little step revives their tender texture and makes them feel just baked, even days after baking.
FAQs
Can I use liquid food coloring instead of gel for the Red Velvet Cookies with Red Sanding Sugar Recipe?
It’s best to use gel food coloring because it provides a bold red color without adding extra liquid, which can alter the dough’s consistency and potentially make the cookies too soft or cakey.
What type of cocoa powder should I use?
The recipe calls for Dutch-process or Hershey’s Special Dark cocoa powder for the truest, richest red velvet flavor. Natural cocoa powders may result in a less vibrant color and a slightly different taste.
How do I prevent the cookies from spreading too much?
Chilling the dough slightly before shaping and making sure not to overmix the batter helps control spread. Also, spacing the cookies with enough room on the baking sheet allows for gentle expansion without merging.
Can I make these cookies vegan or dairy-free?
You can try substituting the butter with a plant-based alternative and use a flax egg or other egg replacer for the egg. Keep in mind texture and flavor may vary slightly, but many have had success with those swaps.
Is the red sanding sugar necessary?
While not mandatory, red sanding sugar adds a delightful crunch and sparkling finish that makes these cookies so memorable and festive. You can use plain sugar if you prefer, but the sanding sugar really elevates the look and texture.
Final Thoughts
There’s something genuinely magical about making Red Velvet Cookies with Red Sanding Sugar Recipe part of your baking repertoire. They’re a heartfelt way to celebrate with something beautiful and delicious, bringing joy to your kitchen and smiles to everyone who tastes them. Don’t wait for a special occasion — go ahead and bake a batch today, because these cookies truly make every day feel like a celebration.
Print
Red Velvet Cookies with Red Sanding Sugar Recipe
- Prep Time: 10 minutes
- Cook Time: 10 minutes
- Total Time: 25 minutes
- Yield: 12 cookies
- Category: Dessert Cookies
- Method: Baking
- Cuisine: American
Description
Delight in these soft and tender Red Velvet Cookies coated in vibrant red sanding sugar, offering a perfect balance of sweet cocoa and rich butter flavors. These cookies feature a subtle chocolate taste enhanced with a splash of vanilla and a striking red color, ideal for festive occasions or any time you crave a colorful treat.
Ingredients
Wet Ingredients
- 1/2 cup (113 g) unsalted butter
- 1/2 cup plus 1 tablespoon (110 g) light brown sugar
- 1/4 cup (50 g) granulated sugar
- 1 large egg, room temperature
- 1 1/2 teaspoons vanilla extract
- 1 1/2 teaspoons red gel food coloring
Dry Ingredients
- 1 1/4 cups (160 g) all-purpose flour
- 2 tablespoons cocoa powder, sifted (Dutch-process or Hershey’s Special Dark recommended)
- 1/2 teaspoon baking soda
- 1/2 teaspoon baking powder
- 1/2 teaspoon salt
Coating Sugar
- 1/2 cup red sanding sugar for rolling
Optional Red Sanding Sugar Preparation
- 1/4 cup (50 g) granulated or coarse sugar
- dollop of red gel food coloring (do not use liquid food coloring)
Instructions
- Melt the Butter: In a small saucepan over medium-low heat, gently melt the unsalted butter until fully liquefied, or melt it using the microwave. Pour the melted butter onto a shallow bowl or plate and place it in the freezer for 5 to 8 minutes, ensuring it cools but does not solidify.
- Mix Wet Ingredients: Transfer the slightly cooled melted butter to a medium mixing bowl. Add the light brown sugar, granulated sugar, egg, vanilla extract, and red gel food coloring. Whisk these ingredients together until the mixture is smooth and well combined.
- Combine Dry Ingredients: In a separate bowl, whisk together the all-purpose flour, sifted cocoa powder, baking soda, baking powder, and salt to distribute the leavening agents and cocoa evenly throughout.
- Fold Ingredients: Add the dry ingredient mixture to the wet ingredients. Using a large spatula, gently fold the mixture together until just combined, taking care not to overmix, which could result in tough cookies.
- Preheat Oven and Prepare Sheets: While allowing the dough to rest, preheat your oven to 350°F (177°C). Line two baking sheets with parchment paper to ensure easy cleanup and to prevent sticking during baking.
- Shape Cookies: Using a medium cookie scoop, portion the dough into balls weighing approximately 2 ounces each. Roll each ball thoroughly in red sanding sugar to coat fully, then place them on the prepared baking sheets, spacing them 2 to 3 inches apart to accommodate spreading.
- Bake Cookies: Bake the cookies for 9 to 10 minutes, or until the edges are set and the centers look slightly puffed and underbaked to maintain a soft, tender texture. Avoid overbaking to keep the cookies moist.
- Cool and Finish: Remove the cookies from the oven and, if desired, sprinkle additional sanding sugar on top while still warm. Allow the cookies to cool on the baking sheets; they will deflate slightly as they cool, resulting in a soft, chewy bite.
- Prepare Red Sanding Sugar (Optional): Preheat the oven to 250°F (121°C) and line a large baking sheet with parchment paper. Combine 1/4 cup granulated or coarse sugar with a dollop of red gel food coloring inside a large plastic bag. Shake and massage the bag until the sugar is evenly colored. Sift the colored sugar through a fine mesh sieve to remove clumps, repeating the coloring and sifting process until uniform. Spread the sugar evenly on the baking sheet and bake for 10 minutes. Let the sanding sugar cool completely for at least 15 minutes before using.
Notes
- For best results, use red gel food coloring as liquid food coloring can alter the dough consistency.
- Do not overbake the cookies; they should look slightly underbaked in the center for a soft texture.
- The resting period for the dough during oven preheat helps improve texture.
- Preparing homemade red sanding sugar is optional but enhances the vibrant presentation of the cookies.
- Store cookies in an airtight container at room temperature for up to 4 days.
- Use Dutch-process or dark cocoa powder for a richer chocolate flavor.


